JPayne Woodworking Creative Craftsmanship
I was recently approached by a gentleman who wanted to know if I could make a Pocket dump tray. If you don’t know what this is, it simply is a tray or bowl or dish that at the end of the day you dump the contents of your pockets into. Change, bills, pens, a pocket knife your wallet, car keys, what ever you EDC (Every Day Carry). For a lot of people this is something that is important for them to have as it makes sure you have all of the small items you need with you when you leave your house. He did not want a simple dish with a shallow area to dump his pockets into rather he wanted a tray with 2 beautiful rivers running through the center of the tray. This was a tad bit of a challenge to think of how to achieve. The center of the tray needed to be a small piece but with live edge on both sides. I wanted to do this to get the natural shape and random look of live edge on both rivers. This was a little tougher to find because most live edge pieces are much larger. Luckily I had just the right piece. I decided to use a couple of the crotch pieces from the spalted tree from Jays Custom Creations. We have not for sure be able to figure out if the tree was a maple or a sweet-gum either way the figure in the wood looks amazing. With the perfect wood for the project in mind it was time to get to working on the tray itself.
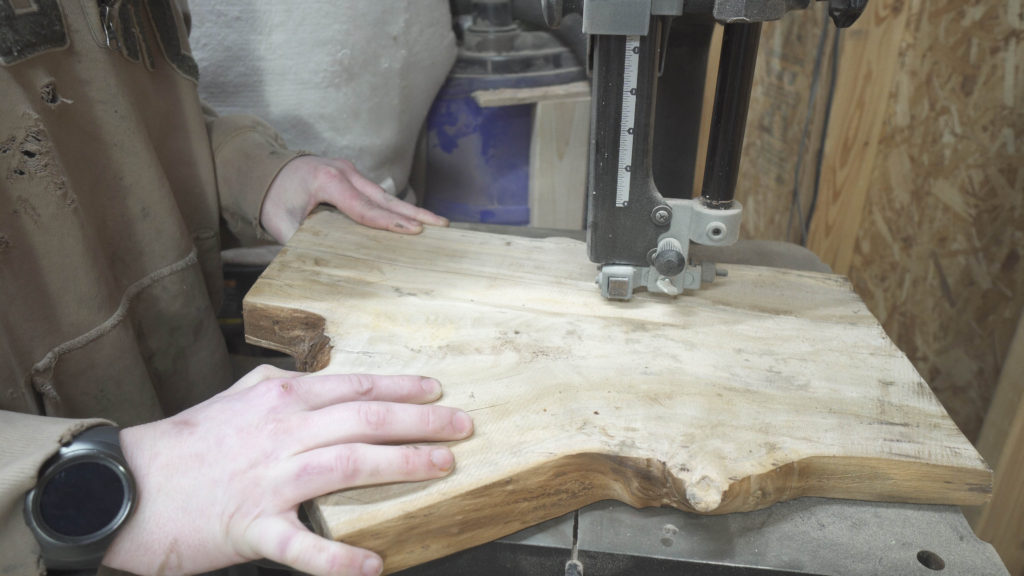
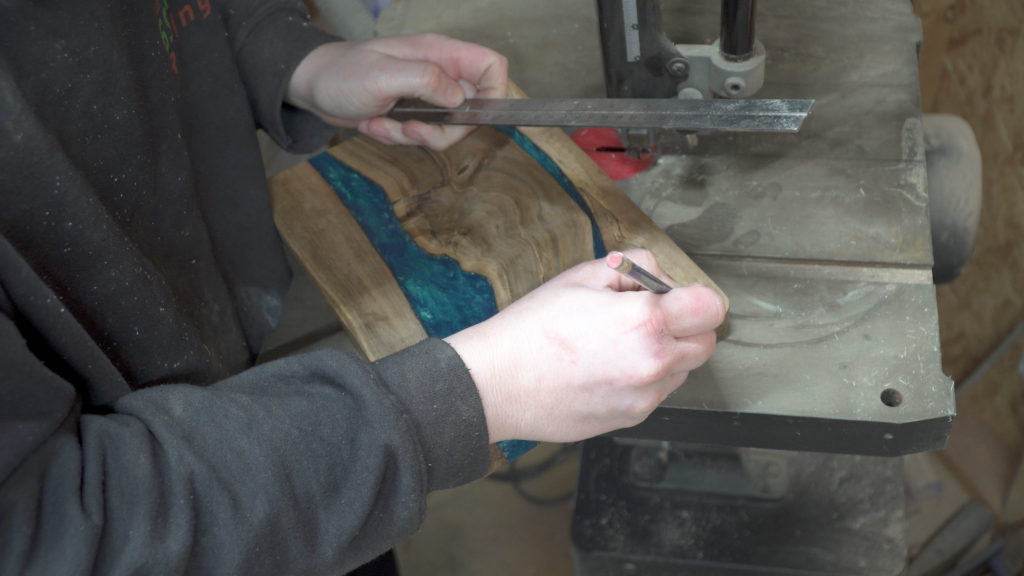
After drying out the pieces for the tray I used the band saw to cut the pieces I needed to shape. Mostly this just meant cutting the two crotch pieces in half. I had originally planned to only use the two halves of just one of the crotch pieces. This plan changed however as both of the boards only had one live edge side that I thought would look good with the smaller center piece that I would be using.

I didn’t want the rivers to have to many hard curves in such a small space. This would possibly take something away from the tray itself. After the two boards were cut down to the width that would be used for each of the sides I had to remove the bark that was still on the smaller center section piece.
The ends of the boards then needed to be trimmed so that they would sit flush against the end walls of the mold that would be built around them. This is a very important step to take. Trimming the boards where they can all sit flush to the end walls of the mold will make it much easier to seal off the ends of the mold stopping it from leaking.
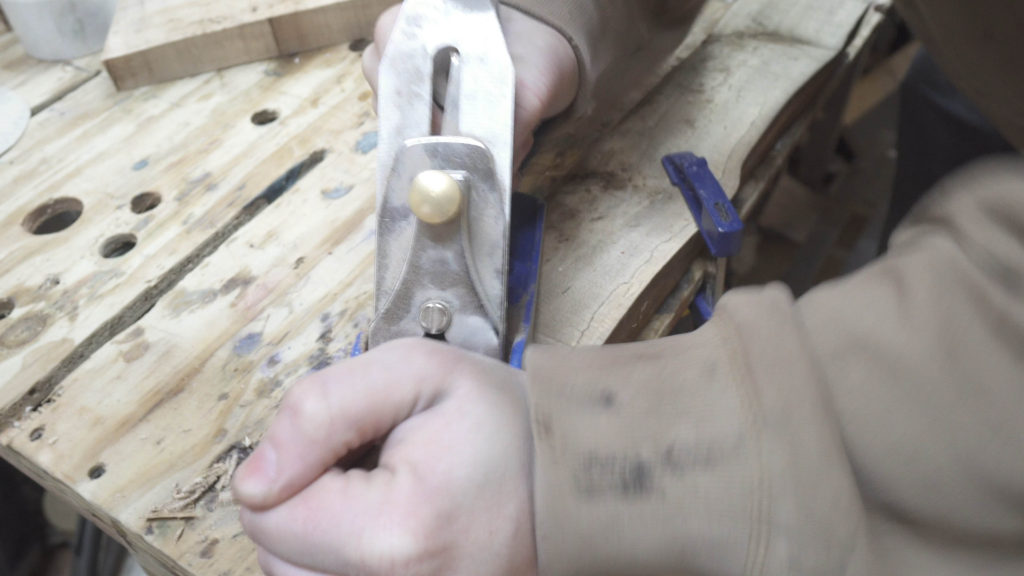
After trimming the pieces to size I planned down some of the pieces to make them sit flush to the bottom of the mold. I had to be careful not to trim down to much of the thickness though as these boards were only about a quarter of an inch thicker than the final thickness I was looking to achieve.
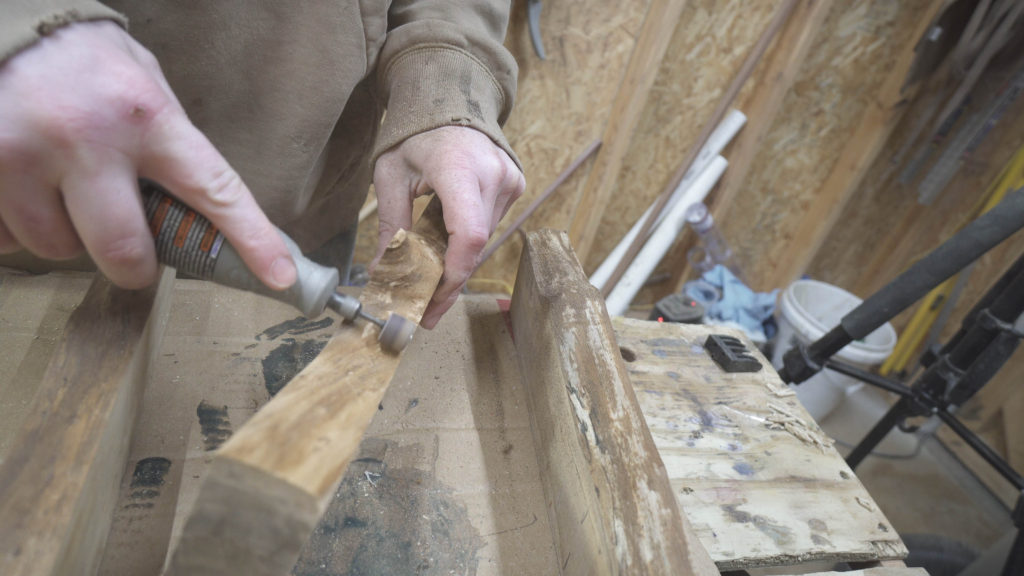
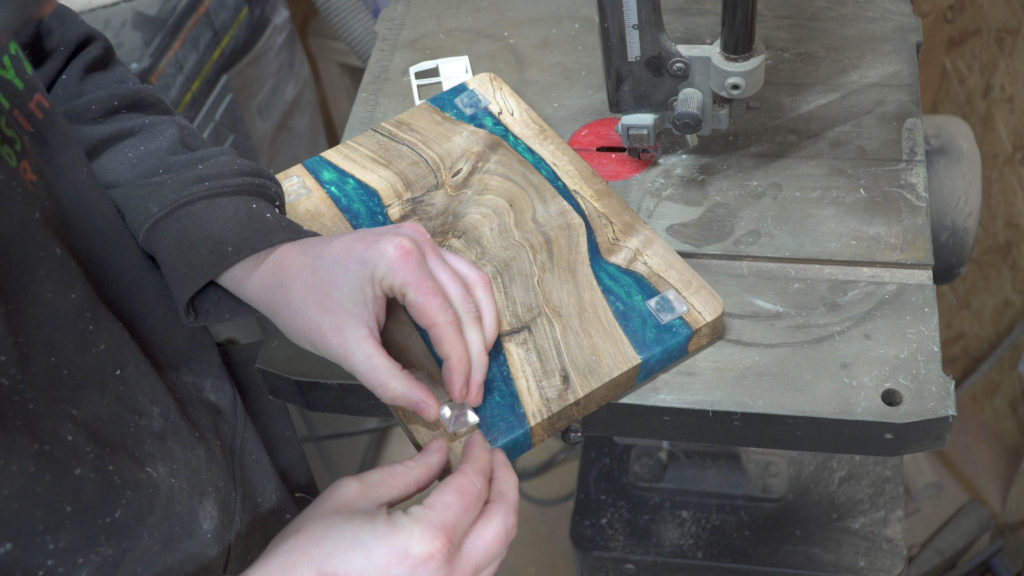
To prep the boards I started by using a Dremel tool to remove the larger debris on the live edges of the boards. Then went back over the boards live edges with some 80 grit sand paper to remove and debris left over. This was important to ensure there was good adhesion of the epoxy to the live edges of the boards. If there are large amounts of bark or debris or dirt on the edges of the board it risks not properly sticking to the epoxy as well as risking defects in the epoxy itself.
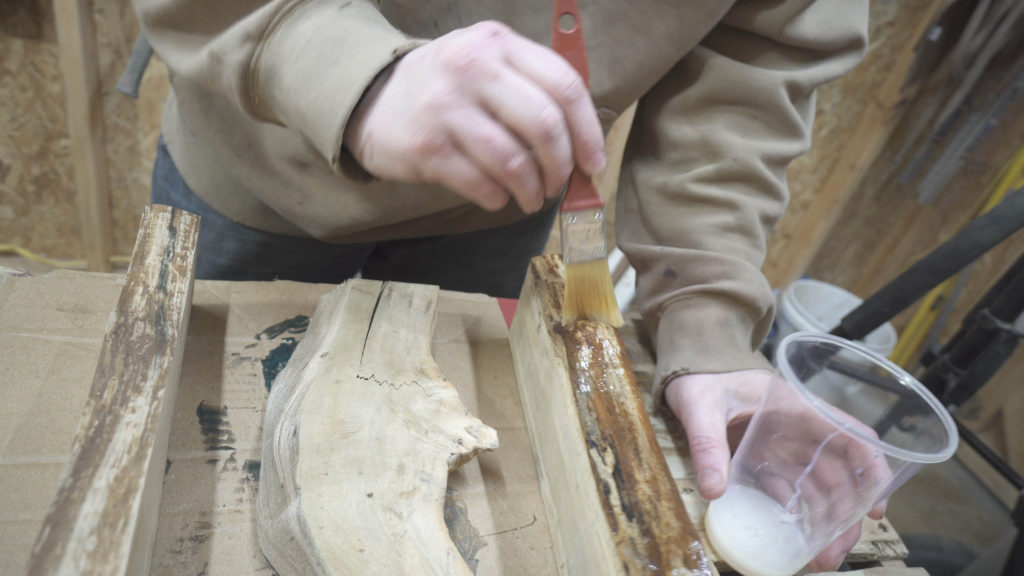
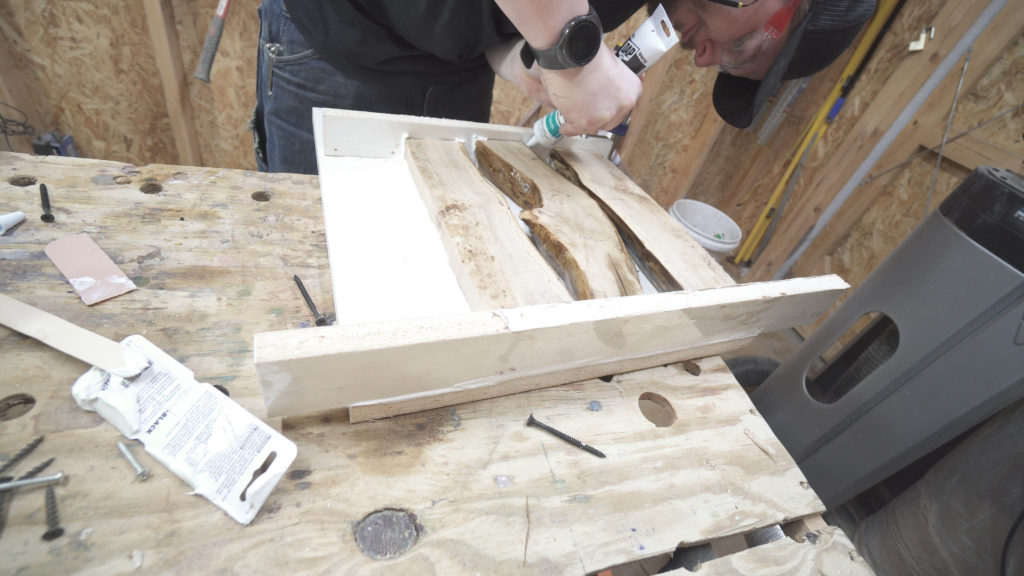
After cleaning the edges good I applied 2 coats of Total Boat varnish. The purpose of the varnish is to seal the edges of the wood to stop any embedded debris or possibly air that might escape into the epoxy it cures. This processes is not absolutely necessary but it is helpful and can help to stop some issues later on in the finishing process.
The mold is now ready to be built. I use melamine board and to keep any epoxy from forming a bond to the melamine I cover every face of the interior of the mold with packing tape. I have been asked before why packing tape.
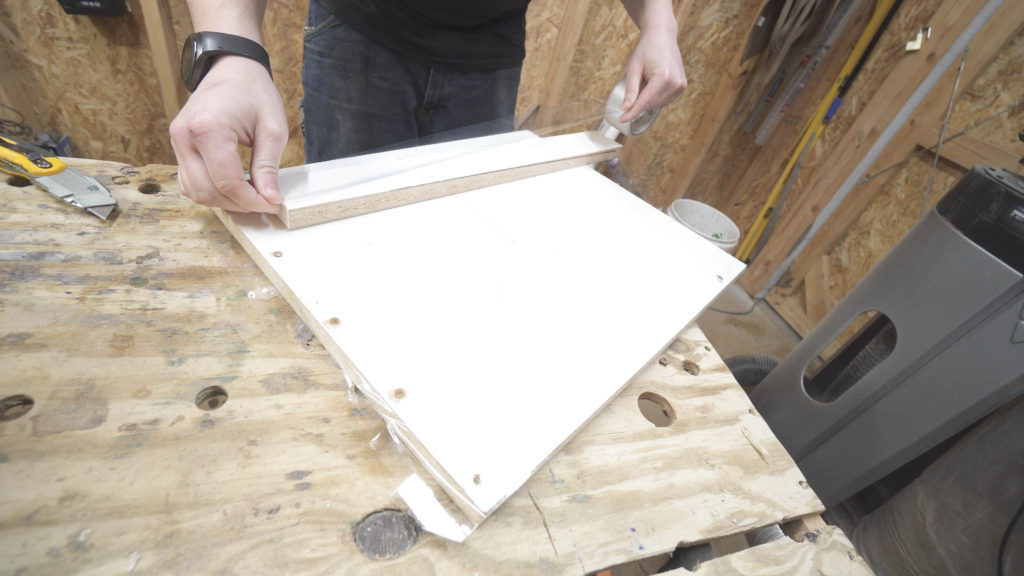
The smooth surface of the packing tape will keep the epoxy from permanently sticking. This makes releasing the tray from the mold much much easier. Another step to think of taking is to apply masking tape on the bottom sides of the wood and add a bead of calking.
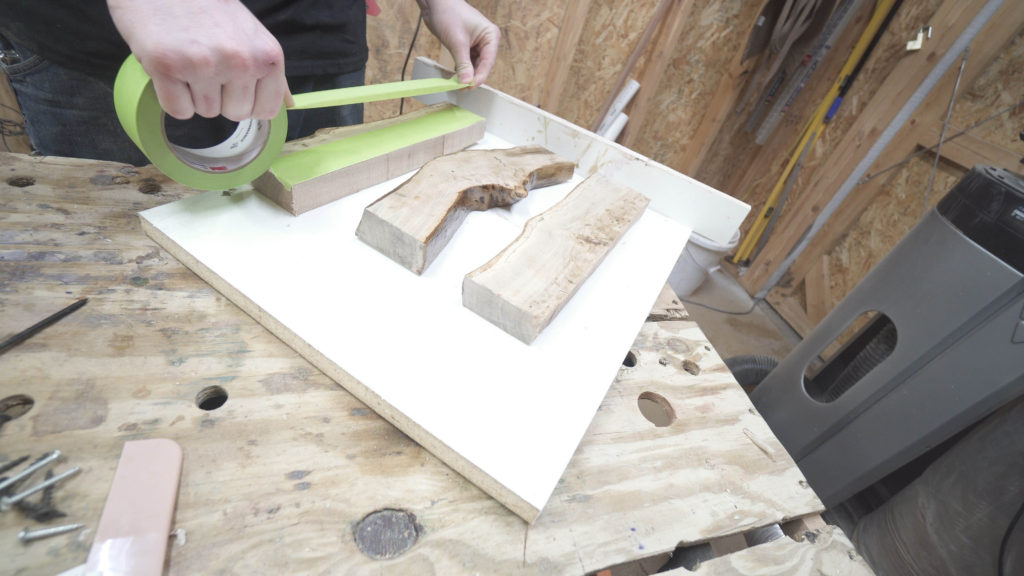
On smaller pours like this the calking on the bottom side of the board helps to hold the wood in place as well as keeping epoxy from leaking underneath the wood.
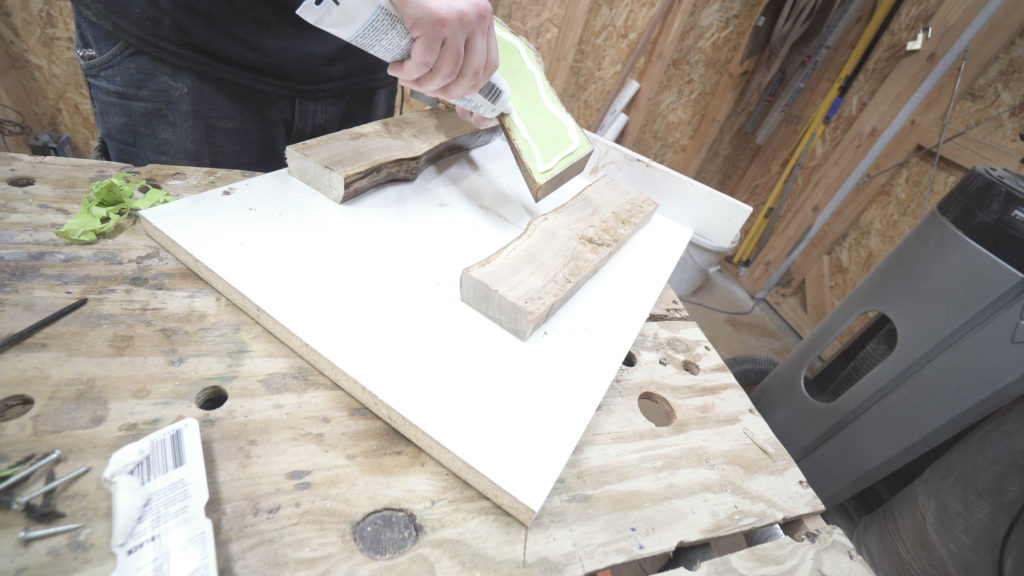
Attach one of the end walls of the mold to the base with calking in the seam and a small bead spread over the interior joint where the pieces meet. I use this to align the wood and to arrange the pieces how I would like them to look once poured.
With the wood in place and secure add the other wall to the end of the wood pieces add calking to the end of each piece of wood and to the seam of the joint and screw the wall in place. I also make sure to go back and seal any cracks both on the ends of the mold as well on the inner pieces this will stop epoxy from leaking out as well as save on the amount of epoxy that you need to use.
Once you have the mold build as well as placed where you would like to do the pour use a level and check the mold to make sure it is not leaning to one side or the other. Leveling out the mold will allow the epoxy to set flat and not run to one side causing problems once it is cured. Do not mix you epoxy until you have the mold completely built and leveled. Then you can mix and pour your epoxy.
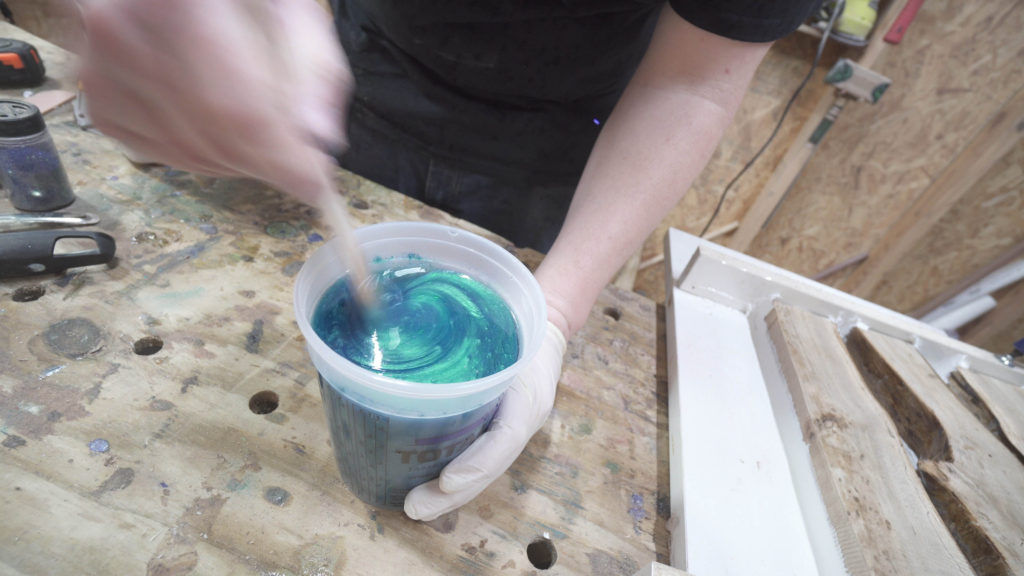
For this board I used Total Boat epoxy with Kp Pigments Bora Bora pigment to get this blue color. Make sure to thoroughly mix the epoxy. If it is not properly mixed it can an will have problems curing or with the hardness of the epoxy. While pouring the epoxy start at one end and slowly work to the other end of the void this will help to push air out of the void not trapping it within the epoxy.
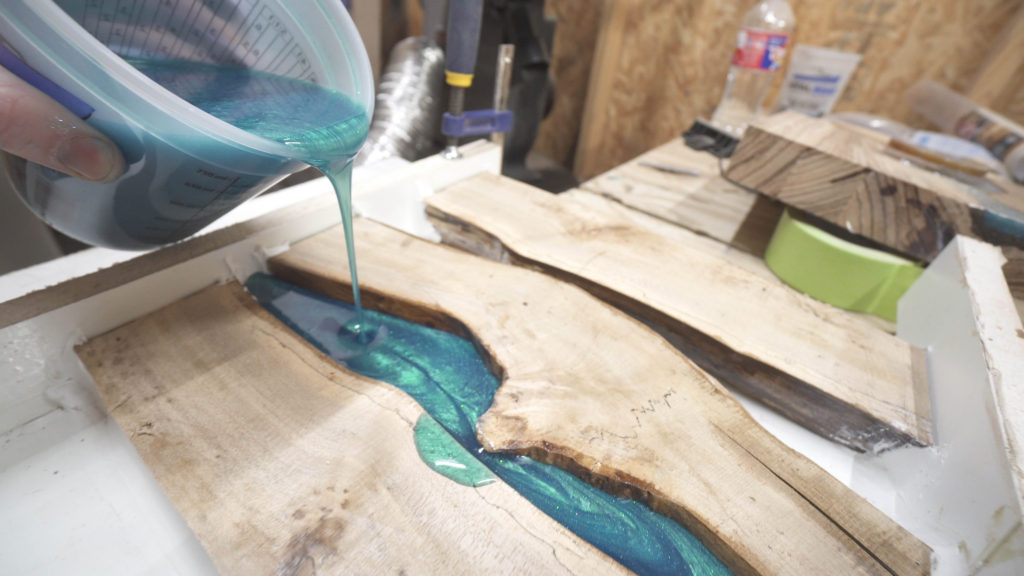
Another quick tip is to use a pocket torch and heat the stream of epoxy as you pour it. This should pop most of the micro air bubbles that are introduced into the epoxy during the mixing process. Fill the voids to the top. I also added a bead of calking along the edges of each void to keep the epoxy from spilling over the entire board to make clean up easier. If you would like to try to add any swirls or patterns to the epoxy you can do so with a small skewer to add the patter into the epoxy pigments.
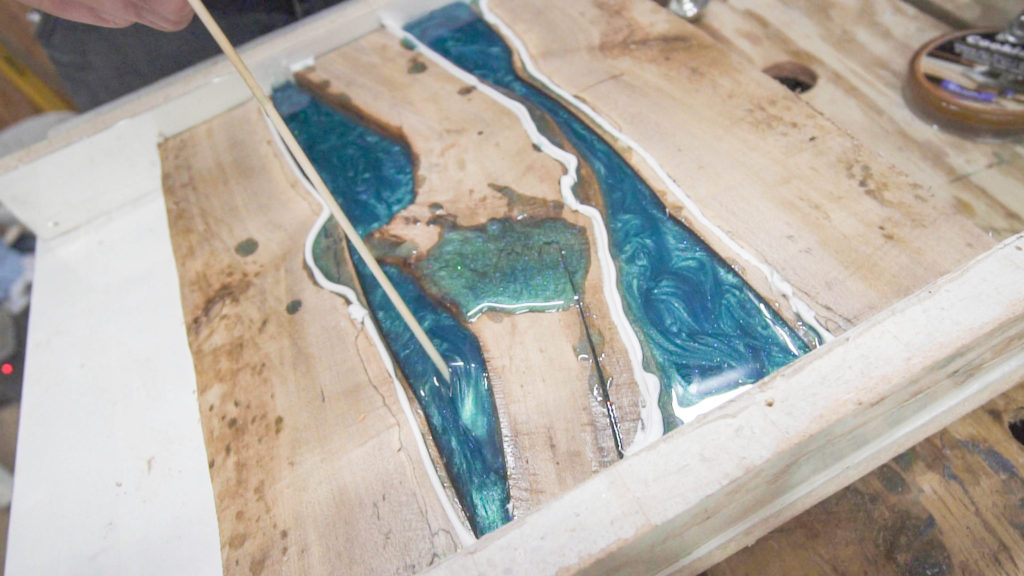
This is done at a point where the epoxy is starting to gel but is not solidified. To early and the pattern might lessen some and to late and this can damage the pour. Each epoxy is different in the time you will need to add this pattern and the best idea is to do tests with your epoxy of choice as to how long to wait to add a swirl pattern. With the pattern now set let the epoxy completely cure before removing the mold.
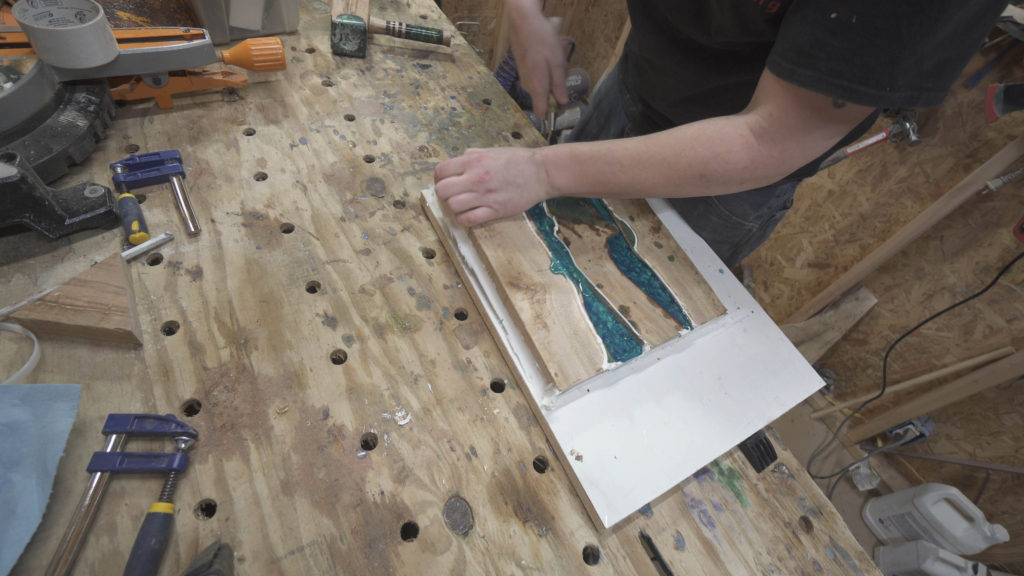
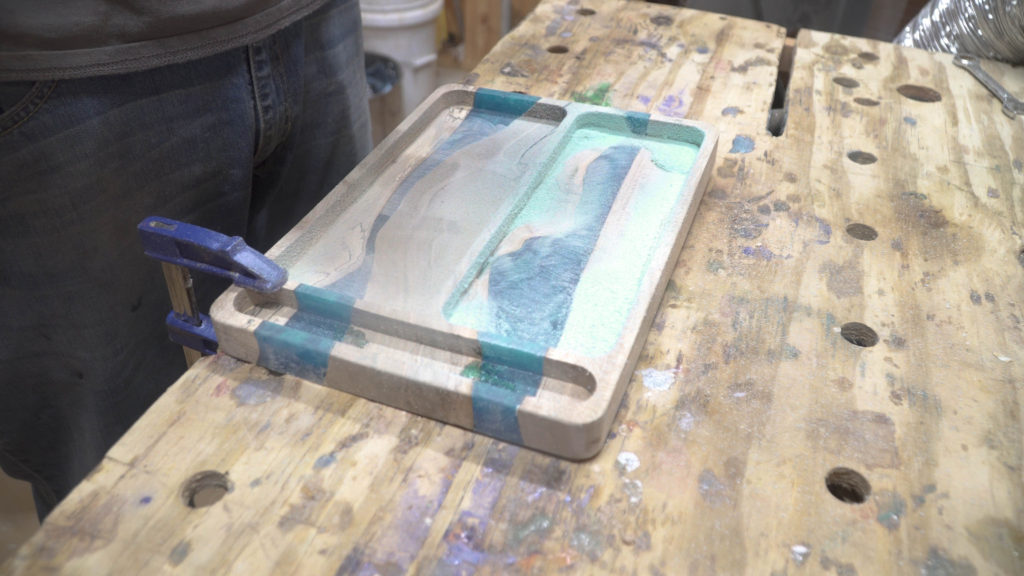
If the mold was properly built it should release fairly easy using a mallet and a chislel or pry bar. Remove the screws holding the walls on and knock them loose with the mallet and the pry up the board from the bottom of the mold.
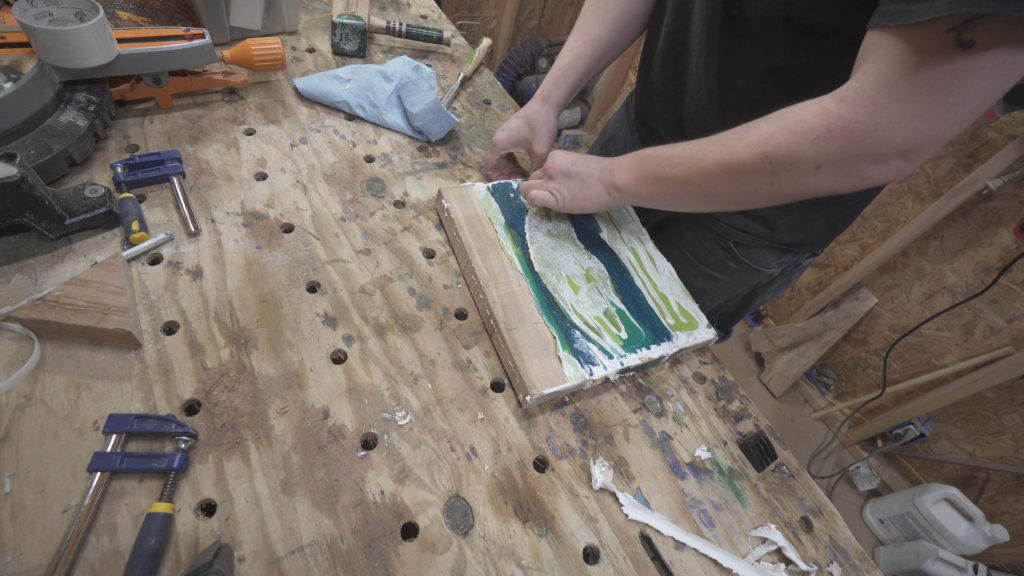
Once the board is out of the mold remove the masking tape from the bottom. This can be a little more difficult than releasing the mold but should be done the best you can to keep from getting any of the calking onto whatever machine you are using to surface the board.
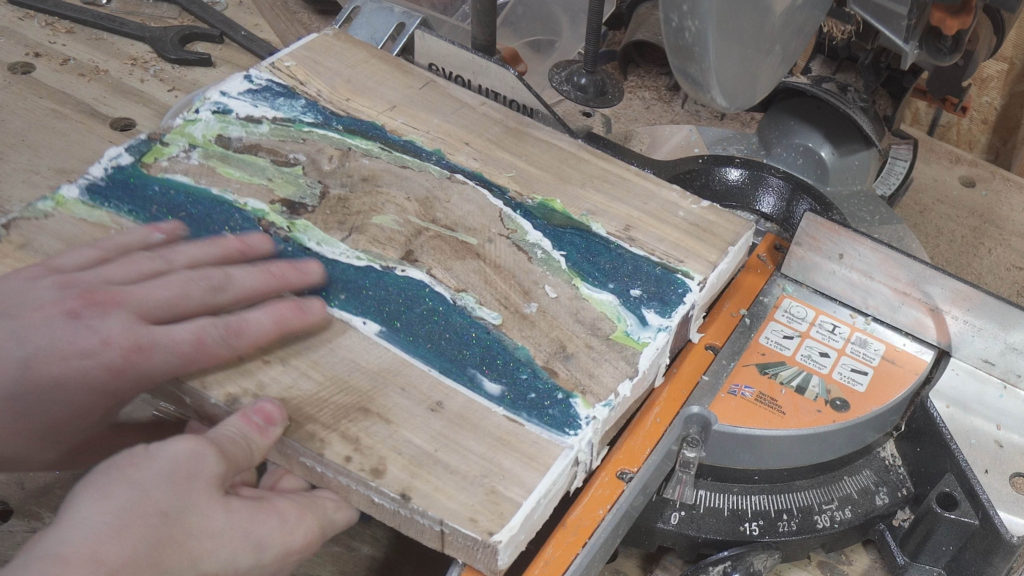
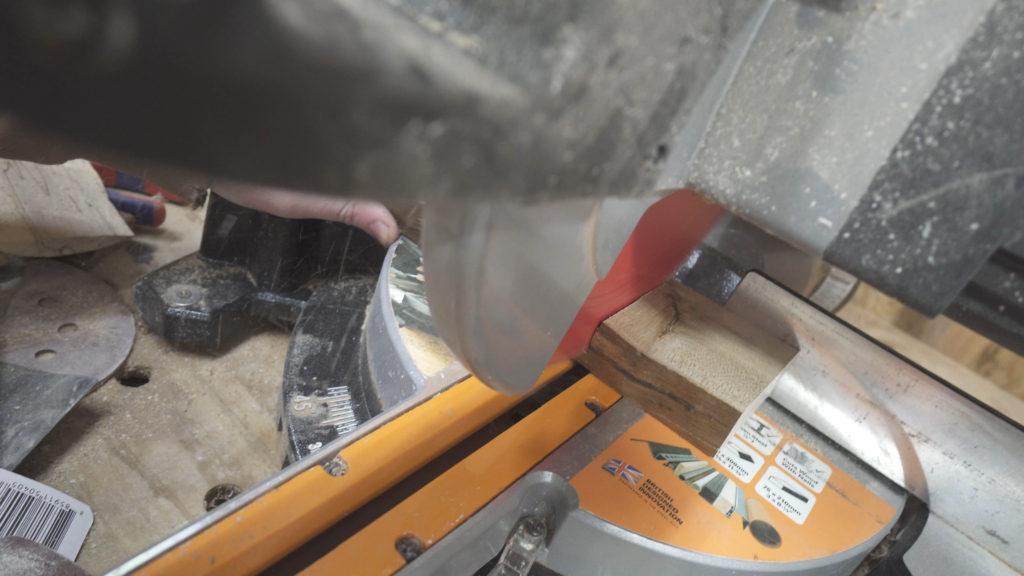
Once the masking tape was removed I went a head and cut the board down to dimension. This is to make planing the board down easier and also there is no need to remove more material than necessary with the router plane jig. For this process I decided to just use the miter saw as the board was small enough to safely cut to size with no issues.
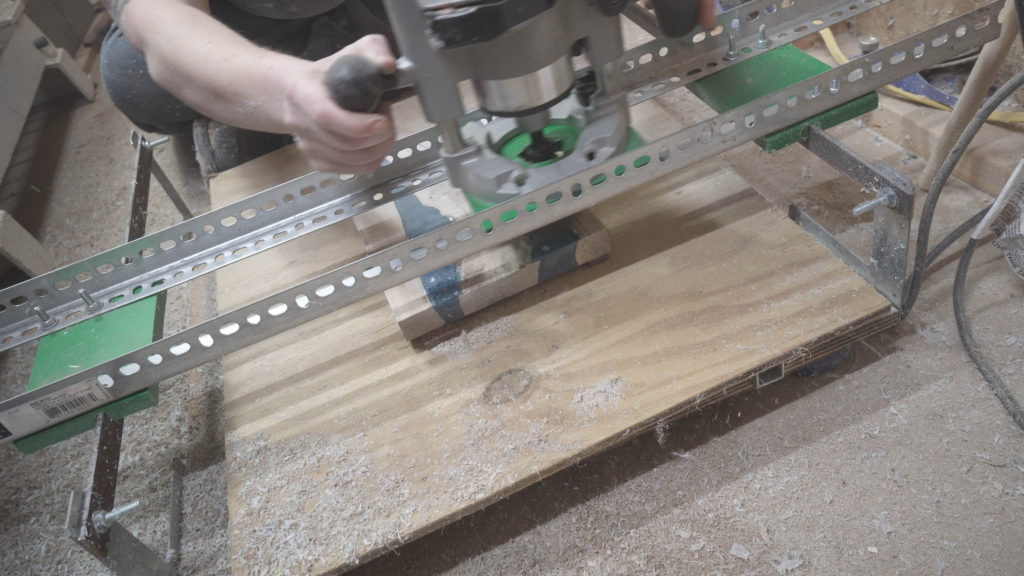
With the board cut to the dimensions I wanted I used to router plane jig to plane down the board to an even thickness of one inch. This was one process I was kind of excited about just because it was the first time using my new Whiteside spillboard bit from Bits and Bits. This bit is a beast and cut through even the rock hard epoxy like butter. Now the board can be used to draw measurements from to design the pockets that will be cut out on the CNC.
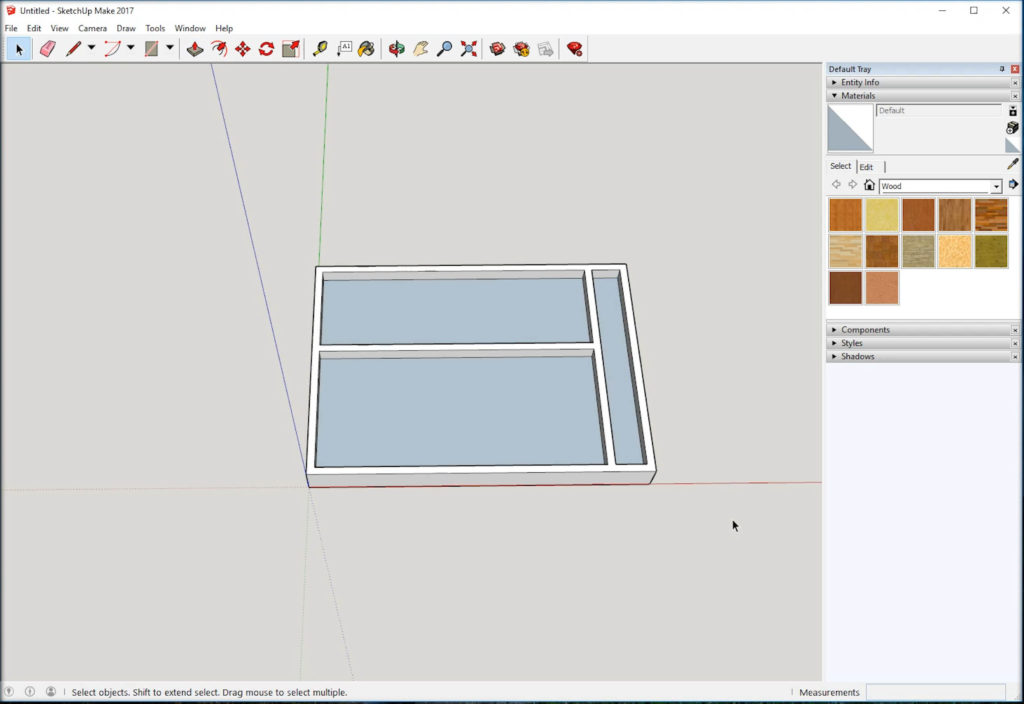
To make this process easier I used Sketch Up to design the pockets and importing the final Sketch Up file to V-Carve Pro to generate the tool paths for the CNC. For detailed instructions on designing the pockets and tool paths make sure to check out the video above.

The pockets were all cut out using a Bits and Bits ¼ inch end mill upcut bit. Also the speed of the cut was slowed down to allow the bit to make as clean a cut as possible. The cuts came out great. In all honest an upcut bit was not the correct choice of bit but as I did not have a downcut bit at the time it still gave a great cut and finish. Another thing to keep in mind when doing projects like this is that epoyx is acutally harder than most woods.
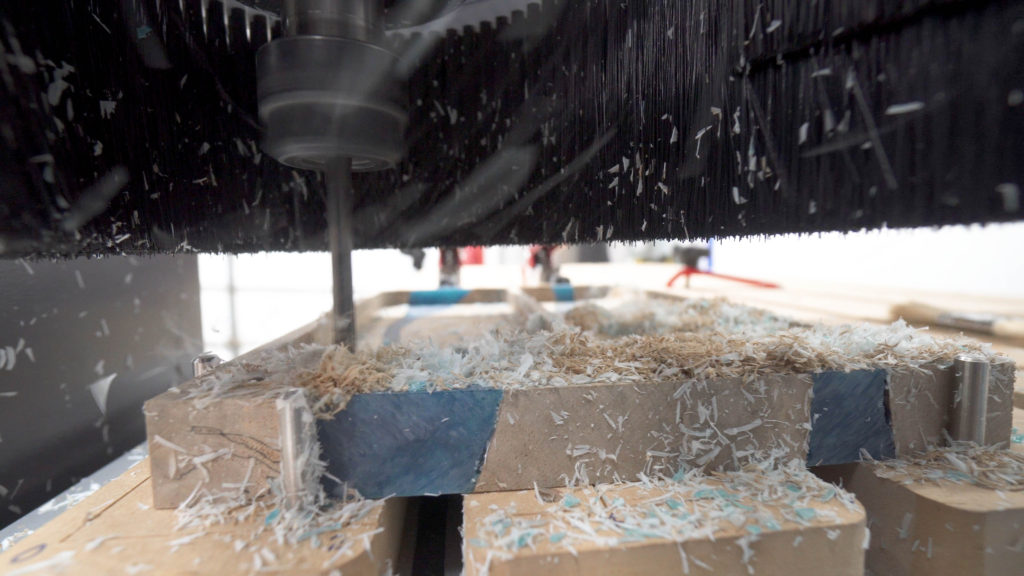
So when deciding on you feed speed of the CNC you need to take that into some consideration and possibly slow down the machine some. Thought most CNC machines now days will have no problem cutting thorough epoxy at all.
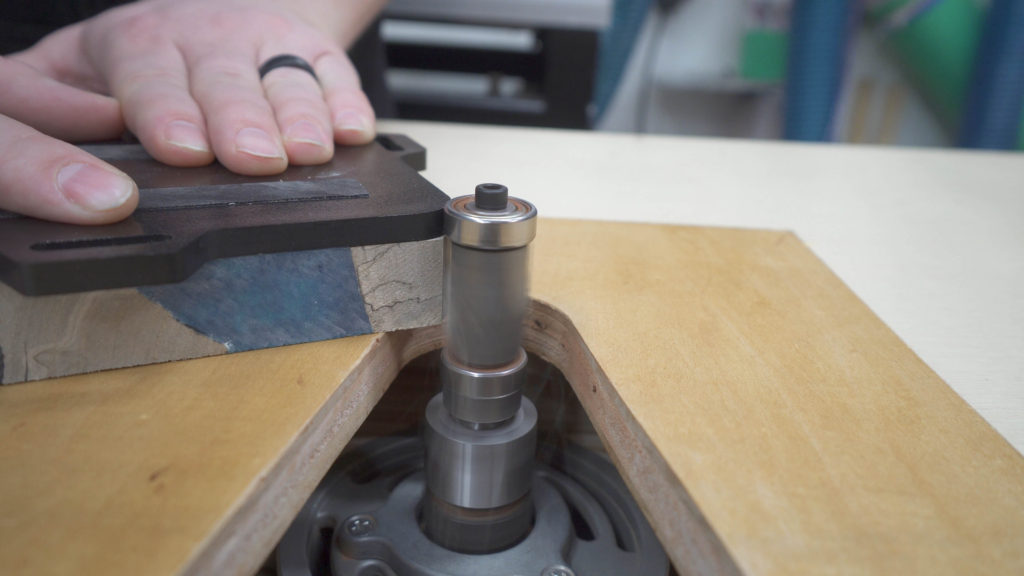
After the CNC was done doing its fantastic thing I decided to round over the outer corner of the board. With the flow of the epoxy rivers and the soft edges of the pockets rounding over the corners of the tray seemed like a natural decision. This gave a soft rounded look to the entire tray. The easiest way to accomplish this look was on the router table using a roundover jig. There is something just so satisfying of watching a flush trim bit round over the corners of the tray. Going from a hard sharp corner to a smooth soft radius seemed to complete the look of the tray.
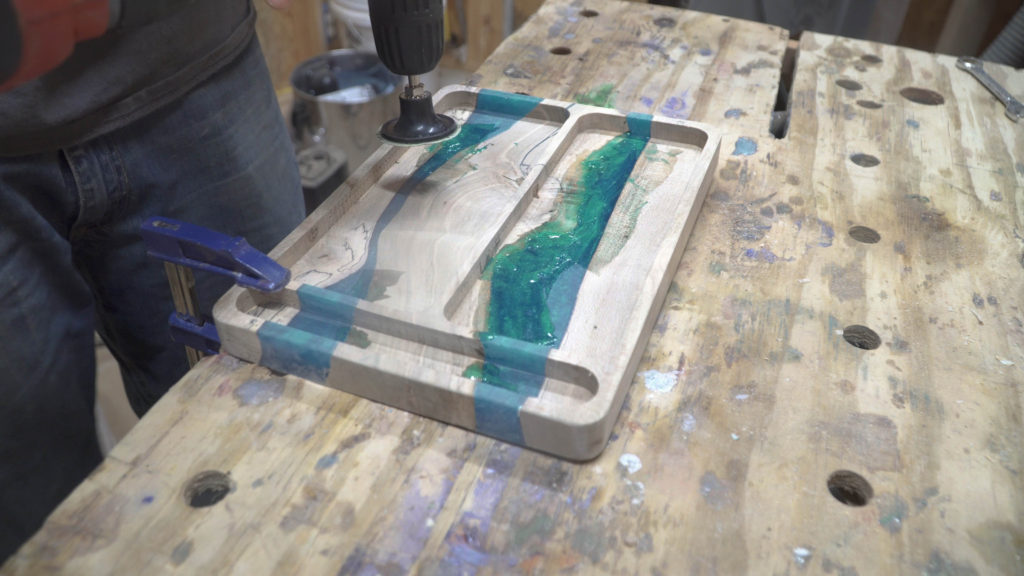
After all of the corners were rounded over there were a few small pockets likely from air in the epoyx. These were exposed when the CNC cut the pockets out. To repair these I mixed up a small amount of epoxy and refilled the pockets. This does happen sometimes and is an issue that you just have to deal with and repair along the way. After letting the epoxy repairs dry and fully cure it was time to get to sanding. Sanding this tray was a bit of a challenge as well as a lot of work sanding by hand. If you have never sanded epoxy by hand trying to remove material “try it”. Honestly it is not an easy process. Properly cured epoxy is extremely hard and takes a good bit of sanding to remove any real amount of material.
I decided to use an angle adapter for my drill with 2 inch sanding disks starting with 80 grit then 120 grit. This angle adaper worked well especially with the smaller 2 inch disks it made getting into the smaller pockets a good bit easier. One real draw back of this tool and method though is that the disks only up to 120 grit. This does leave some deeper scratches to clean up and also if you are not careful you will over heat the epoxy and cause it to get soft. This will cause the epoxy to not cut properly with the sanding disks. So if you are using this method make sure to never leave the sanding disk in the same spot for any length of time. If at all possible it is best to make long flowing passes. If not move from disk form one section of the project to a completely different section jumping back and forth every couple of seconds.
Once all of rough sanding was done it was time to get to final sanding and finishing. I started by hand sanding the entire tray with 220 grit sandpaper and working my way up to 600 grit on all of the wood sections. On the epoxy sections I sanded along with the wood up to 600 grit then worked my way to 1000 grit and onto micro-mesh up to 12000 grit. This gives a beautiful shine to the epoxy and a water like appearance. Also as a added note once I got to the 1000 grit mark I started using a wet sanding technique. Use a small water bottle or a spray bottle to keep the portion of the epoxy you are sanding wet. You do not have to have pooling water on the epoxy but it should be damp enough that you should feel the sand paper glide with a small amount of resistance. If you use to much water its ok just check the wood edges along the epoxy to make sure you did not raise the grain. If it is slightly rough lightly go back over the wood with dry 400 then 600 grit sandpaper making sure not to sand on the epoxy.
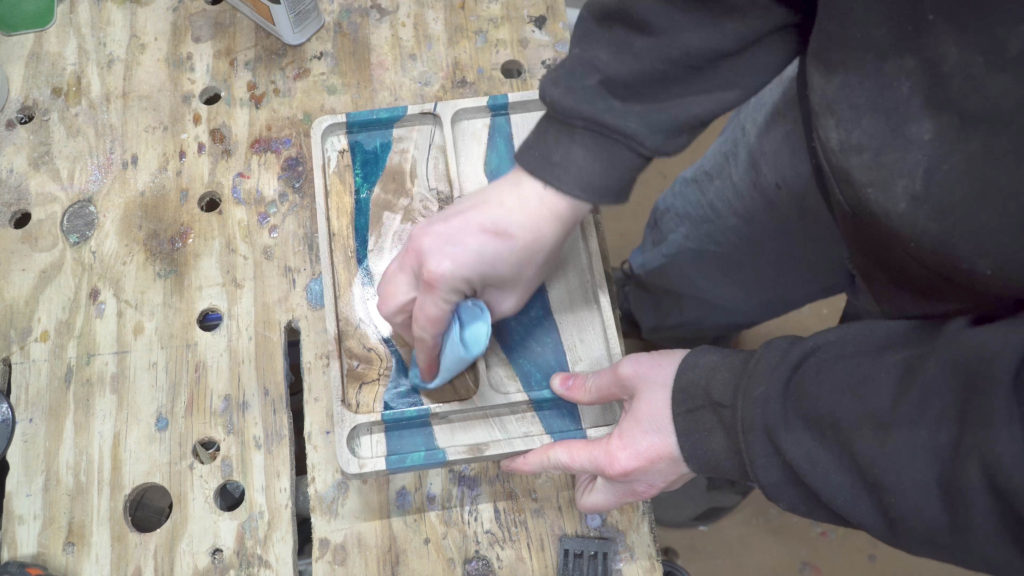
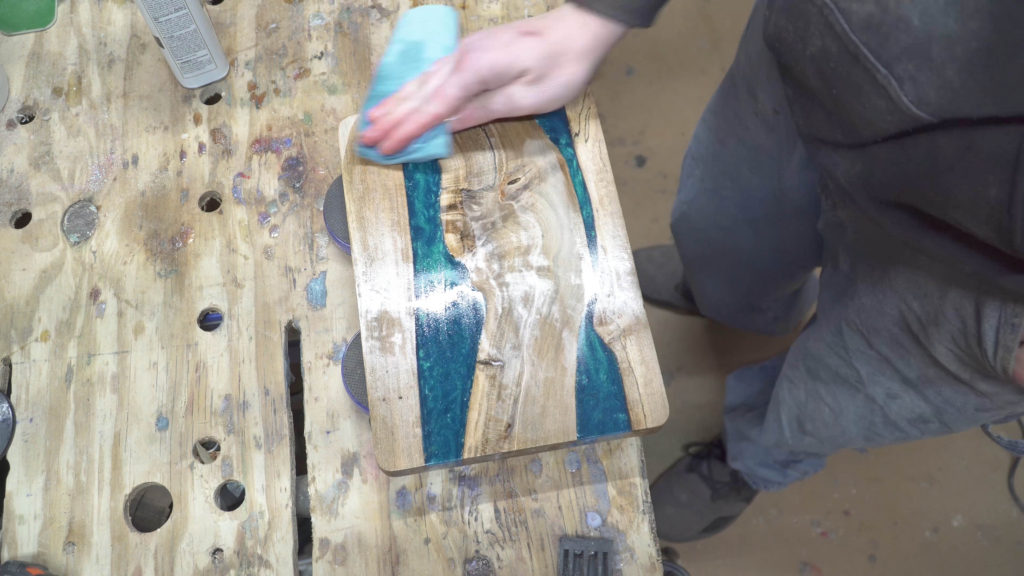
All the wood is smooth and all the epoxy is nicely sanded time to make this baby pop. I went with Danish Oil as the finish of choice on this tray. Seemed like a great choice as it provides more protection then just mineral oil. Using a shop cloth saturate the entire tray top and bottom with the danish oil and then let dry. Then apply a second coat the entire tray.
The final steps of the tray was to add the feet. I had contemplated using screw in style feet but with the bottom of the tray being only one half of an inch thick I decided this was not the best course of action. I then thought of using smaller dot style stick on feet but wanted more lift from the surface that the tray would be sitting on. I finally went with rectangular style half inch tall feet. To install the feet I marked out where I wanted the top left hand corner of the foot to be located as well as the coner for the top right. This makes sure you have the feet placed parallel to the edge of the tray as well as all the feet located the same distance from the edge of the tray.
To attach the feet there was a very technical and tedious process of pulling the backing off the feet and pressing the sticky side to the tray lined up with the two guide marks you made for each foot. These feet should do well on this tray as it is not in a wet place an they give a nice floating effect to the tray while sitting on a table.
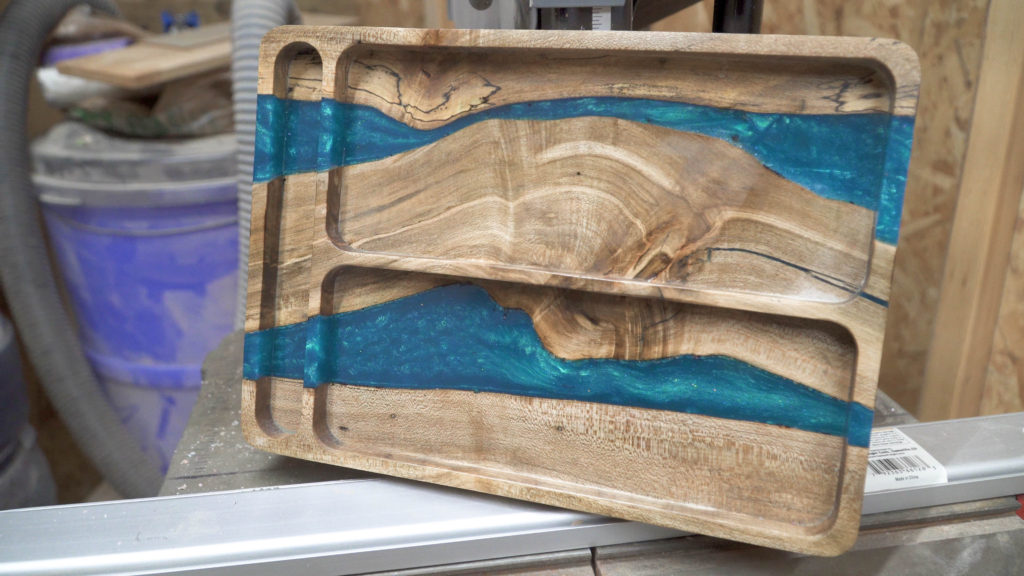
The tray is now finished. I love the look of the epoxy flows in this tray. They give the illusion of real water flowing through a valley and that is the exact look that was being attempted. The wood in the tray looks amazing as well with the Danish Oil bring out all of the grains and the spalted patterns. What do you guys think? Does this look nice enough to put your keys in? Or would you want even more?

Make sure to SUBSCRIBE on Youtube and leave a comment on what you think of the tray. Also if you want to keep up with daily videos and photos follow me on Instagram @jpaynewoodworking . Subscribe the the newsletter here on the website for new, tips and offers.
Thank You and I will see you on the next one.