 JPayne Woodworking Creative Craftsmanship
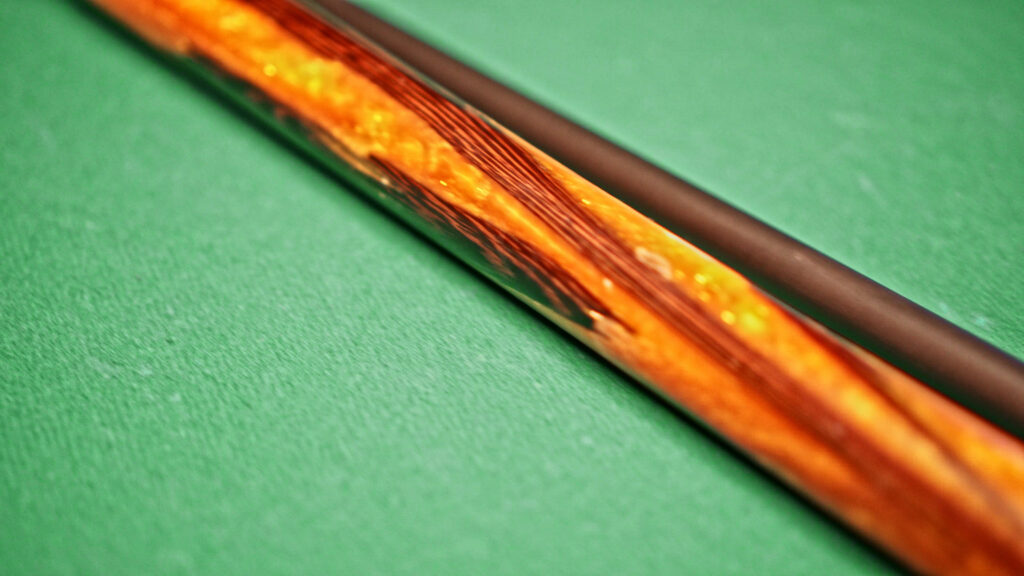
Here we go back at it again trying to make a crazy pool cue for woods that are just lying around the shop. Well, this time Wenge is up on the chopping block literally haha. I mean I am going to chop up a scrap board of Wenge and make what I will go ahead and call the world’s wildest colored pool cue. If you don’t know much about Wenge it is an exotic wood with some beautiful and bold patterns in the grain and is very very dense.
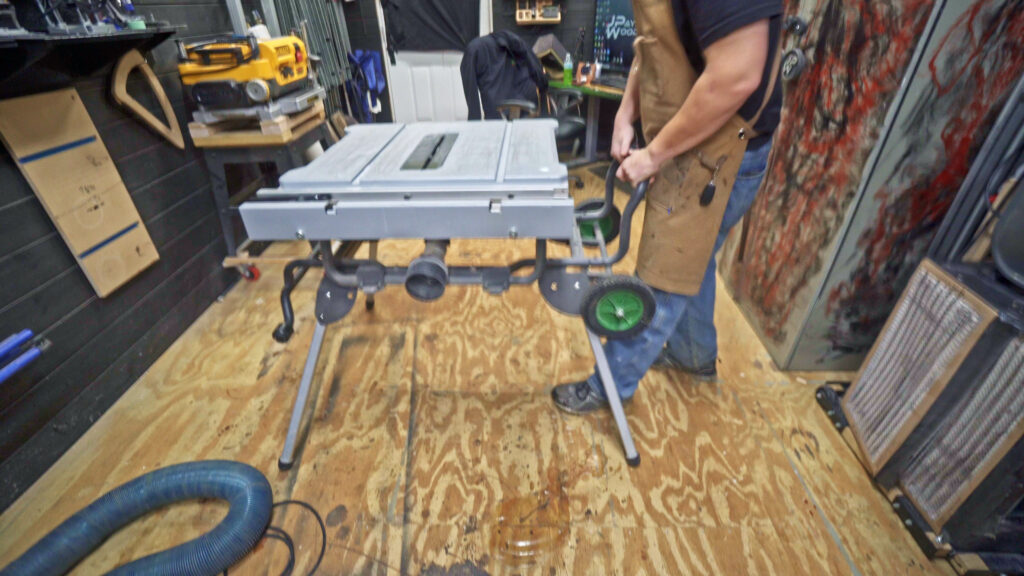
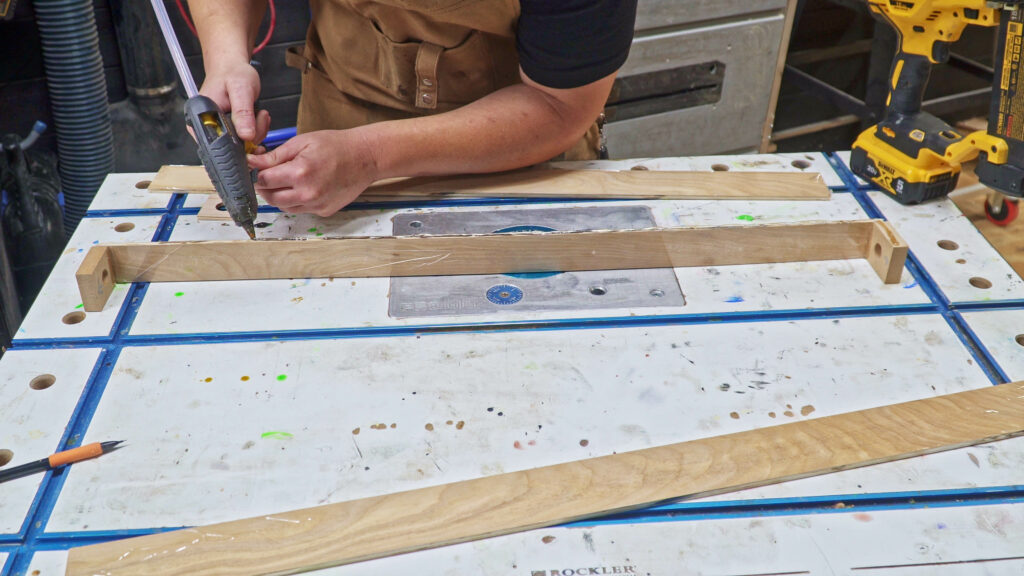
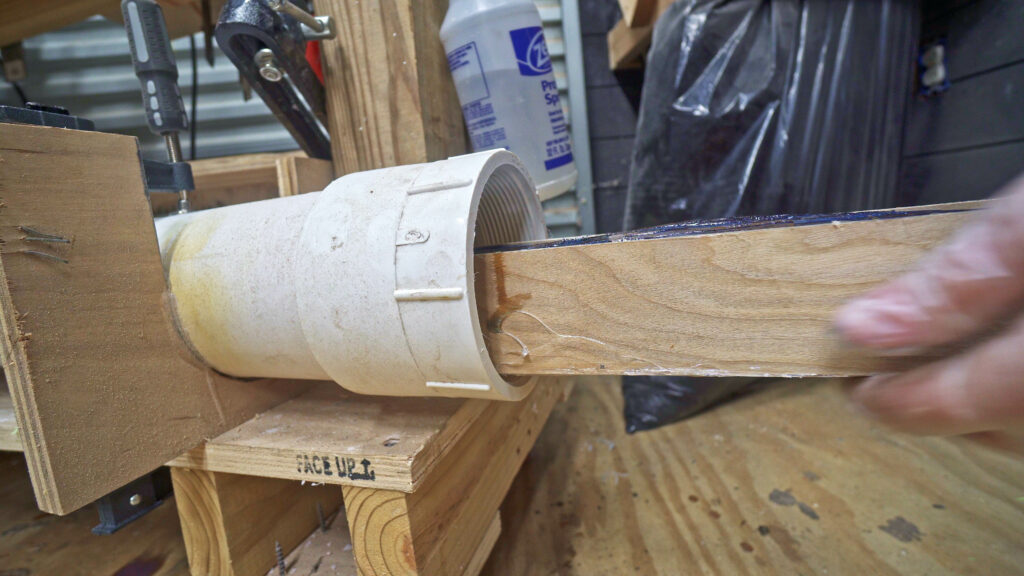
The first step is to set up the mold that will be used for casting the blank that will become the pool cue. Using some ¼ plywood is a great material to use for these molds. While they are not reusable they are cheap and quick to make. Using the table saw I cut the plywood into a properly sized strip to make the blank. For the end caps, I am using some MDF that is CNC with the i2r-8 from I2rcnc.com ( if you are interested in a CNC to go check them out and use code JPAYNE10 to save up to $200 on the i2r-8) cut to ensure the holes for the wood center dowel is centered in the casting. Once all of the pieces are cut the mold is then covered with packing tape on the inside of the mold faces and then assembled with hot glue or caulking and brad nails.
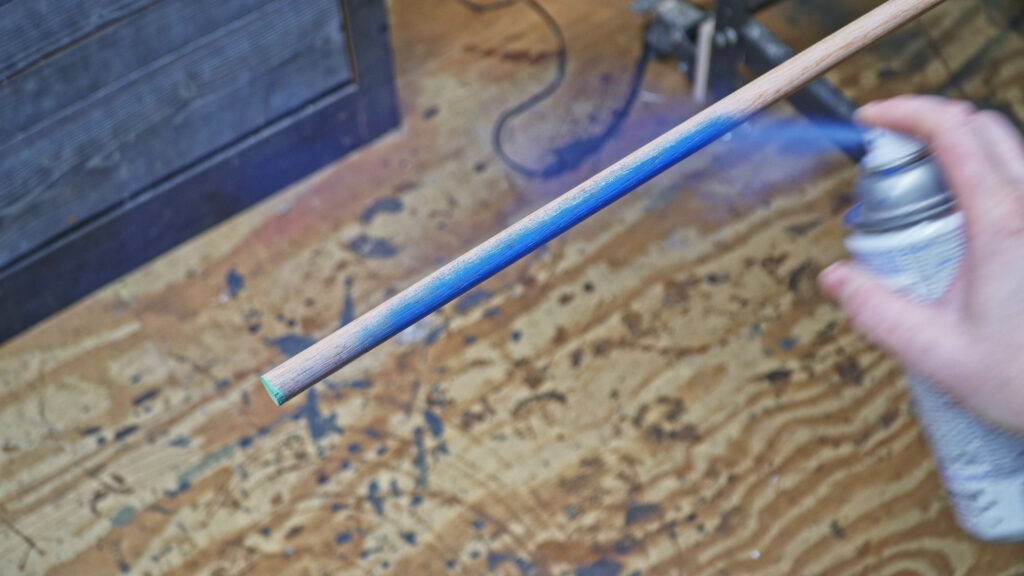
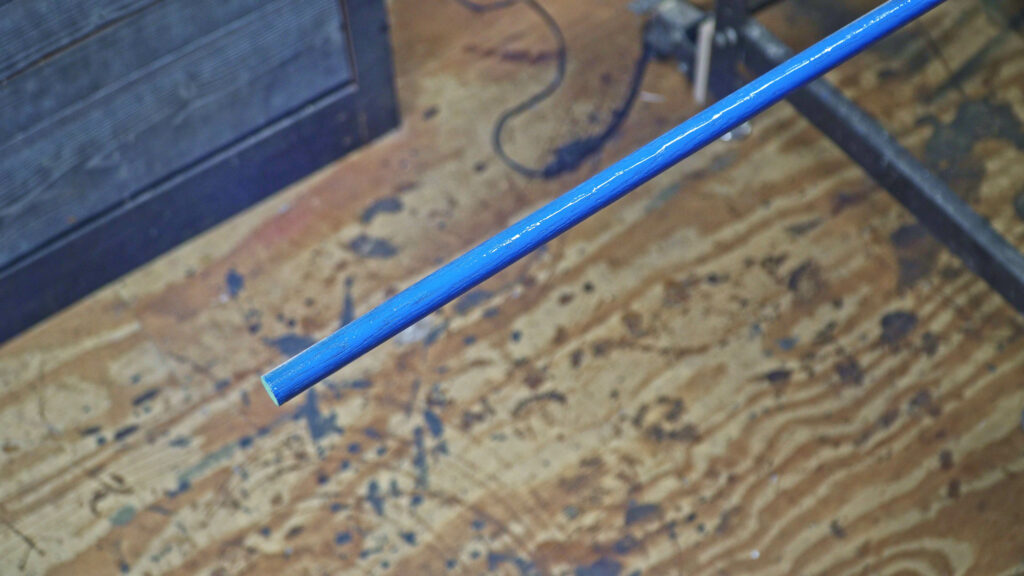
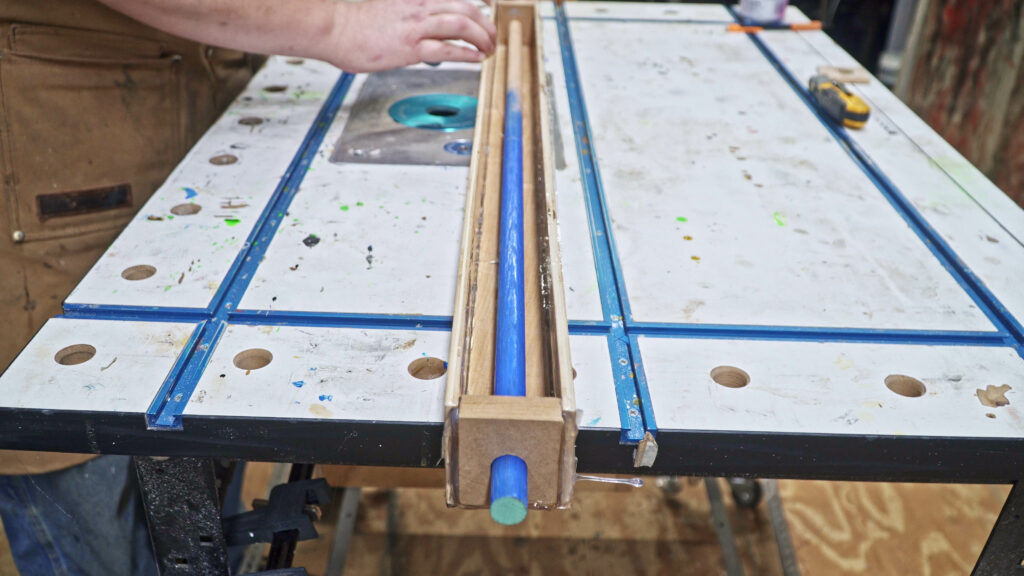
Next, the center dowel will get painted this is simply because on the joint end of the cue the colors of the epoxy can be slightly transparent. This is simply due to how the epoxy pigments work and as the layer of epoxy gets thinner it is more likely to be partly seen through. So painting the dowel will help the colors of the epoxy pop. Once the paint is dry the dowel is then inserted into the mold.
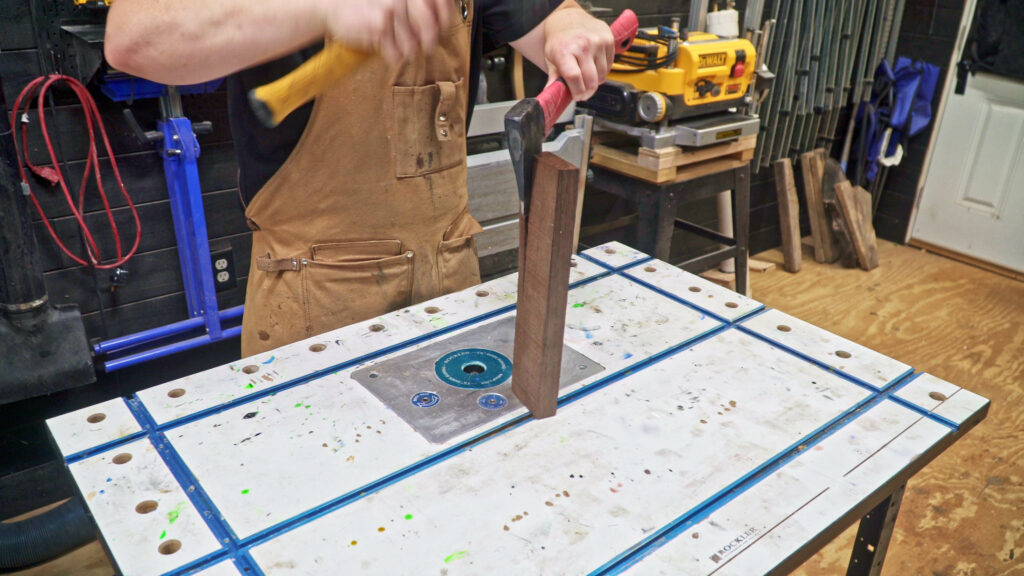
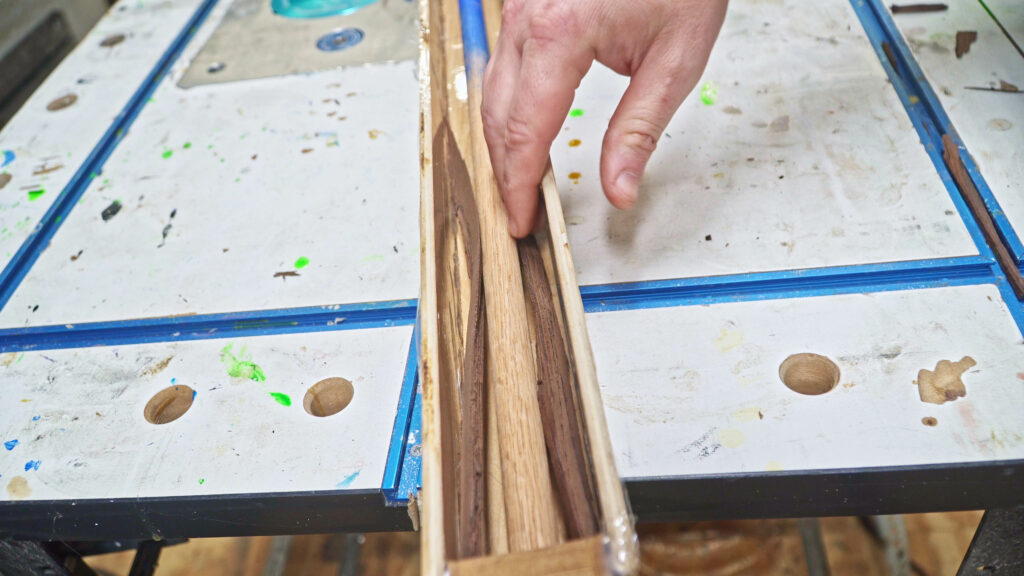
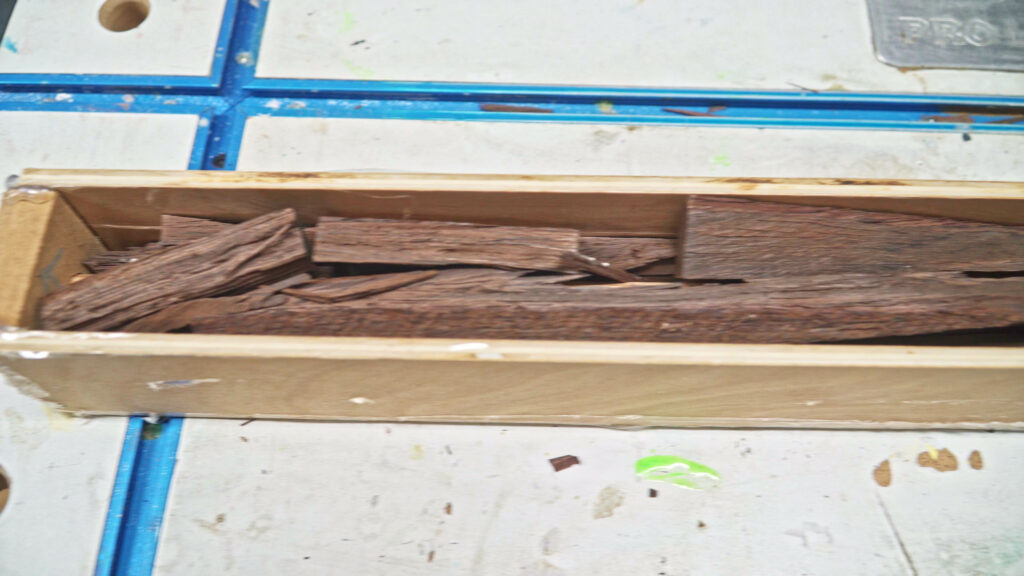
Now it’s time to get to chopping. Wenge is a very splintery wood. It will break into extremely small and sharp shards so I had to be very careful not to impale my hand. Using a hammer and hatchet worked well to not only break up the wood but do it safely. After breaking down the Wenge into slivers that are the appropriate size the mold can then be filled. Making sure to place strips of the wood always round the center dowel.
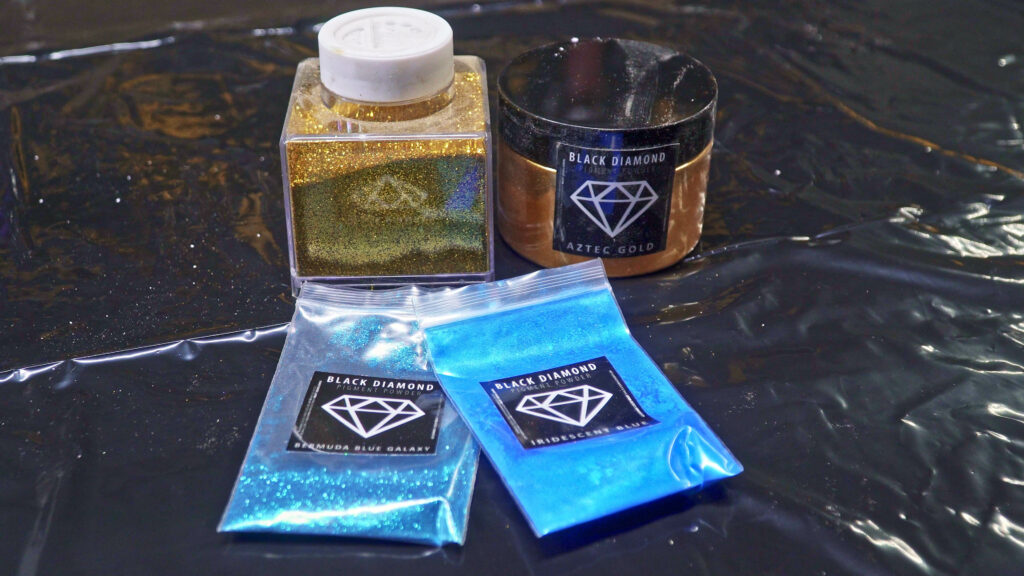
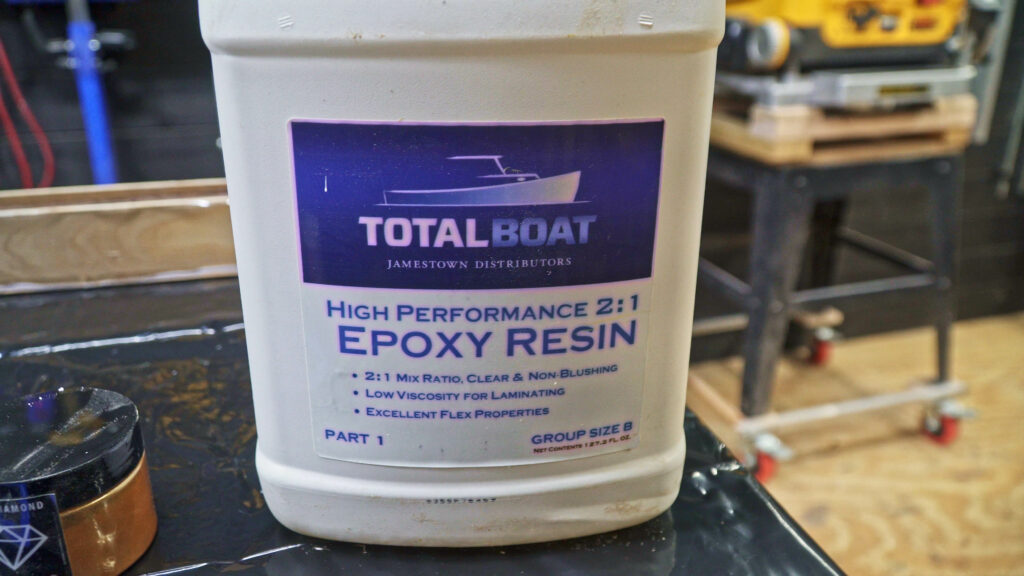
I would be using Totalboat High Performance Epoxy and Black Diamond Pigments to cast the epoxy these two products work great together. If you are planning on any epoxy work or cast click the links above to go see how great these work for yourself.
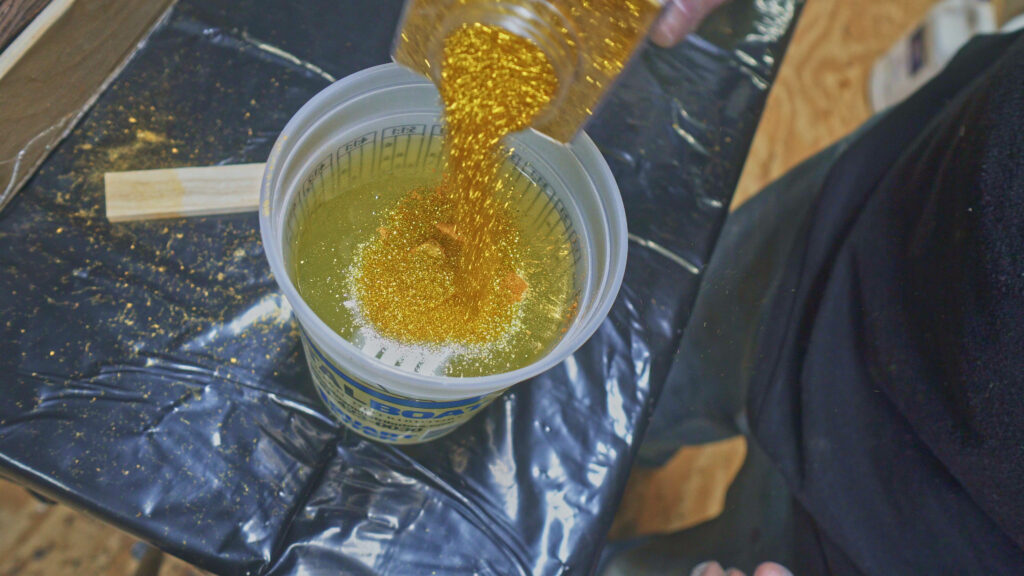
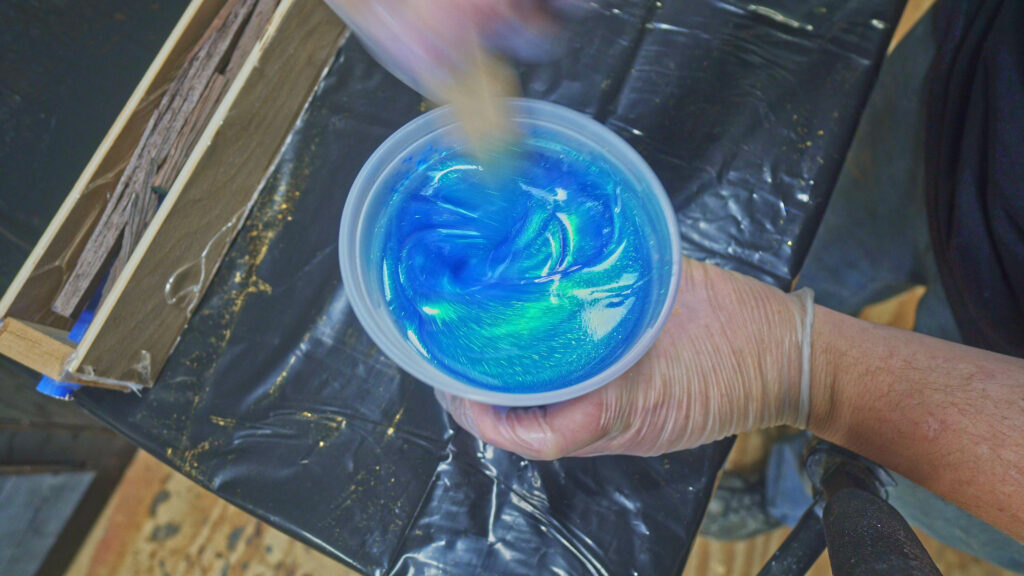
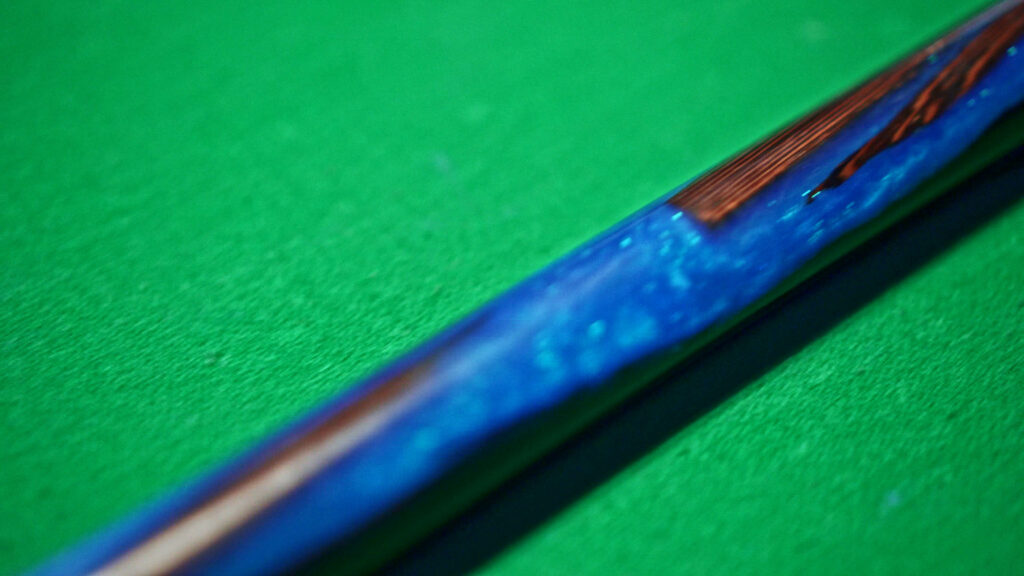
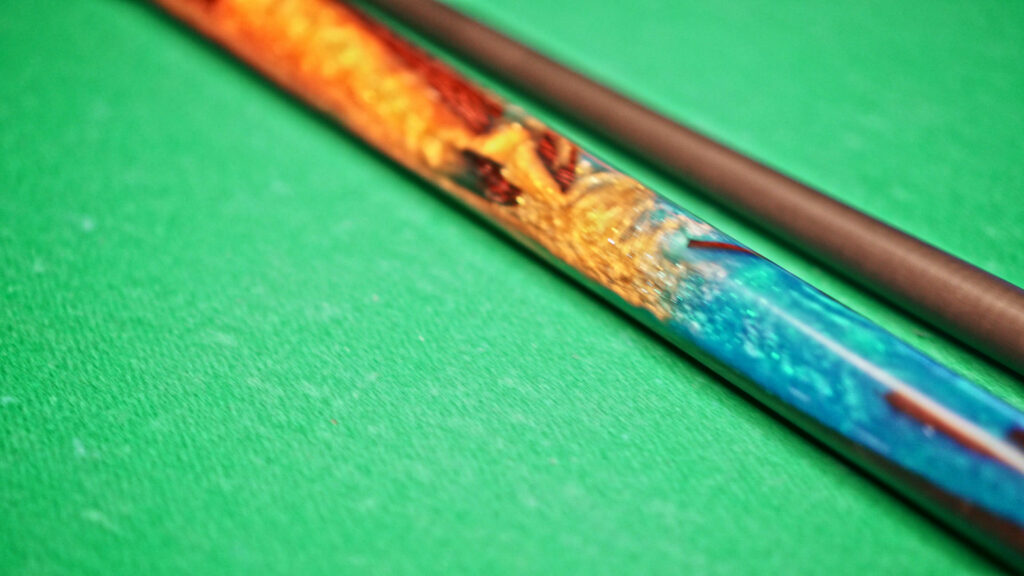
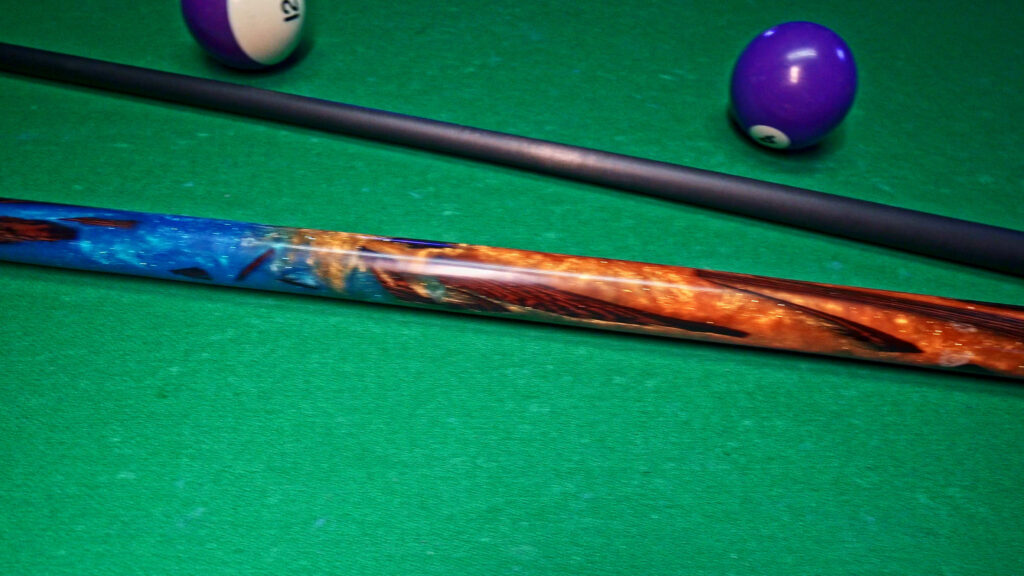
If you were wondering before why only one end of the dowel was painted blue this is why. The colors for the cue are a beautiful blue and a vibrant gold both from Black Diamond Pigments. The gold color will hide the light brown almost cold gain of the dowel so there is no need to paint over the color. I also added a good bit of metal flake that will add some cool bright glitter effect to the cue.
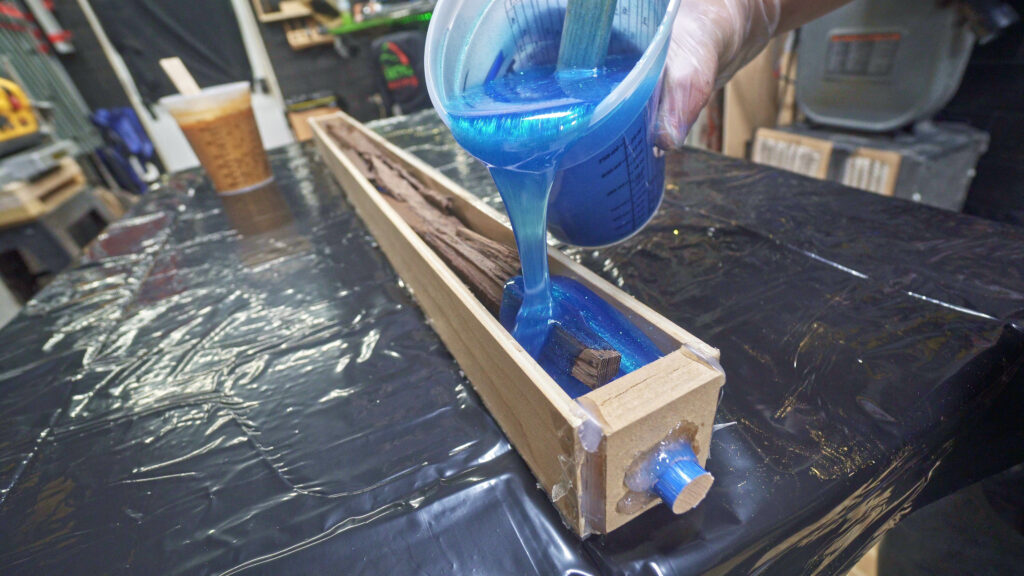
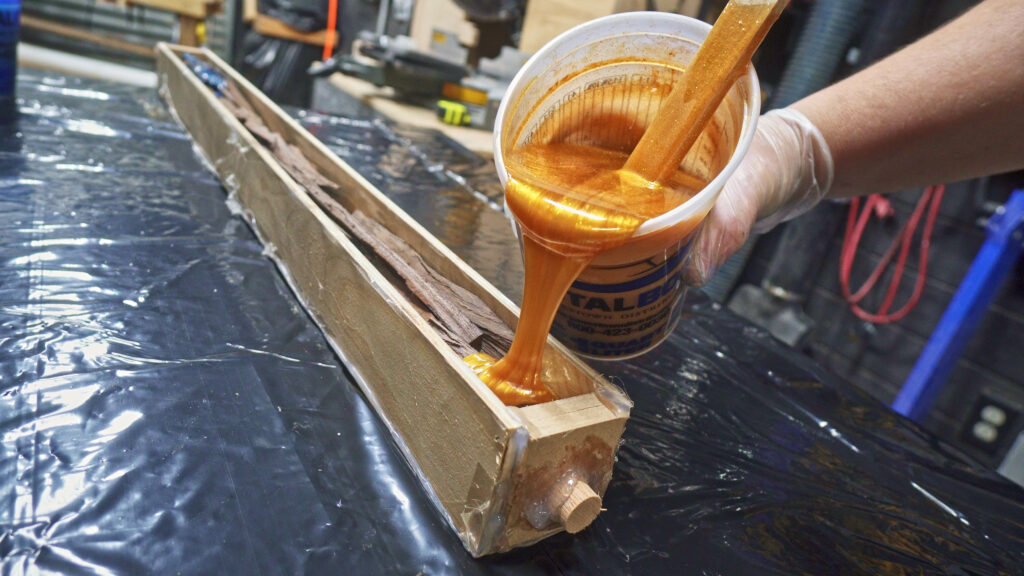
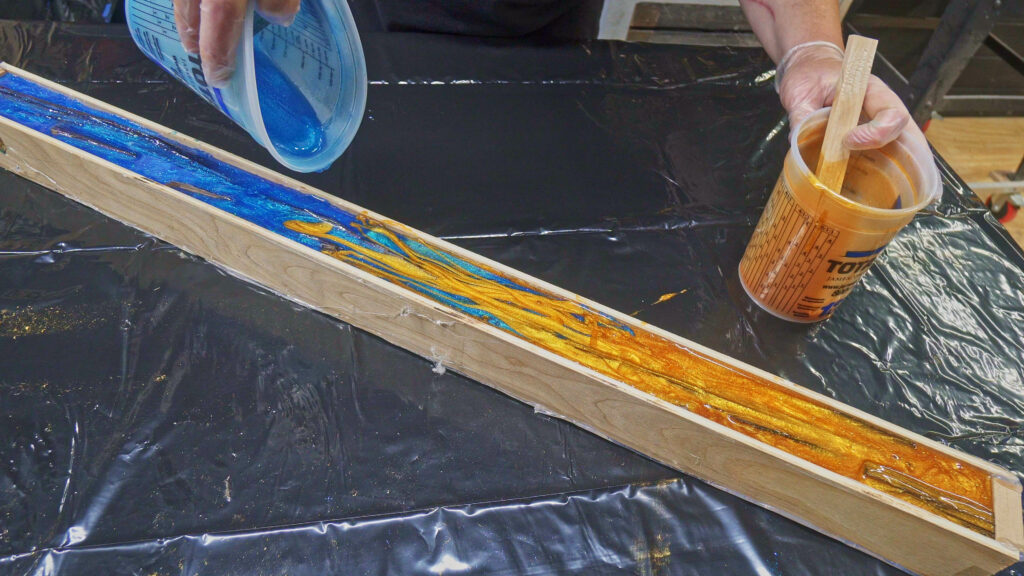
When pouring the epoxy there is a bit of a learning curve to get the nice gentle mixing of the colors in the middle of the cue. Pouring the two colors two fast and not letting them meet in the middle properly will cause one of the colors to run under the other and end up with too much of one color on one side of the cue. These two colors together was a worry for me in the beginning. After making the pour though, those worries were dismissed. The colors look great together.
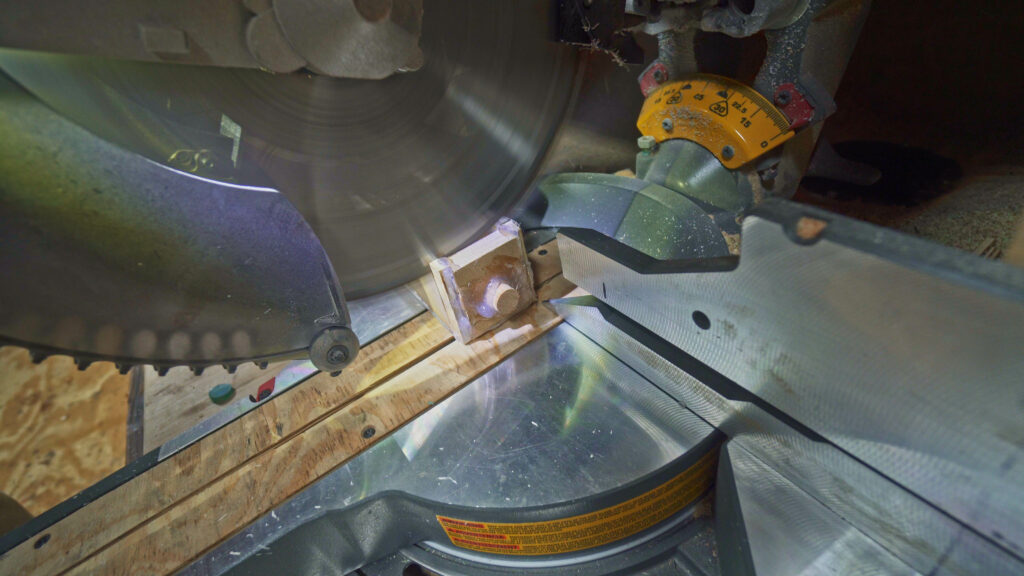
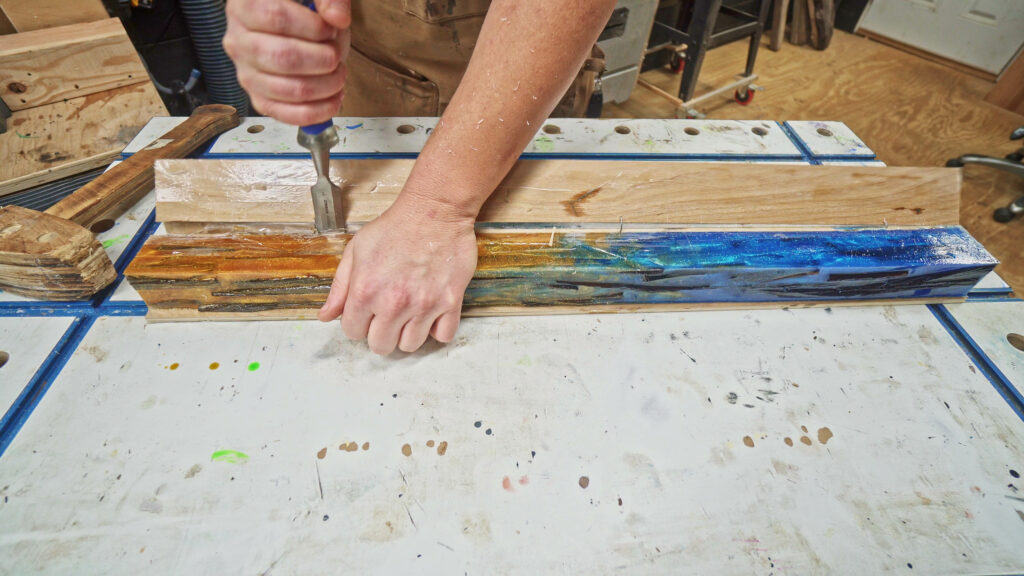
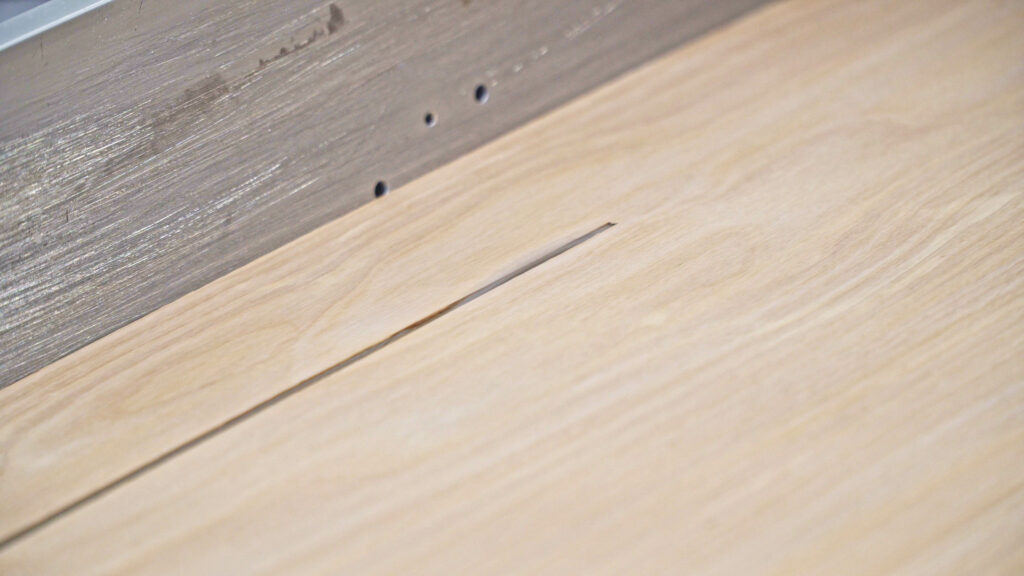
The epoxy would then need to cure in the pressure chamber to ensure that there are no air pockets in and around the wood slivers. After the epoxy is completely cured I could then remove the blank from the pressure chamber and trim off the ends on the miter saw. And then use a chisel and remove the mold side. If the packing tape is properly applied the blank should pop out of the mold easily.
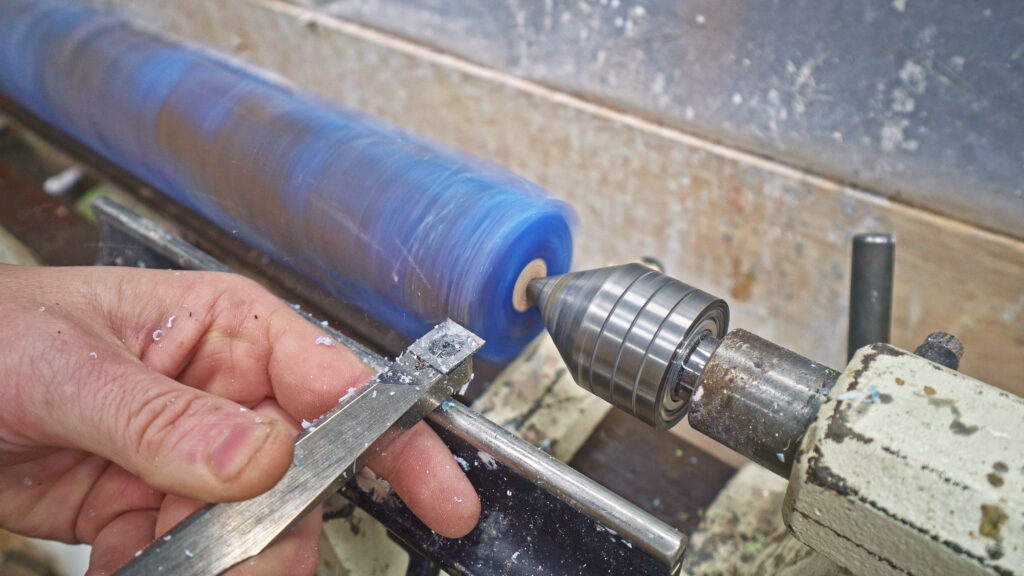
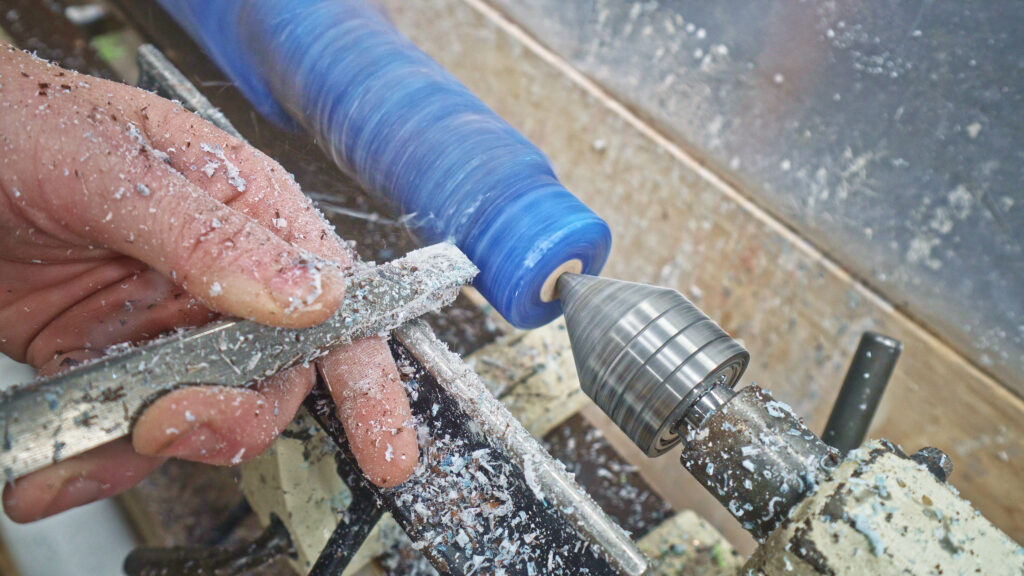
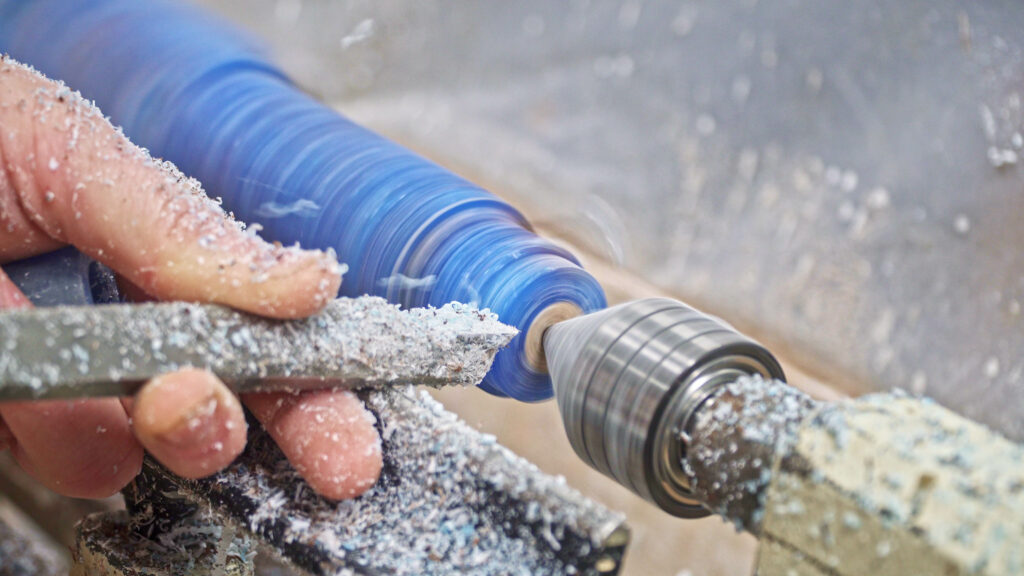
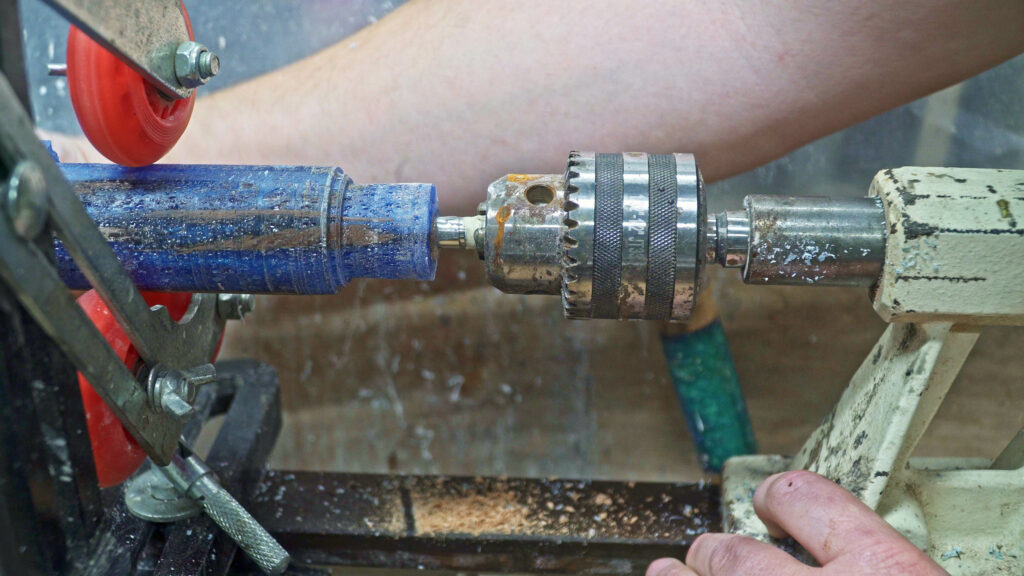
The turning fun could then start. I started by first cutting the end for the cue to a cylinder to allow for the use of the steady rest on the lathe. This would allow me to hold the end of the cue steady and drill the proper size threaded hole for the joint pin.

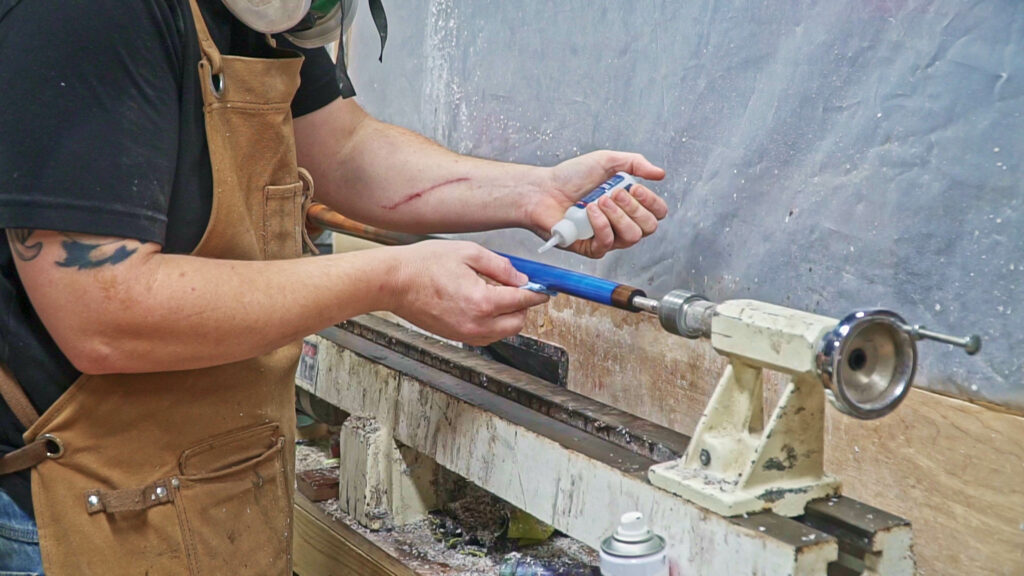
I then could epoxy the pin into place and allow the epoxy to cure. This sets the pin in the proper position. I then started turning the end of the cue butt to the proper size to fit the wenge joint collar.
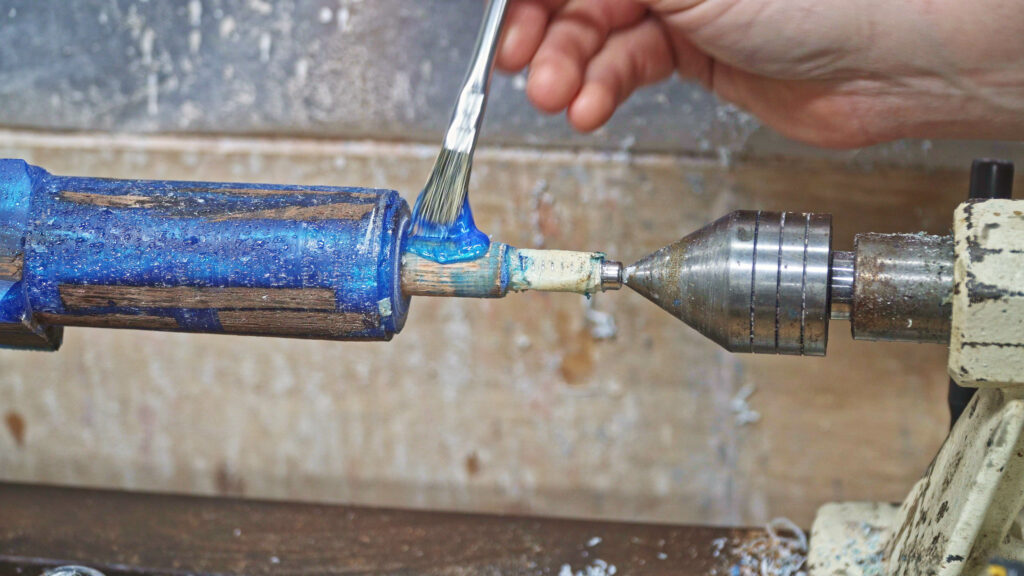
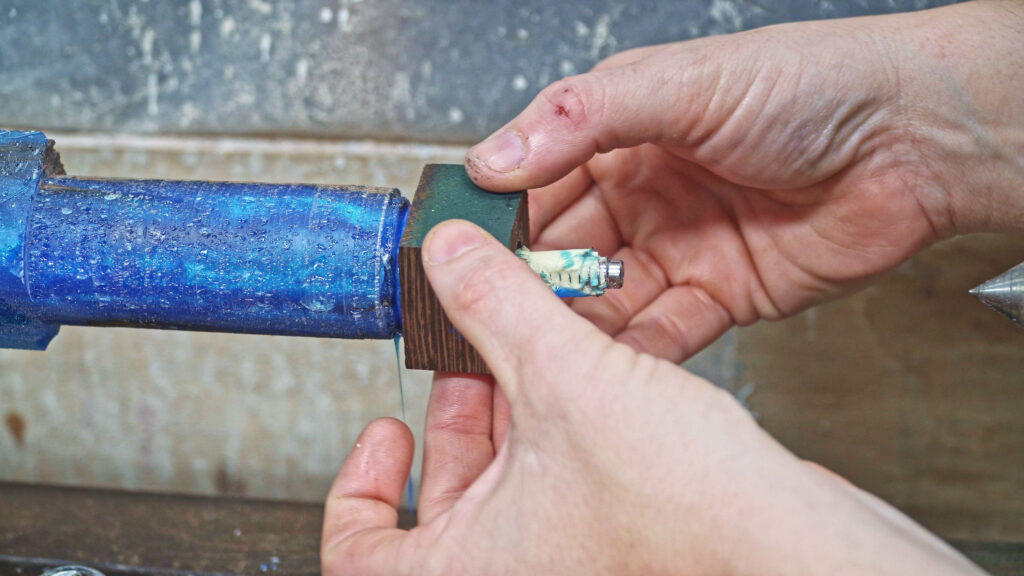
Normally I use a synthetic joint collar but in this case, I decided to use the Wenge to fit the theme of the cue as well as wenge is so dense that it is plenty strong to the application.
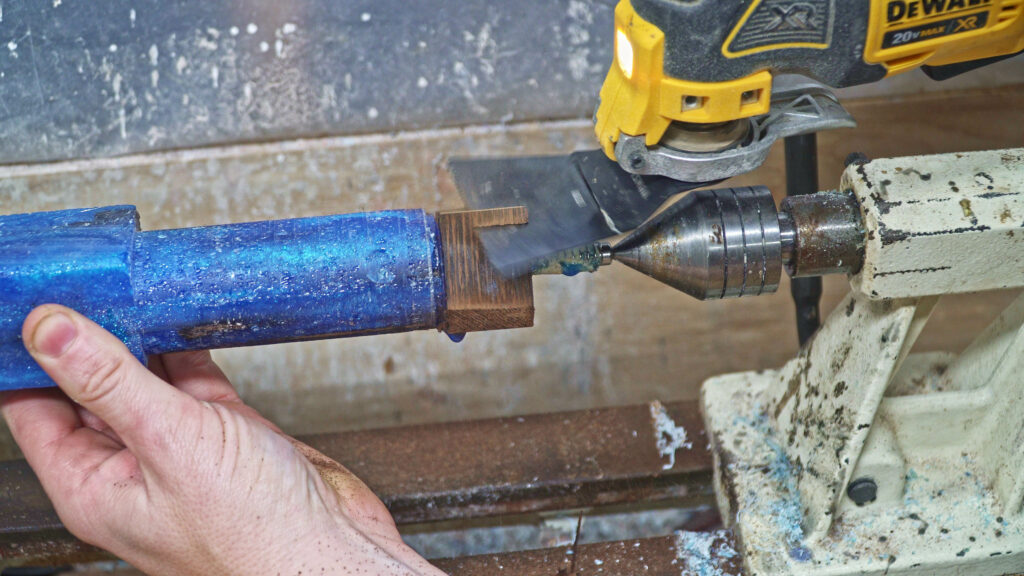
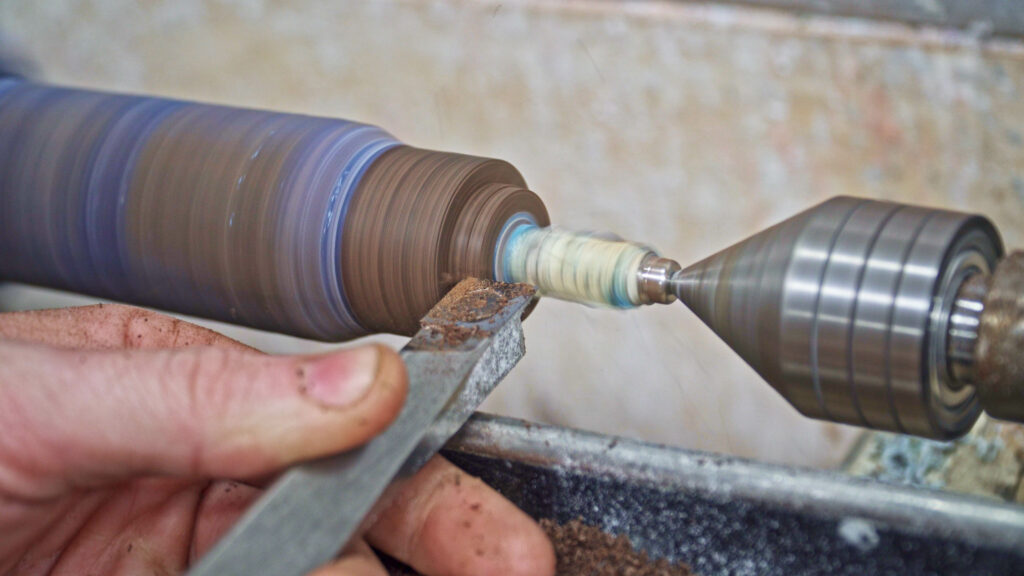
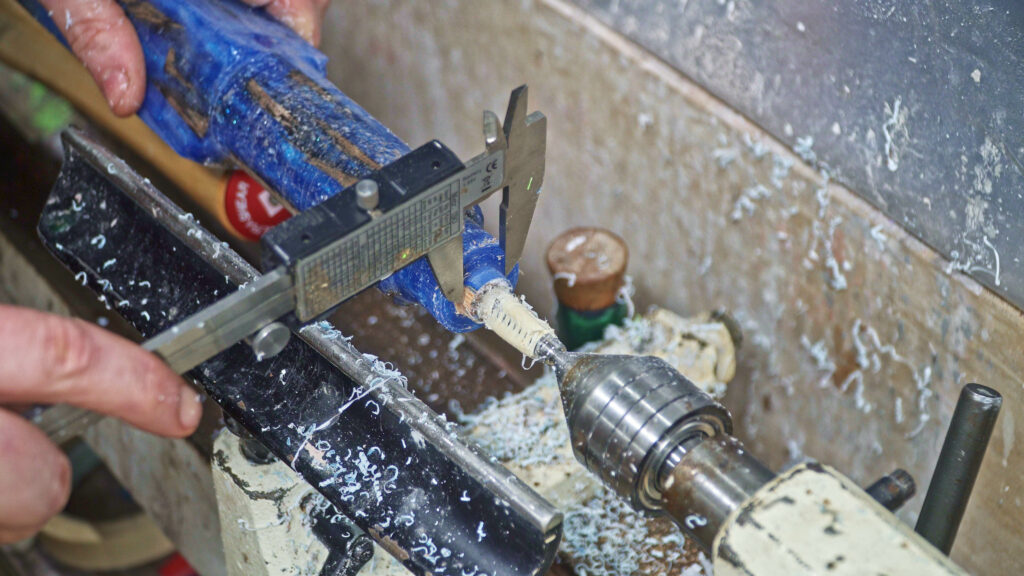
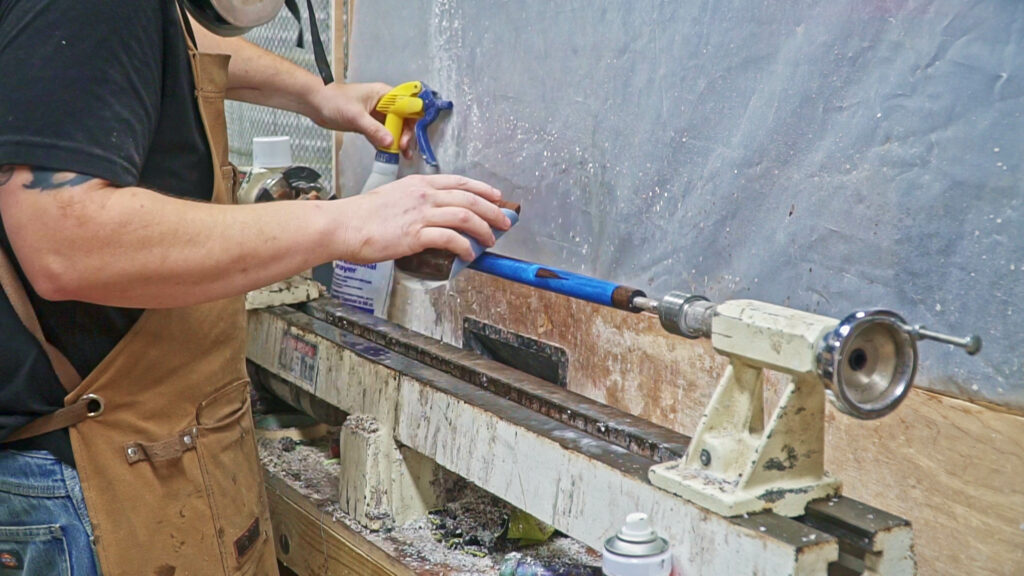
After epoxying the joint collar into place I could then cut off the edges with an oscillating saw making it easier to turn at the Joint collar to a round cylindrical shape. Then I was able to turn the joint collar down to the proper size at the joint end of the cue.
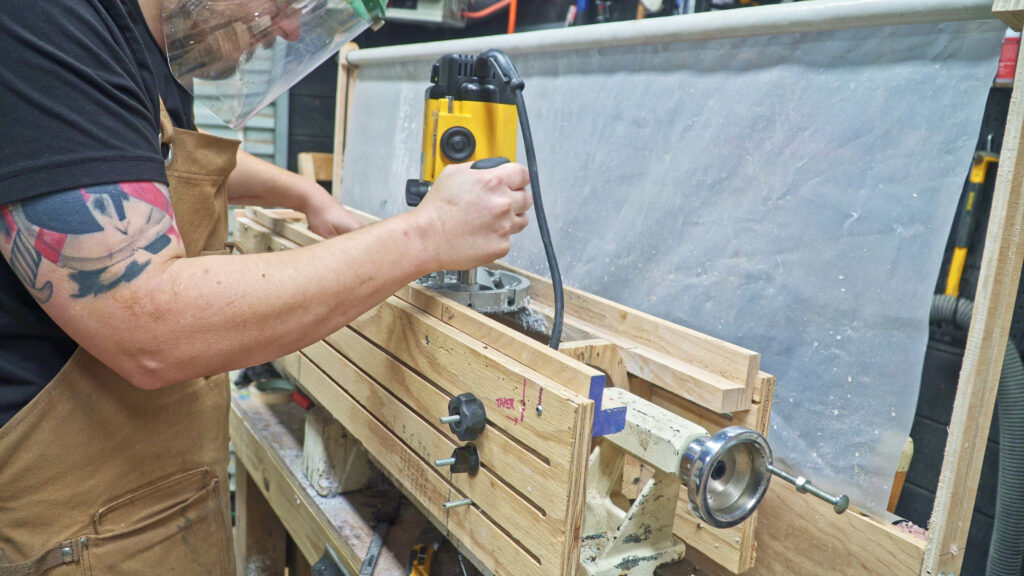
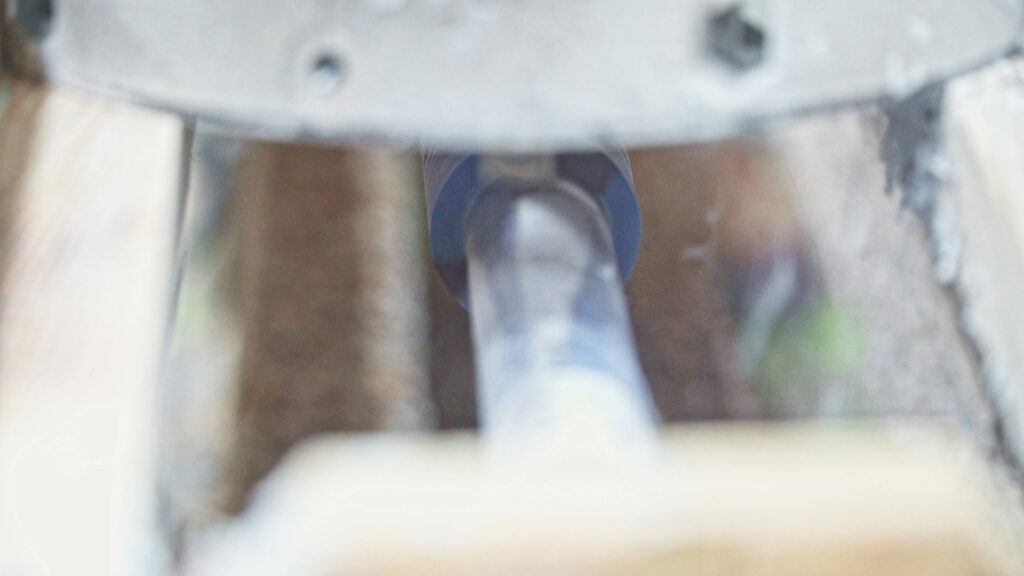
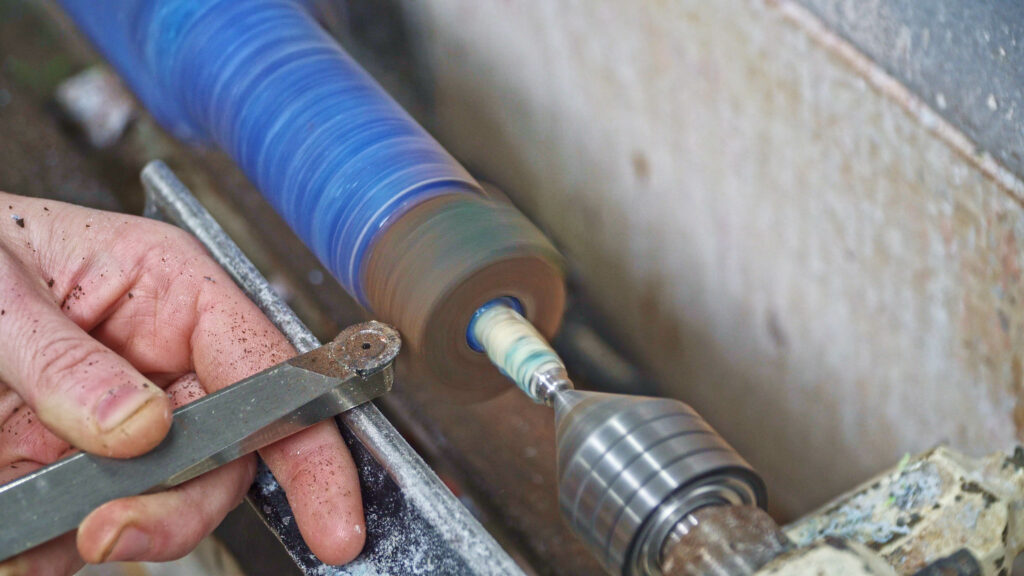
With the joint collar at the proper diameter, I could then move on to using the router jig or tapering jig to cut in the taper. I do want to note that the diameter of the joint section is also slightly oversized this will allow for a proper fit-up and fine-tuning of the joint section during the sanding and finishing process. If you will notice in the video that the lathe is not on rather, I am turning the blank by hand while cutting in the taper with the router and taper jig. The reason for this is the lower rpm speed of the cue spinning allows for a much cleaner cut with the router. The jig also ensures there is a uniform taper on the cue.
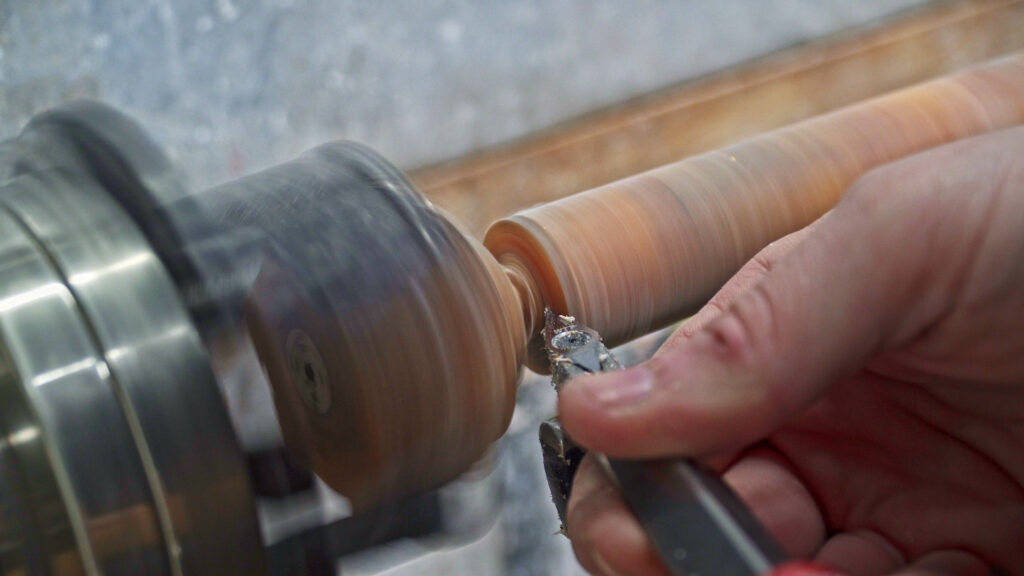
The taper is now cut properly on the cue and the next step is to form the bottom of the cue. This is where you not only shape the bottom of the cue but also set the length. Of the butt section of the cue. Also making sure that this is properly cut and shaped will affect how the rubber bumper is installed on the bottom of the cue.
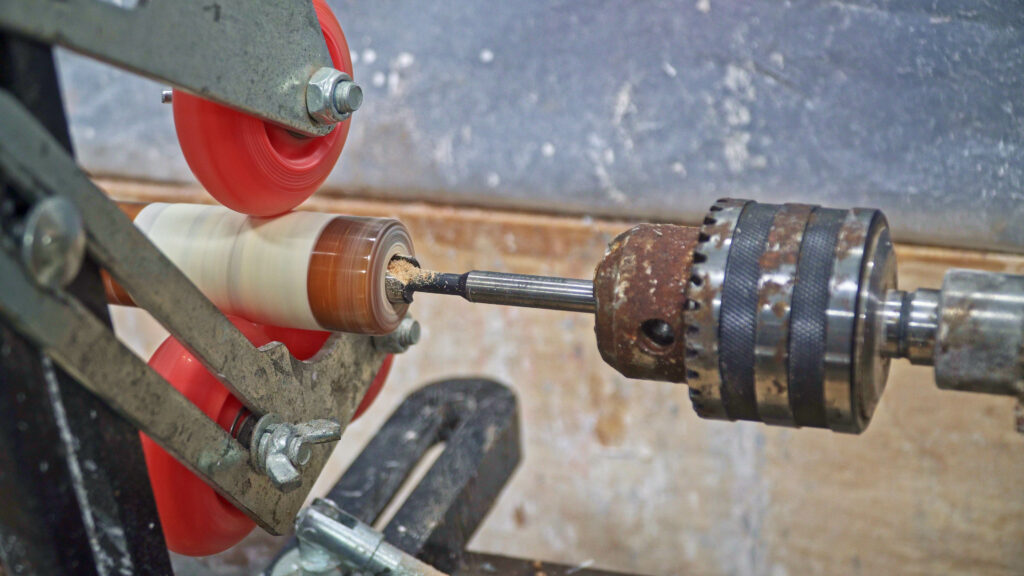
Now it’s time to finish the cue. Initial sanding making sure to remove any traces of the router cutting. Followed by using Starbond CA with multiple finishing coats to seal the cue. I will apply between 3 and 5 layers and then wet sand with medium-grit sandpaper. This smooths out the first layers allowing for the next layers to lay extremely smooth followed by finish sanding and polishing of the glossy finish.
The final step was to drill the hole into the bottom of the cue that will allow for placement of the weight bolt into the cue as well as the rubber bumper on the bottom. This piece is extremely important to keep the bottom of the cue from being slammed onto the floor and it chipping or cracking the end of the cue.
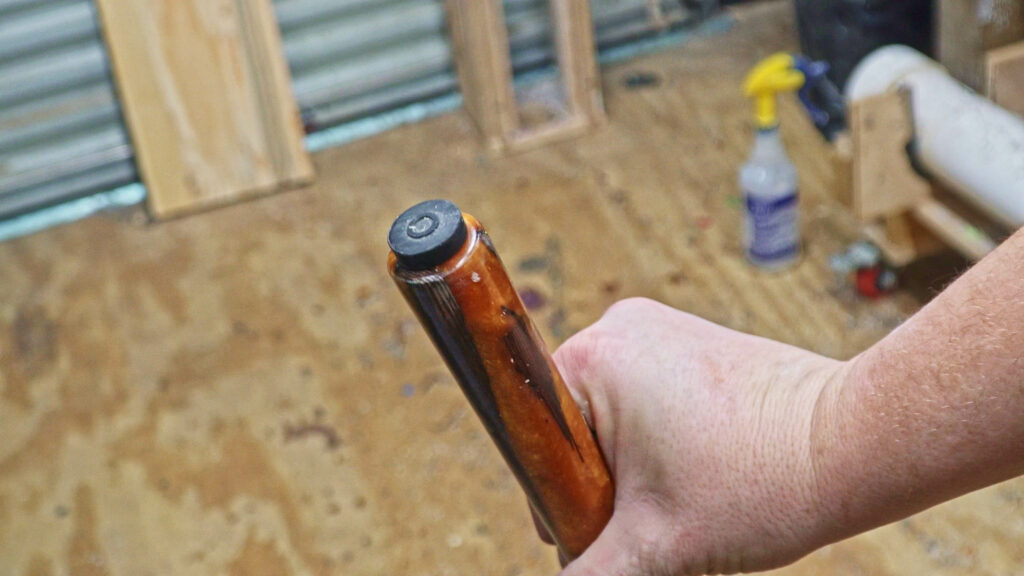
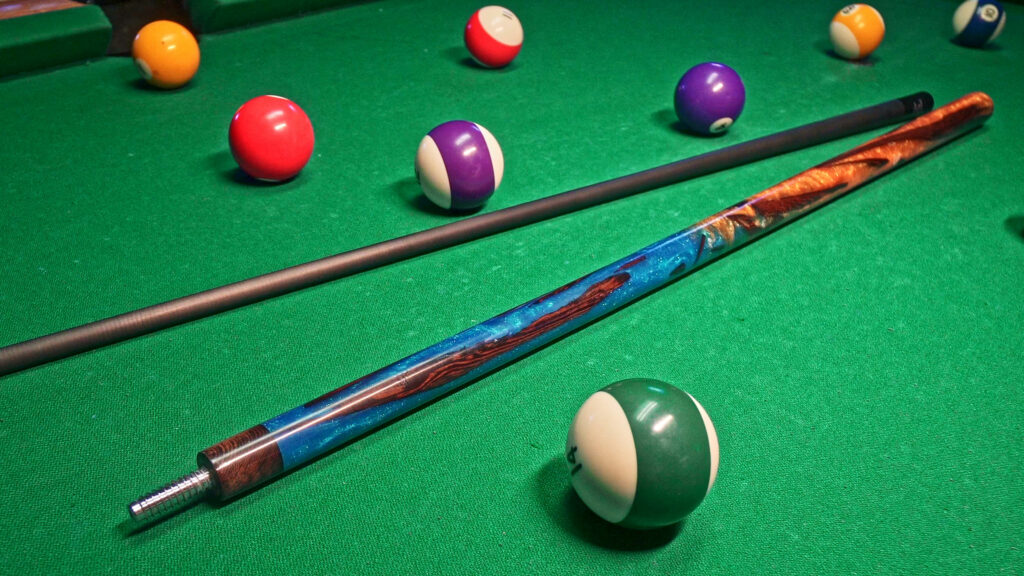
I have to admit this is one of my favorite cues not only that I have ever made but that I have ever shot with. It shoots amazing and looks great. The colors are insane and they blow me away as I look at them. I really like unique and one-off cues and that is in my opinion is the best part of this process.
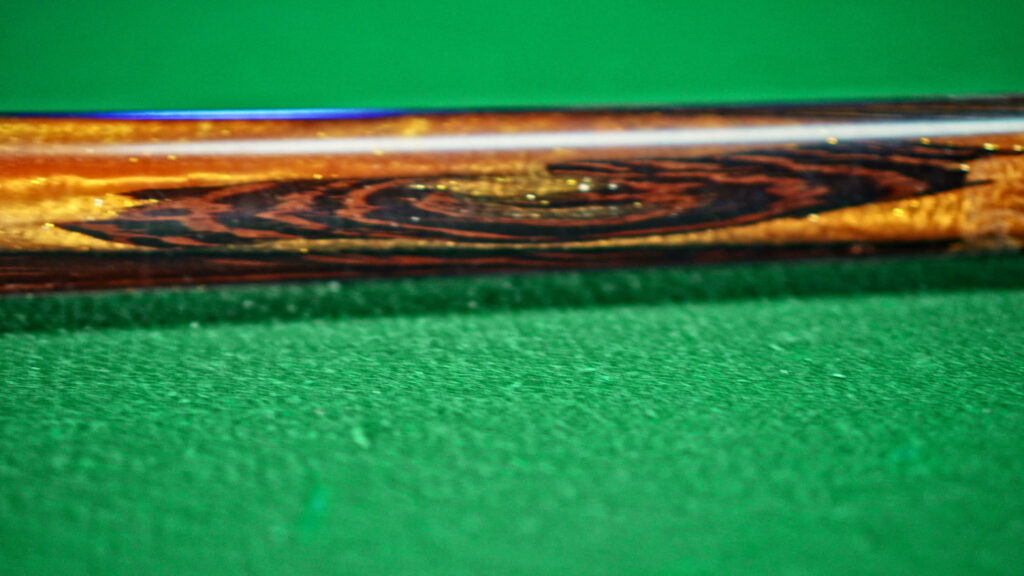
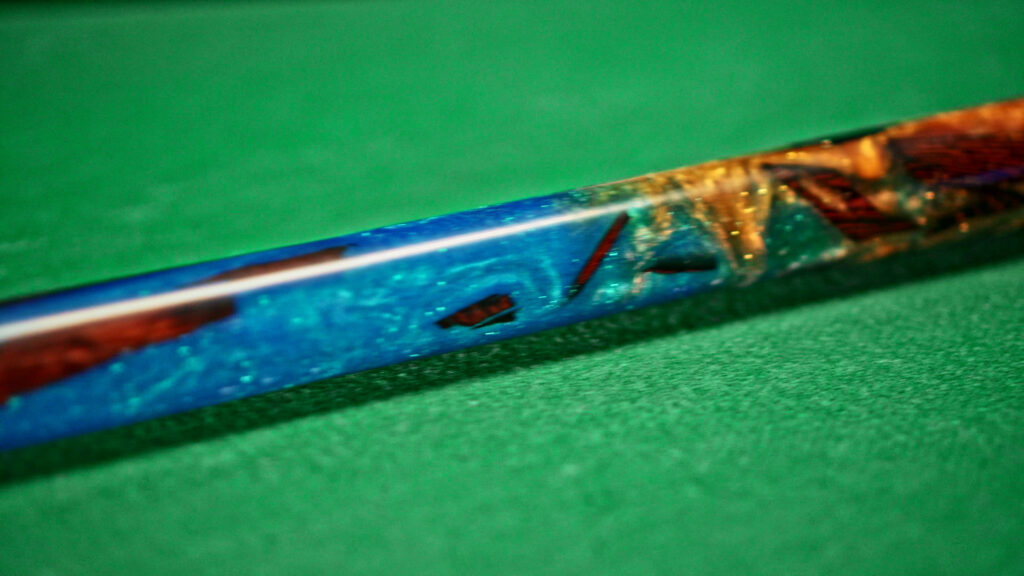
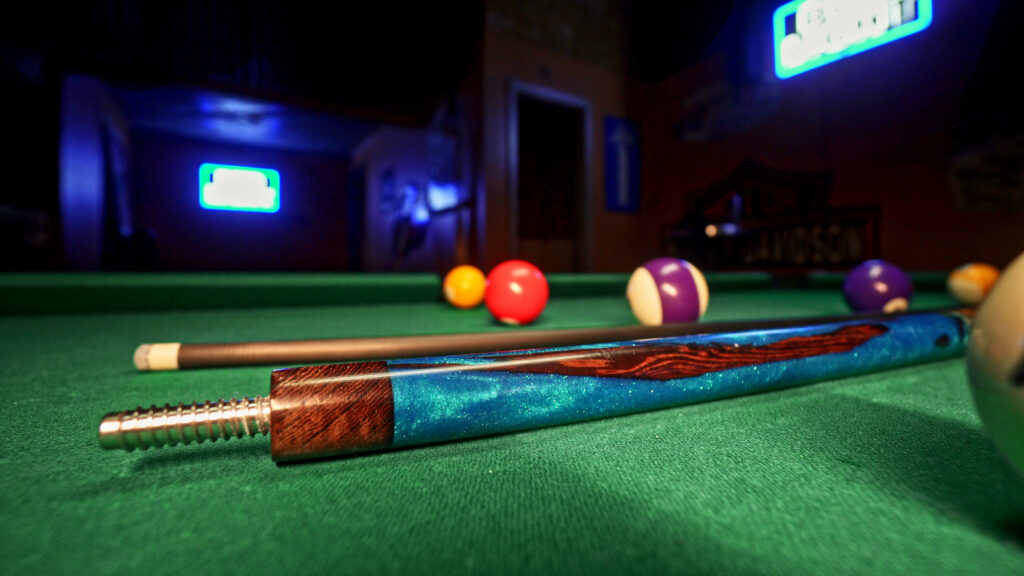
No matter how many cues I were to make exactly like this with the same colors none would be exactly the same. Where the gold and blue come together they remind me of a nebula in space. The wenge wood adds an amazing contrast to the bright colors that are on the cue as well not only with just the colors of the wood but the gain contrast between a very dark brown and almost black.
Thank you guys for making it this far and for all of your support. Make sure you subscribe on Youtube and follow @jpaynewoodworking on Instagram for more photos and videos. Also, you can subscribe to the jpaynewoodworking.com newsletter to get updates when videos, articles, and products are released. If you want to show your support check out the SHOP it really helps to keep the content moving and going as well as you end up with some cool merch. Thanks again and I will see you on the next one!