 JPayne Woodworking Creative Craftsmanship
You ever get out into the shop and look around and think to yourself I wonder if this crazy idea I have will work? I seem to do that alot. I look at a simple project and think to myself I wonder if I can try a new process or material in a way not used before and see if it will work.
This is the process used when I thought about the project below. After recently helping a family member do some wiring I wondered to myself if there was a way to incorporate some of the copper wire into a project. I was also curious how difficult it would be to turn on the lathe. So with that in mind I decided to try to make a pen using the copper wire and decided to throw in some aluminum foil just to see what would happen.
The first step was to assemble the first of the materials I would need so I would be using some large gauge wire and also simple aluminum foil. I would also be using a piece of 1 inch pvc pipe a mold for the epoxy and also a ¼ inch wood dowel.

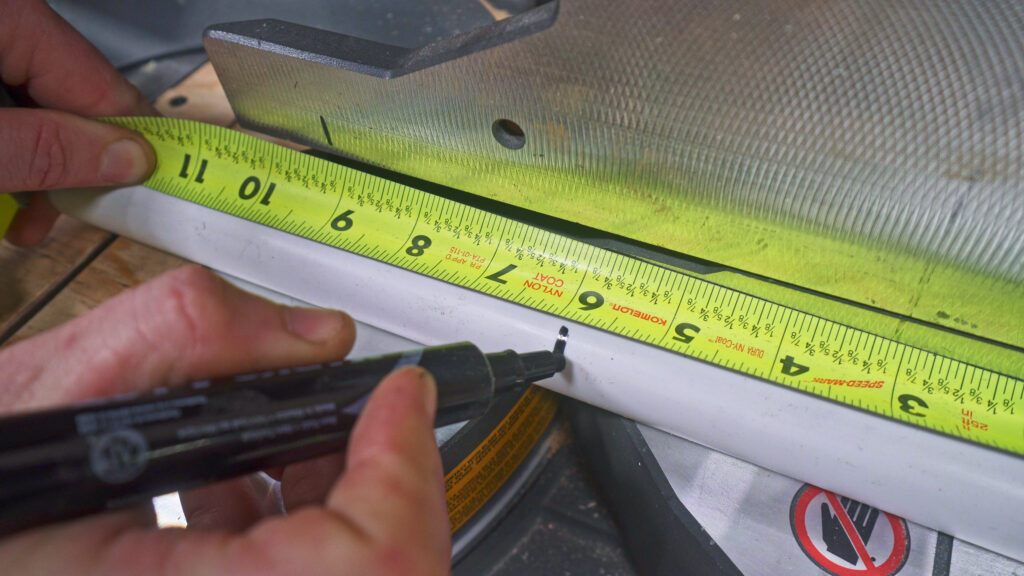
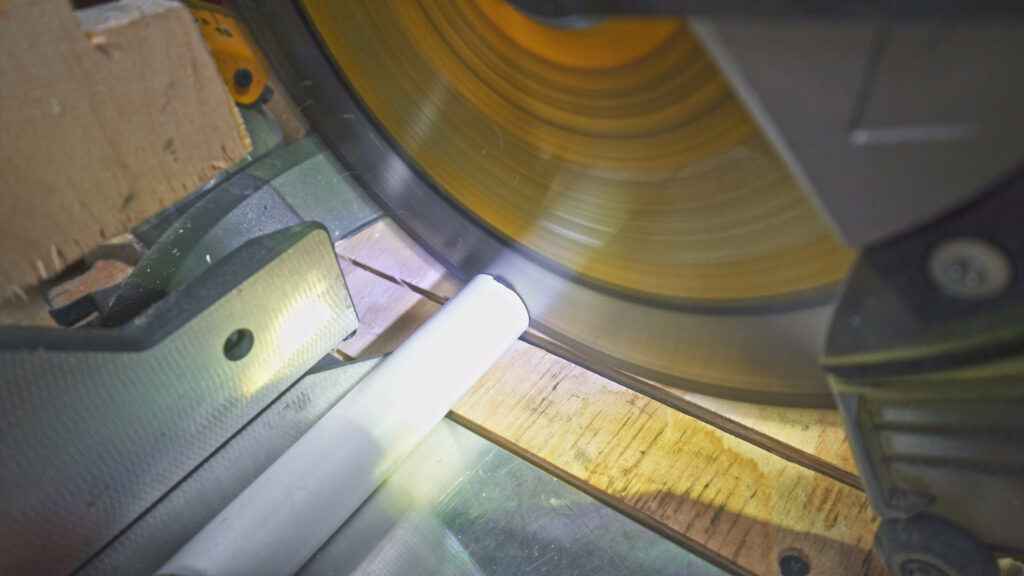
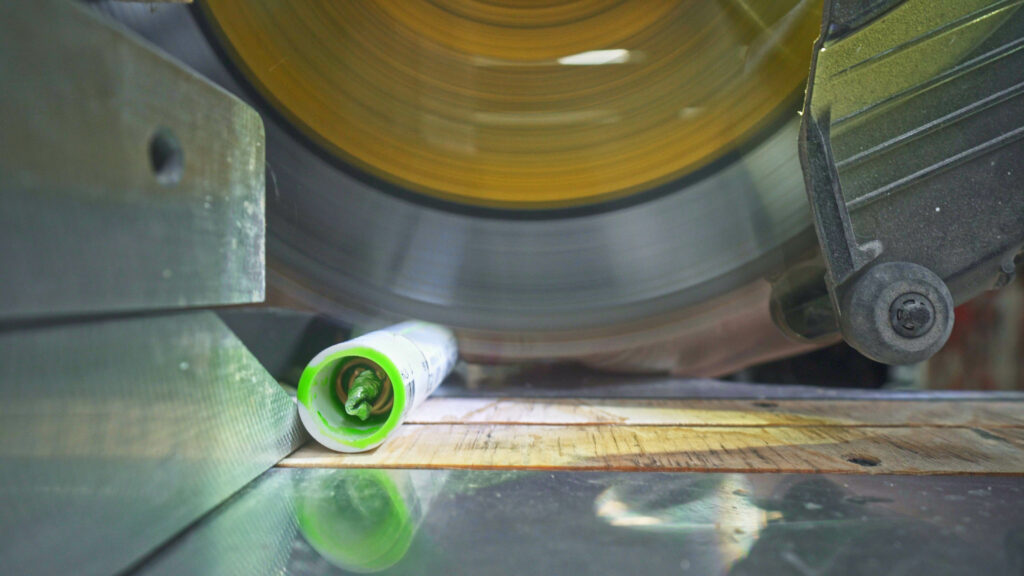
The first step was to cut the pvc pipe and wire to length. I went with a 6 inch length to ensure that there would be plenty of material for the pen barrel. I then used the Miter saw to cut both th pvc and wire to length.
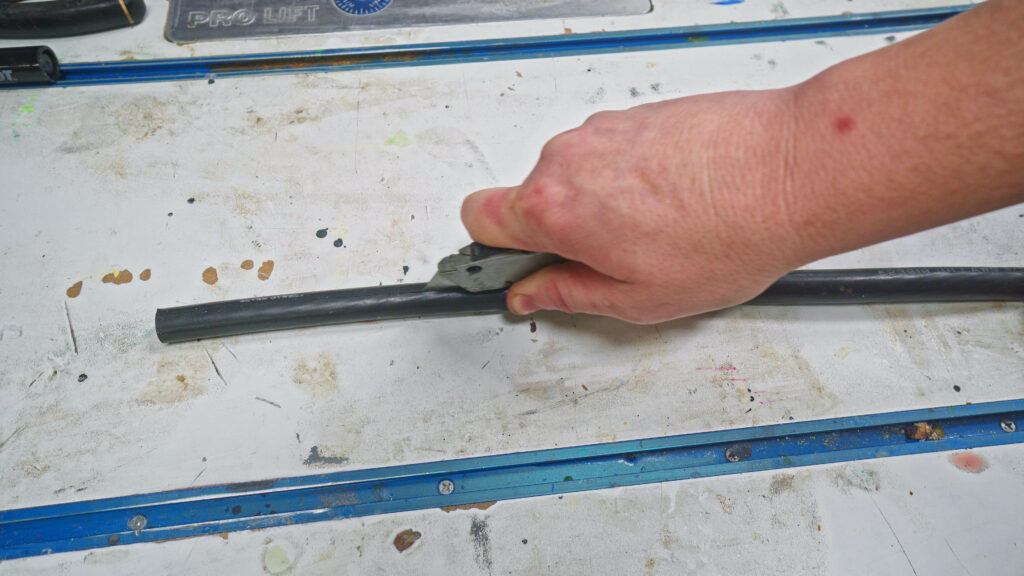
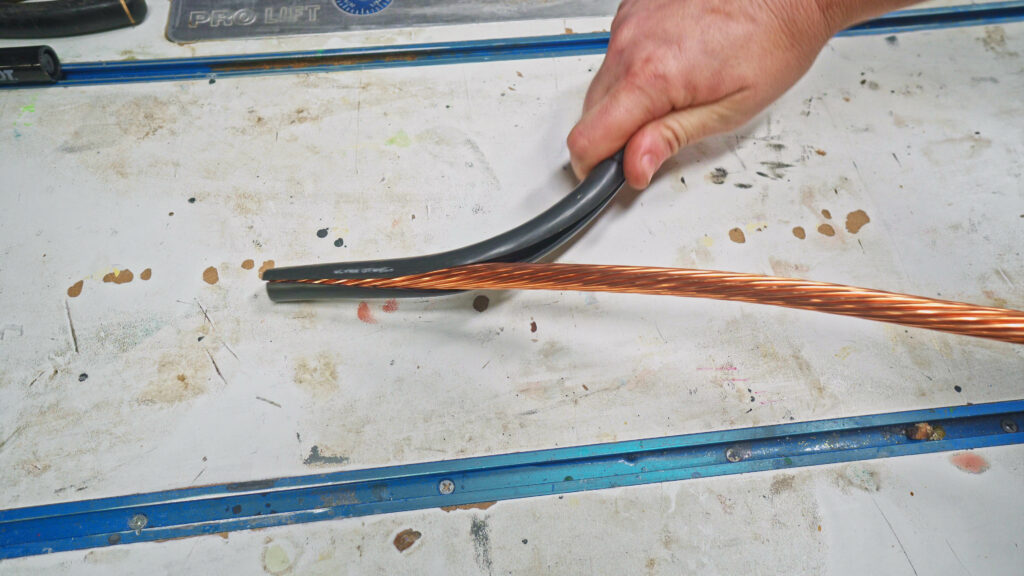
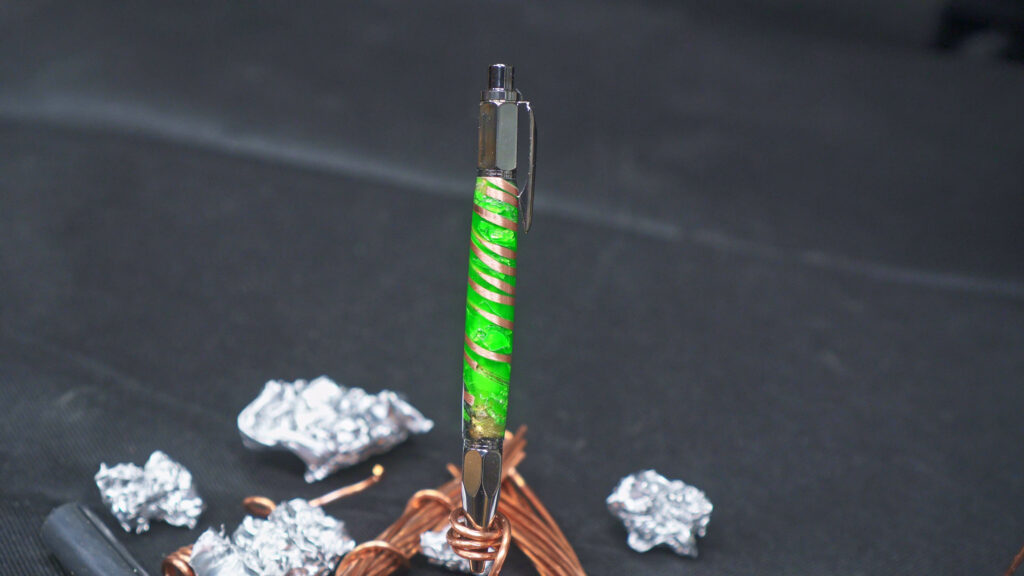
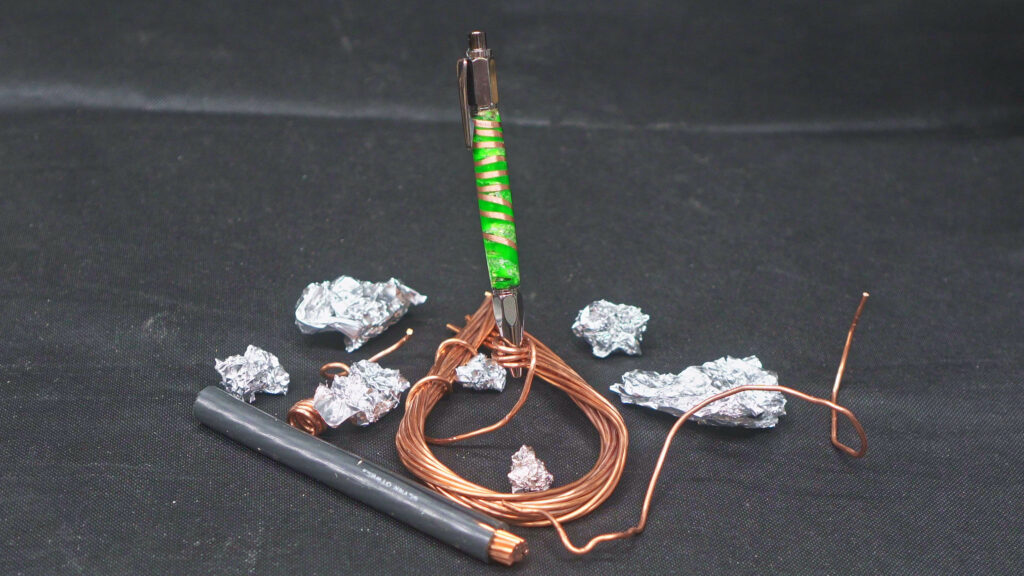
I then needed to strip the rubber insulation off of the wire. This is made really simple by using a razor blade or box cutter to cut a single slit down one side of the wire. This will allow you to pull the rubber insulation off to the copper core of the wire. The wire I used is a large wire with multiple small solid copper wires.
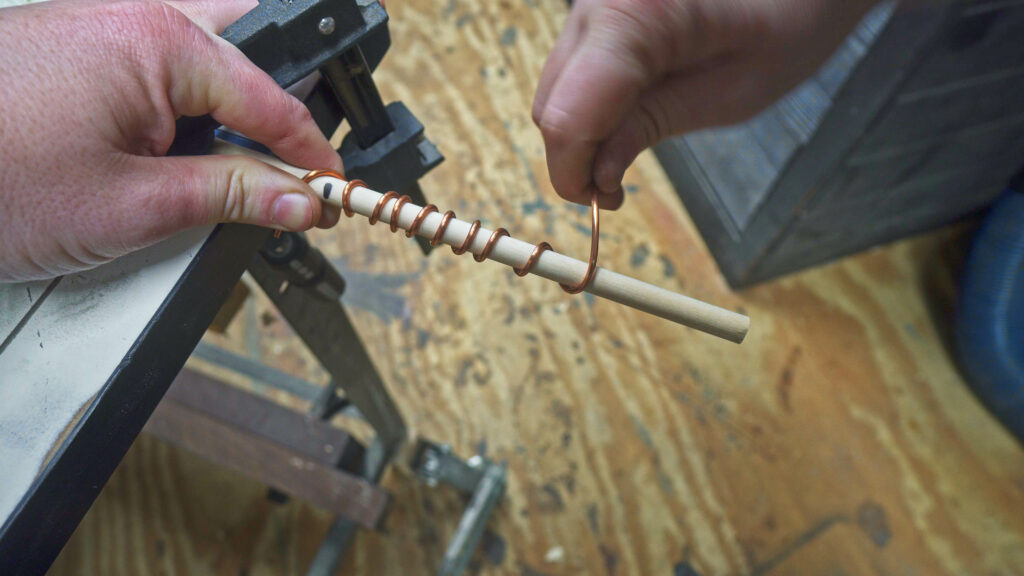
I use a couple of single copper strands to wrap around the ¼ inch wooden dowel; this would be a good size to leave a section down the middle of the wire coil to drill and place the pen barrel. I did learn from this process that it would likely be best to tightly wrap the coil. At this time i did not think it would matter but I believe it would have been a bit more of a dynamic pattern if there would have been more coils of the wire.
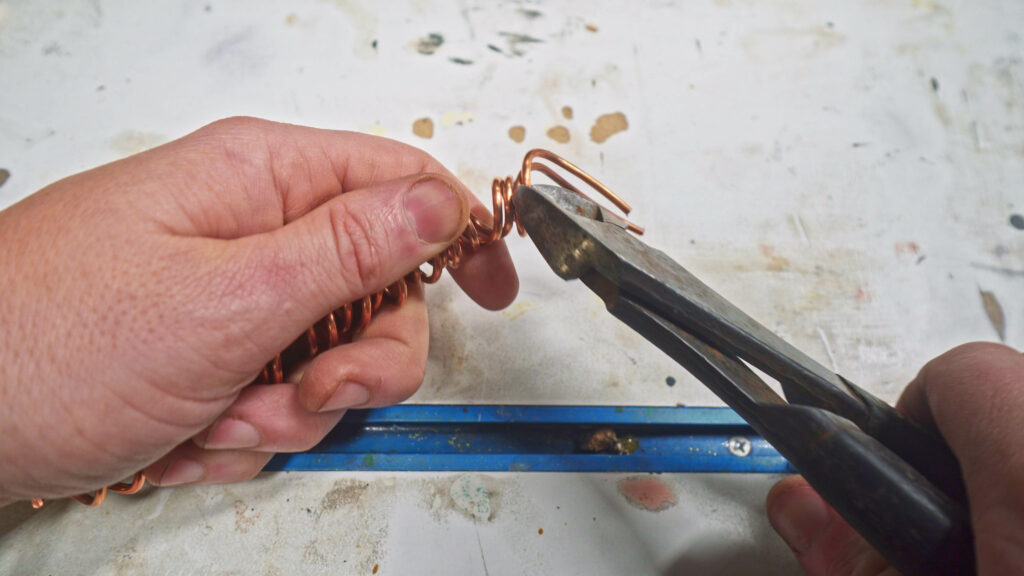
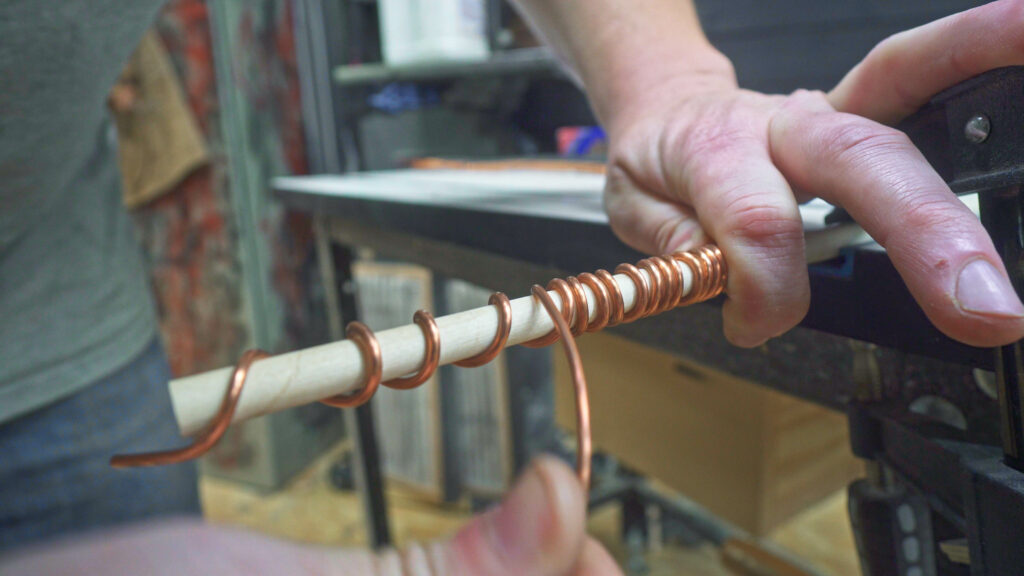
Once the coils were wrapped around the dowel I then removed them trying to not allow them to shift too much as I wanted the centers of the coils to stay as straight a poissable. I then trimmed down the ends of the copper wire to ensure that the coils would fit properly into the mold for the epoxy.
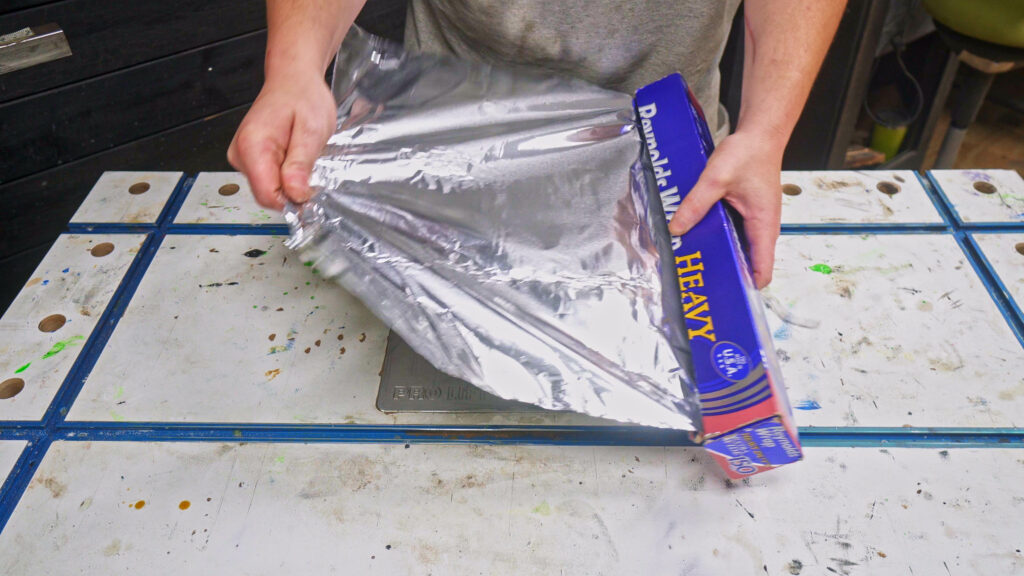
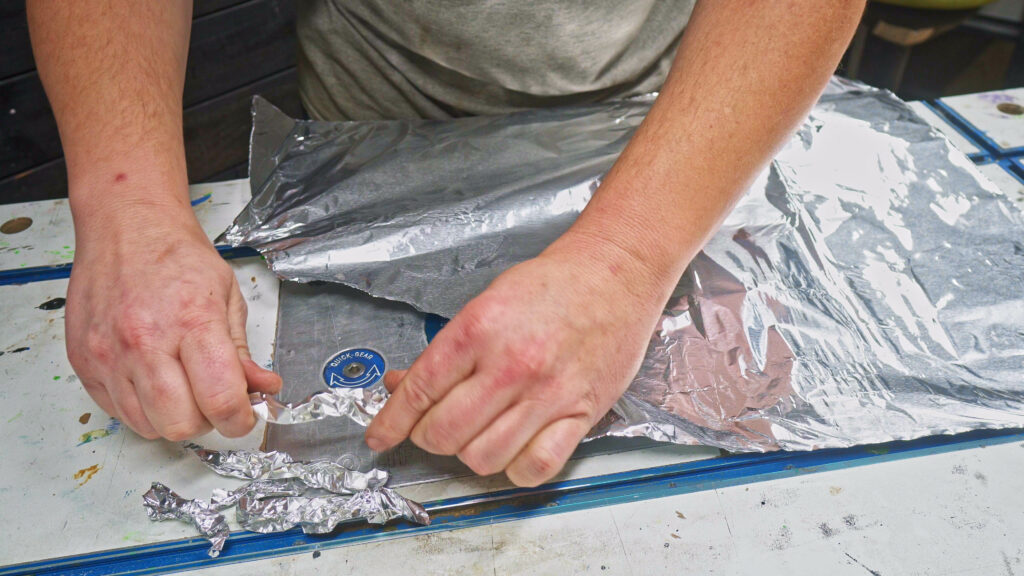
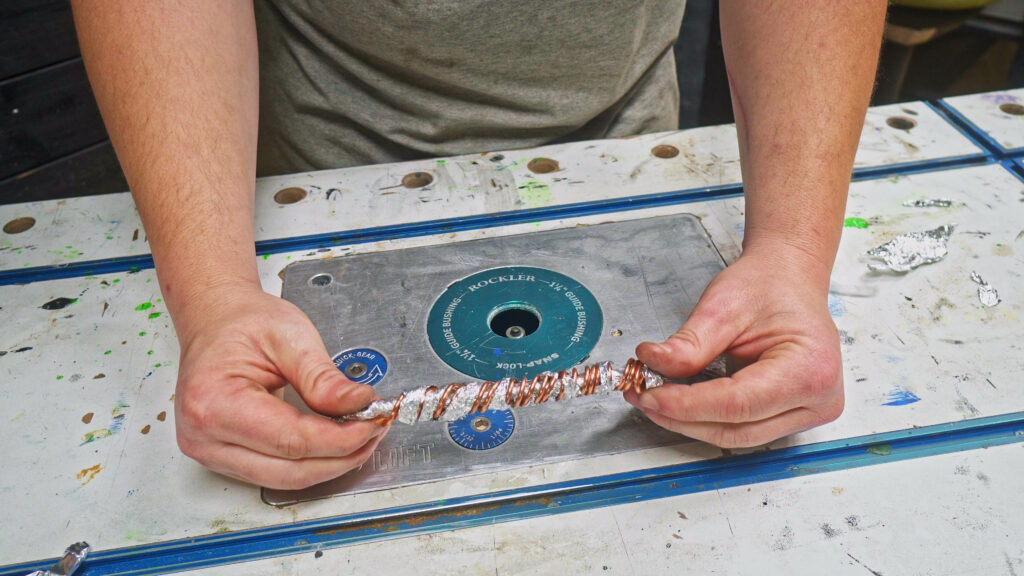
For the aluminum foil I flattened out a larger piece to make sure there was plenty of material and then coiled the foil onto itself. These pieces I then placed inside the copper coils with one larder piece through the center to ensure the copper coils did not move from center and then placed some of the other pieces between the coils of the copper. I was hoping this would just add a cool look to the finished product.
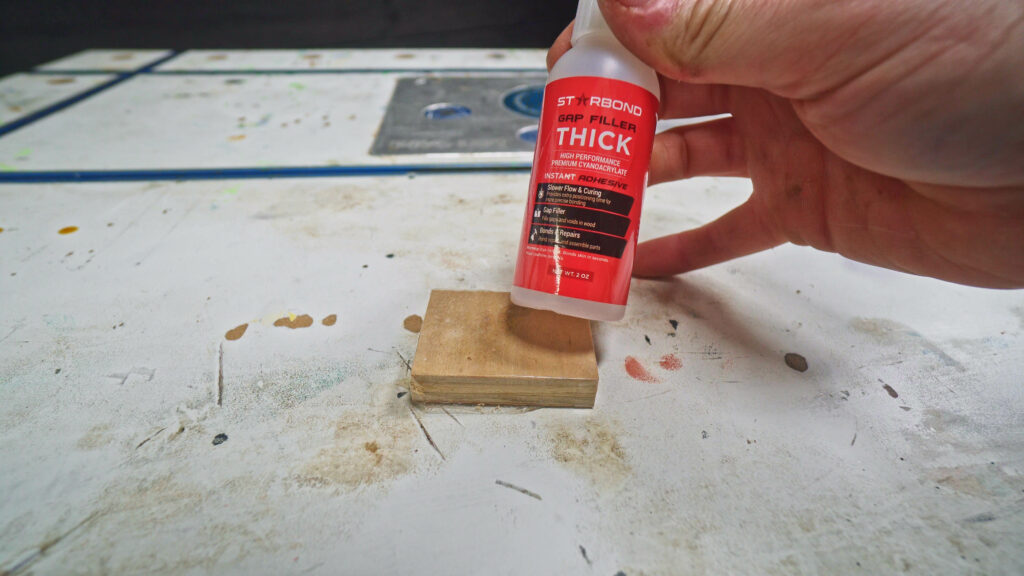
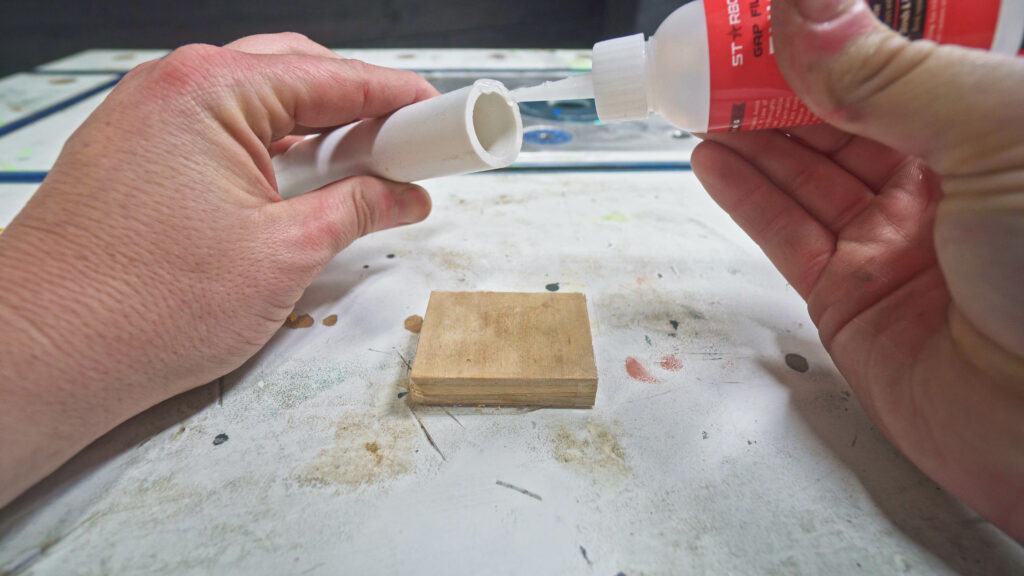
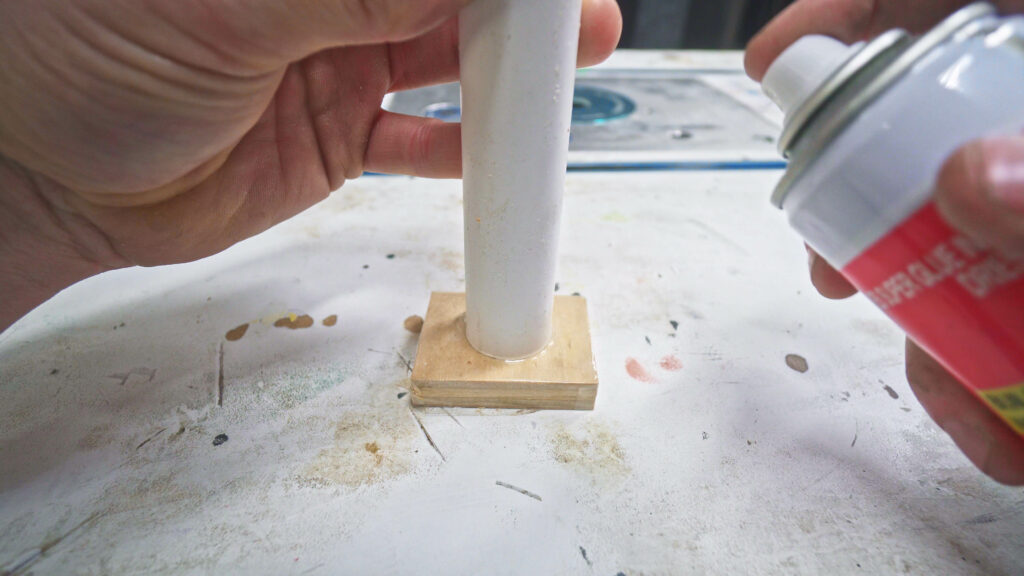
To make the mold I covered a small flat piece of wood with packing tape to ensure that the epoxy would not adhere to it and then used some Starbond CA Glue to hold the pvc tube in place. As well as a bit more around the seam to ensure that it would not leak.
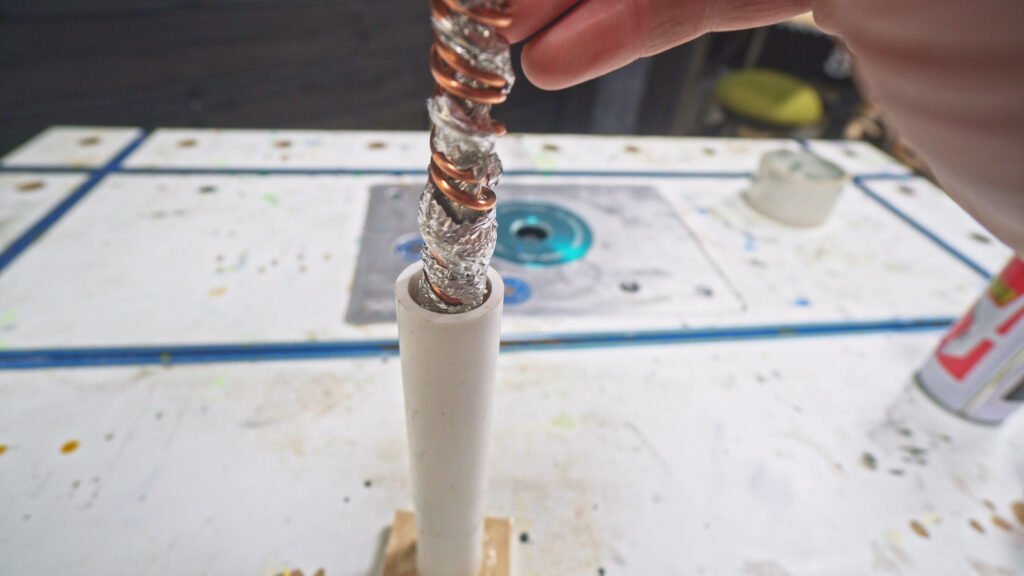
I then placed the copper and aluminum core into the mold. I made sure that the core was short enough to fit entirely into the mold with a little room left at the top to allow me to completely fill the mold with epoxy. Once in the pressure chamber the epoxy level will go down as the pressure forces the epoxy into all the small crevices in the core.
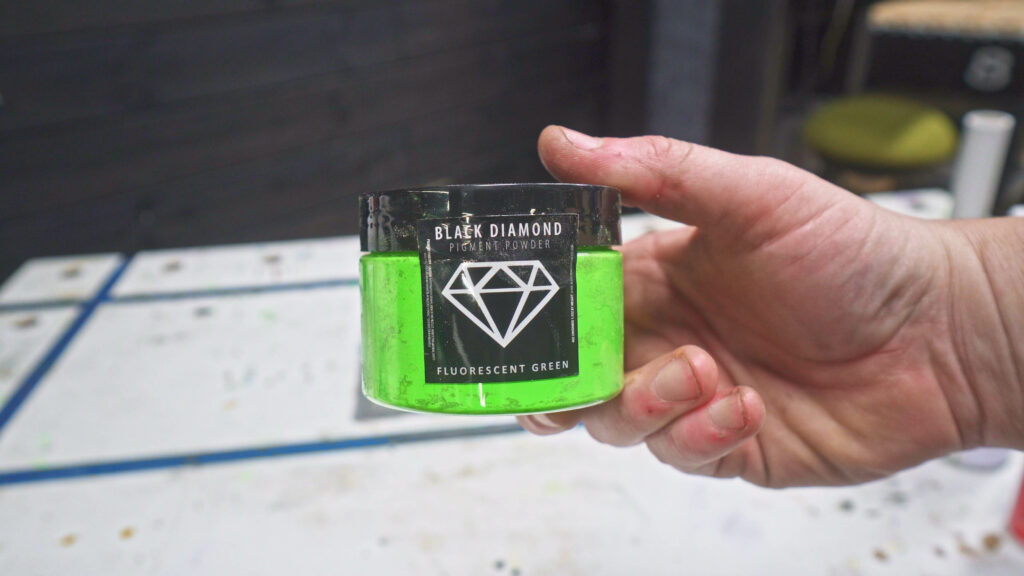
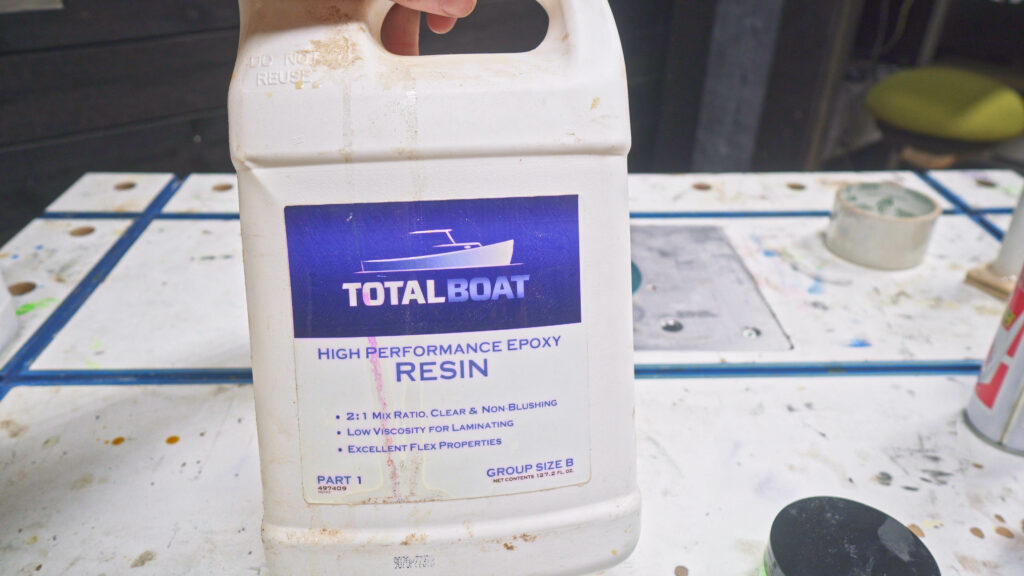
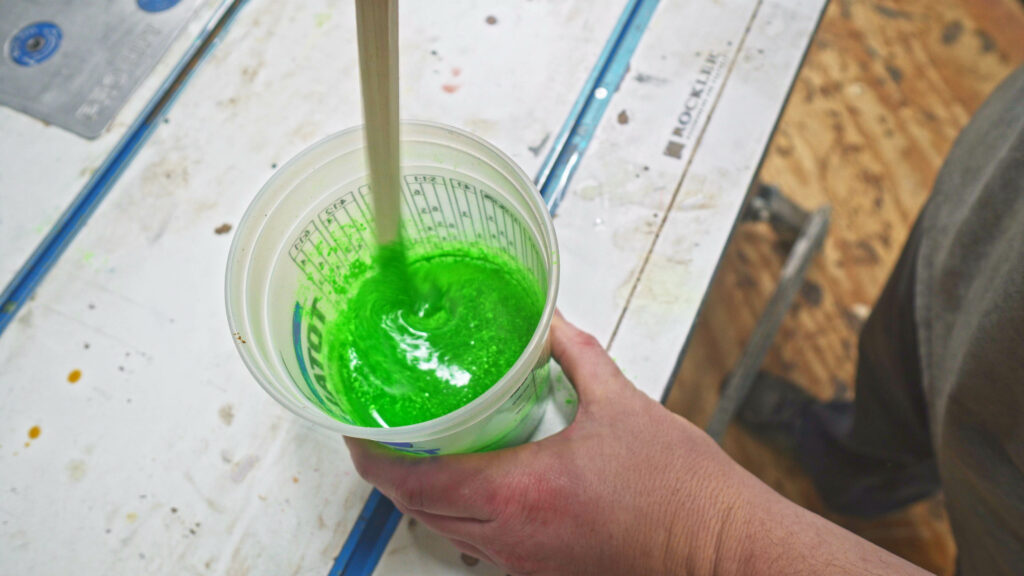
I am using Black Diamond Pigments for the color and decided I wanted a rally bright color so I went with a very bright green. Make sure to click their name here in the article and check them out they have a ton of amazing colors and you will definitely not regret going with them for all of your epoxy pigments. I was hoping this would add a lot of contrast to the colors with the aluminum and copper. With the color picked out I mixed up enough Total Boat Epoxy to fill the mold completely. I used their high performance epoxy for this application as it is a little thinner viscosity and will help to penetrate all of the small openings inside the foil.
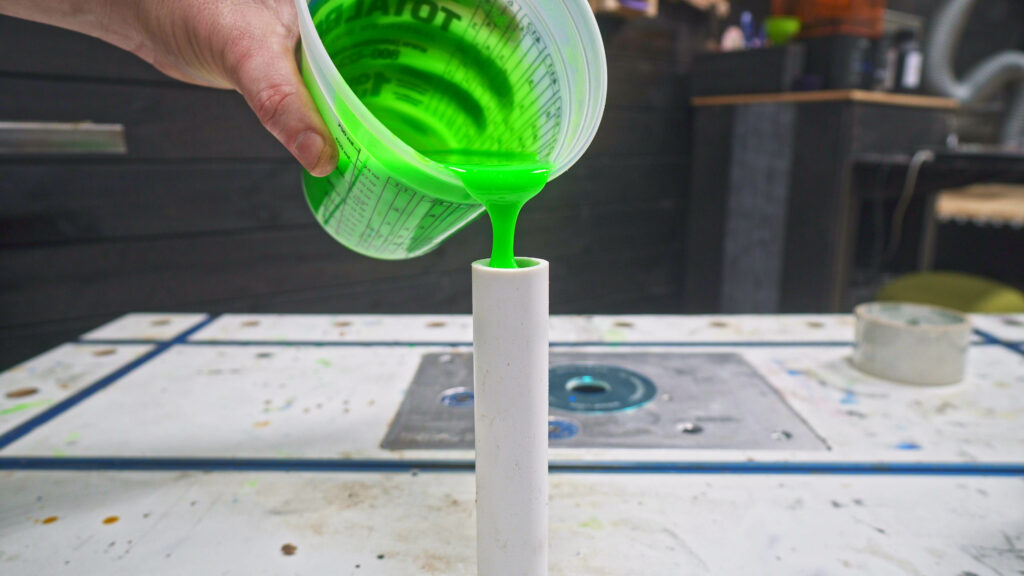
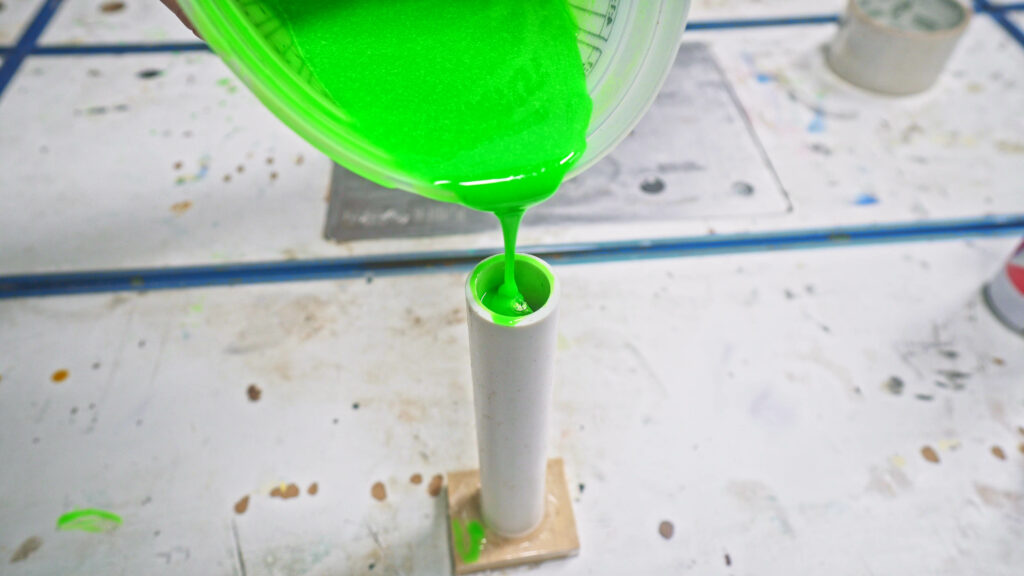
Filling the mold is straightforward just add until the mold is full. I did leave a space at the top of the mold for only epoxy; this is because it would be placed into a pressure chamber and due to how the pressure chamber works it will force the epoxy into the small openings inside the core. This will lower the level of the epoxy at the top of the mold. So I always try to leave a small space in each of my molds to add a small amount over what might be needed to fill the core to ensure all of the voids are filled while under pressure. I then allow the epoxy to fully cure before moving on.
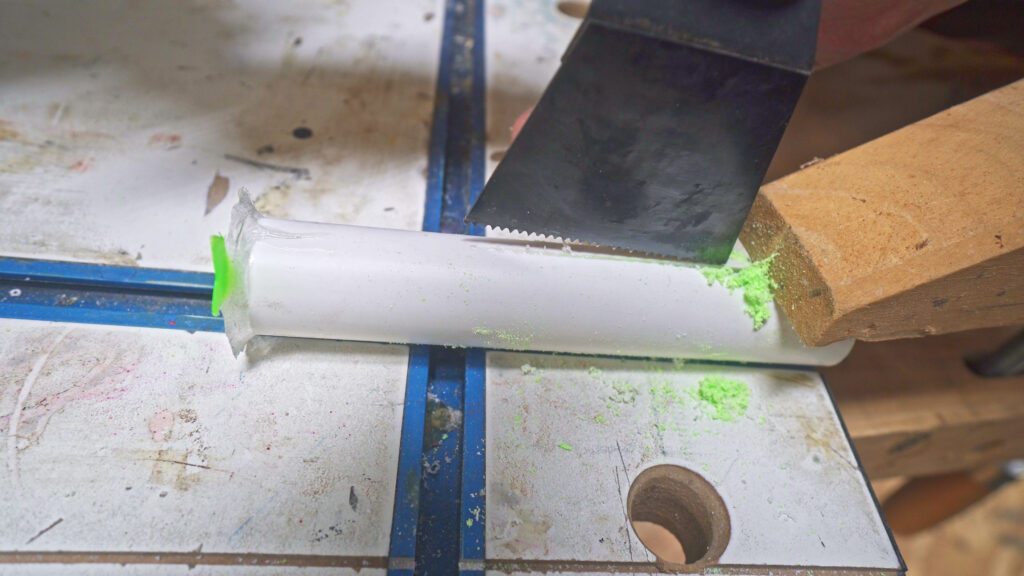
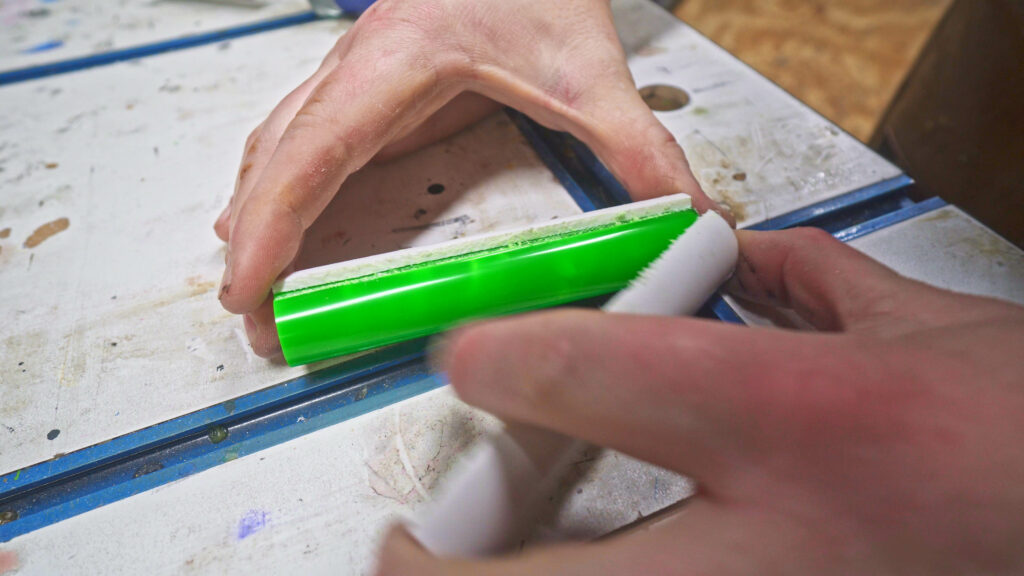
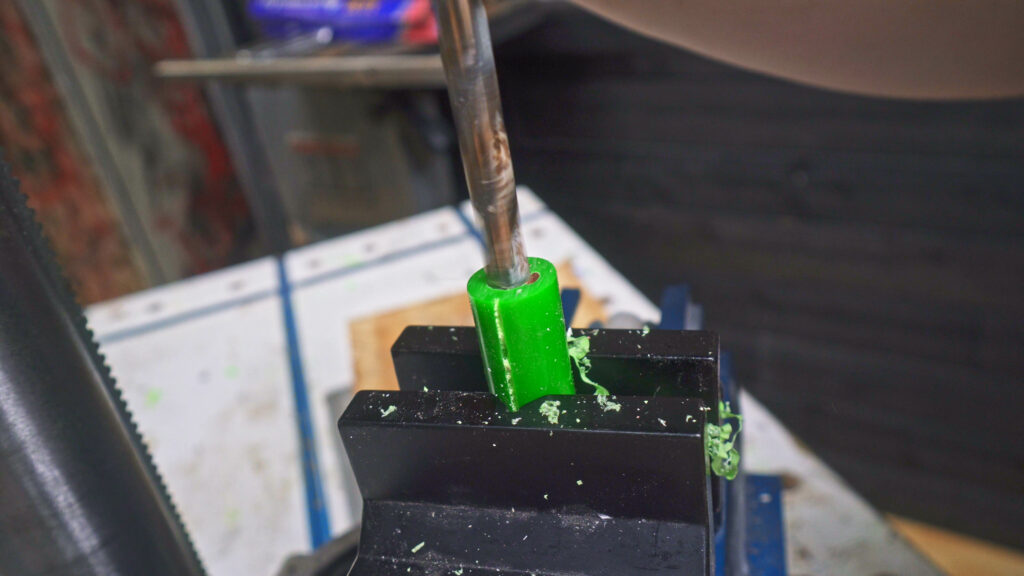
To remove the blank from the mold I use the Dewalt Oscillating Tool to cut a line down each side of the pvc mold. I then used the Miter saw to trim the end of the mold. I could then pull the epoxy out of the mold. The great part is that I can now also simply hot glue and seal the seam in the pvc and reuse the mold to get perfect round blanks.
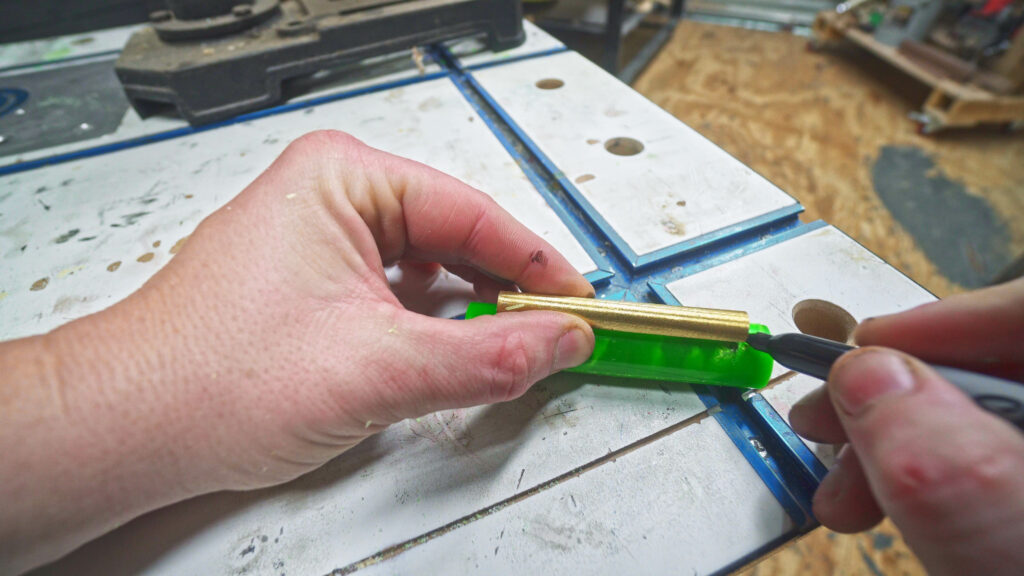
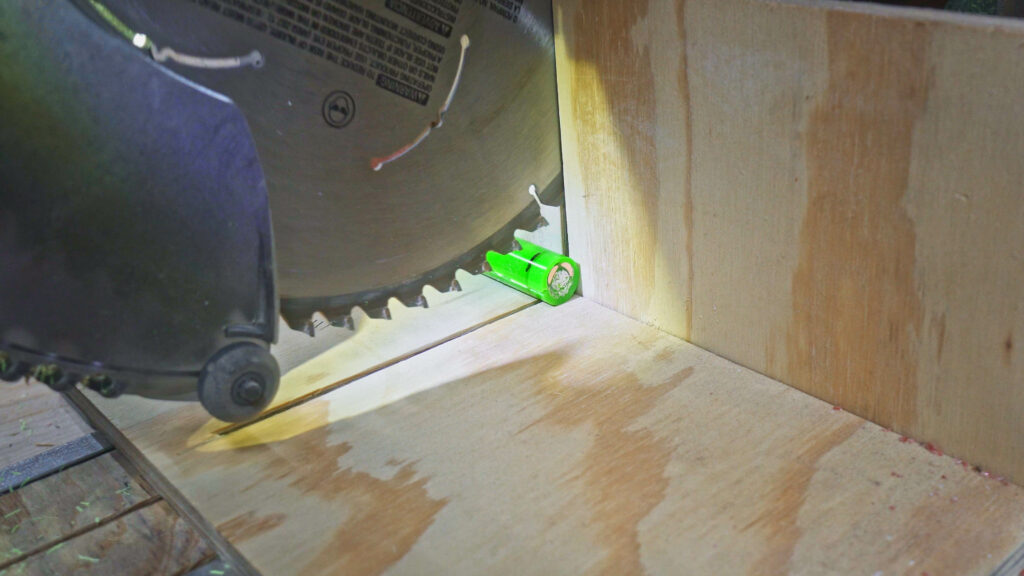
Next I need to trim the blank to length. I would be using a vertex click pen kit from Rockler Woodworking. I need to mark the length of the barrel of the pen so that the blank will be the proper length and allow me to drill the hole for the barrel.
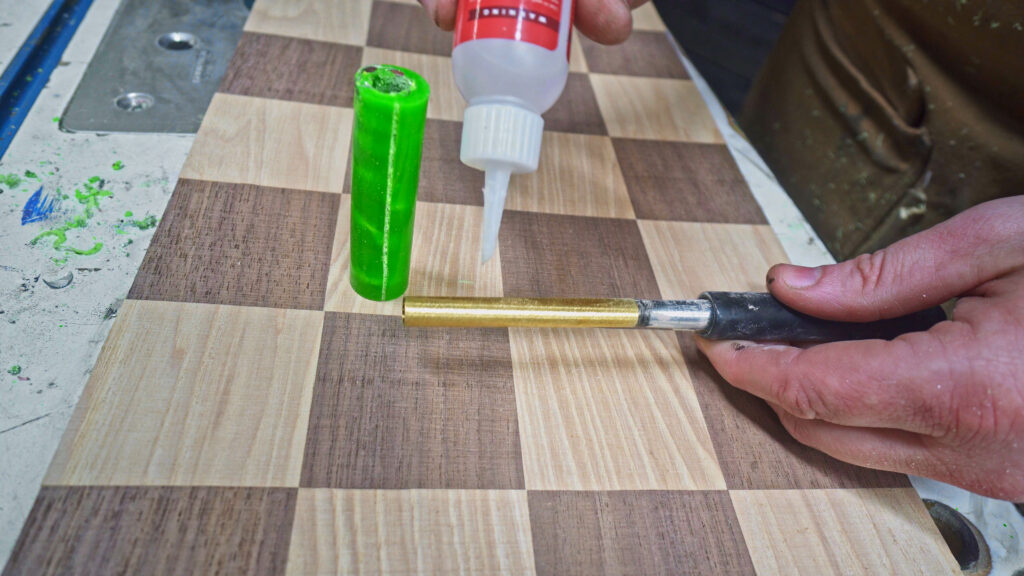
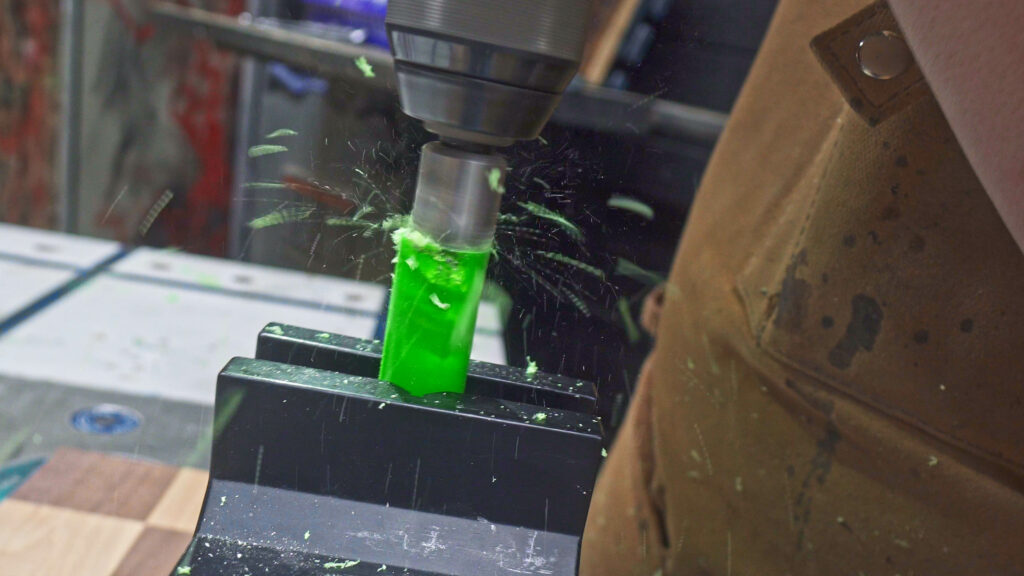
With the blank cut the proper length ( slightly oversized). I could then drill the hole for the pen barrel. This is done with the proper bit for the pen kit you are using. Check in the instructions of the kit you are using. I could then blue the barrel into place using Starbond CA Glue
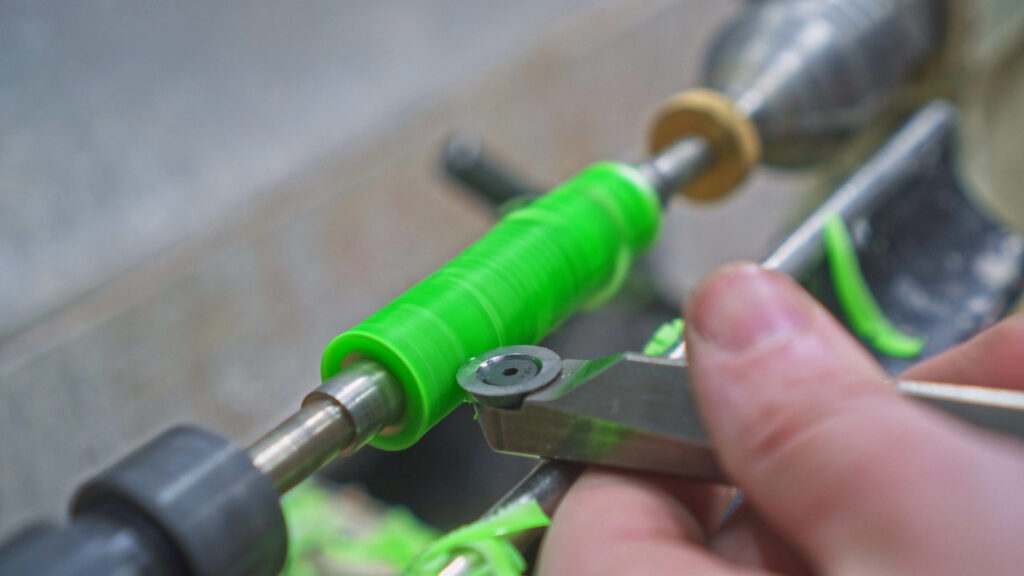
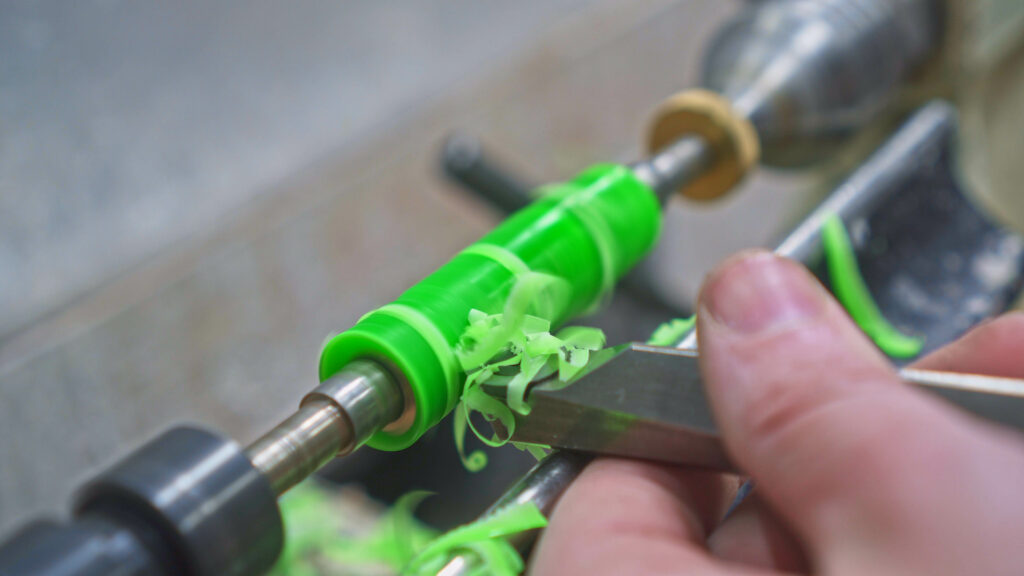
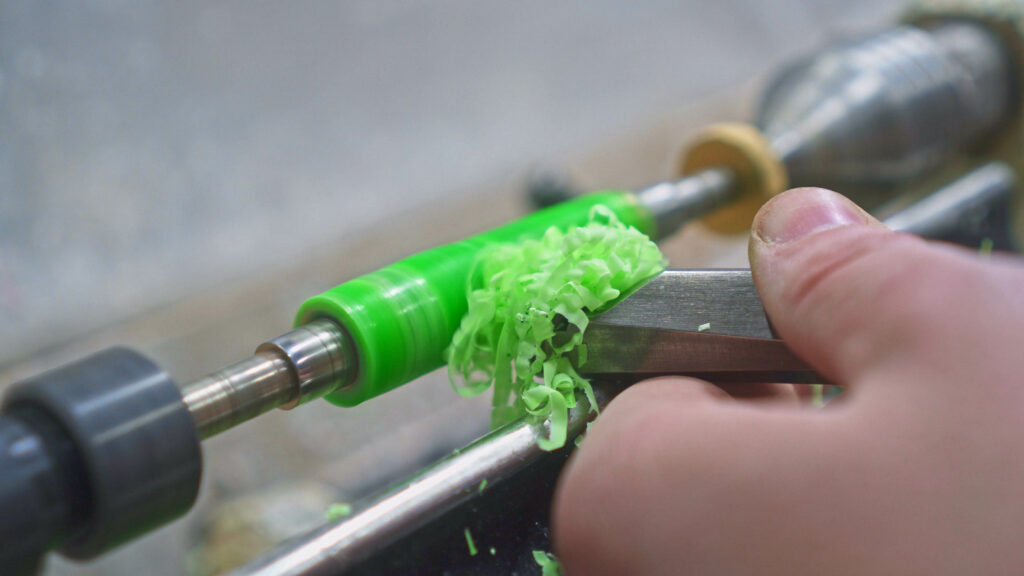
I can now move to the lathe and start turning to make sure to also use the proper bushings for the kit you are using for your pen. I did learn a lot while making this pen. One thing I had not thought about was that the coils of wire would want to come uncoiled while turning if it is grabbed by the cutting tool at any time. To help fix this issue and keep from shattering the blank I made extremely light cuts as well as cut one side of the blank to shape and then flipped the blank on the lathe to reverse the direction of the end of the wire to ensure they could not grab on the cutting tool. The toolsI am using are the Woodpeckers Lathe Tools. These carbide tools went through the wire with no issue at all and are still extremely sharp. I am very impressed with the tools.
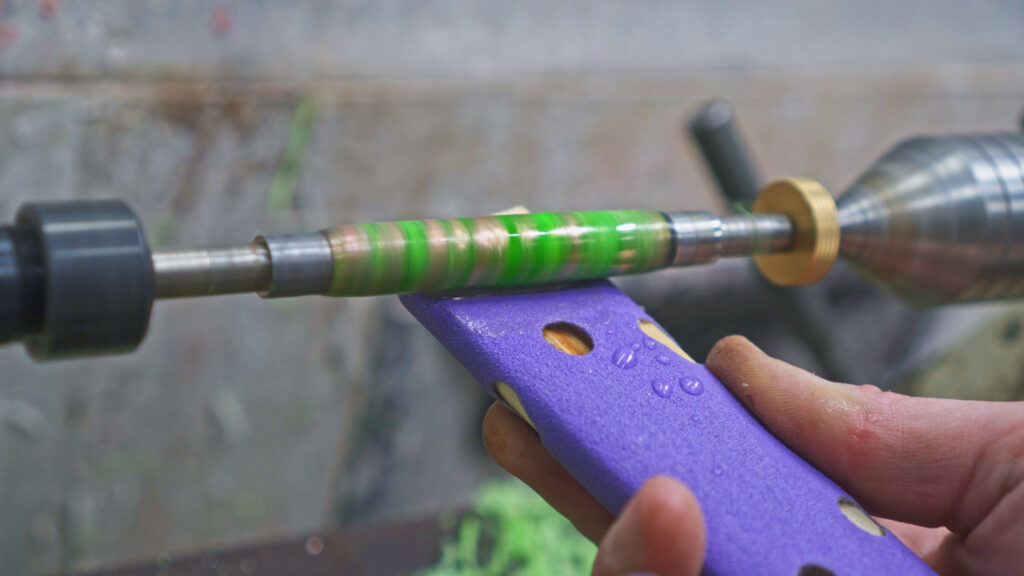
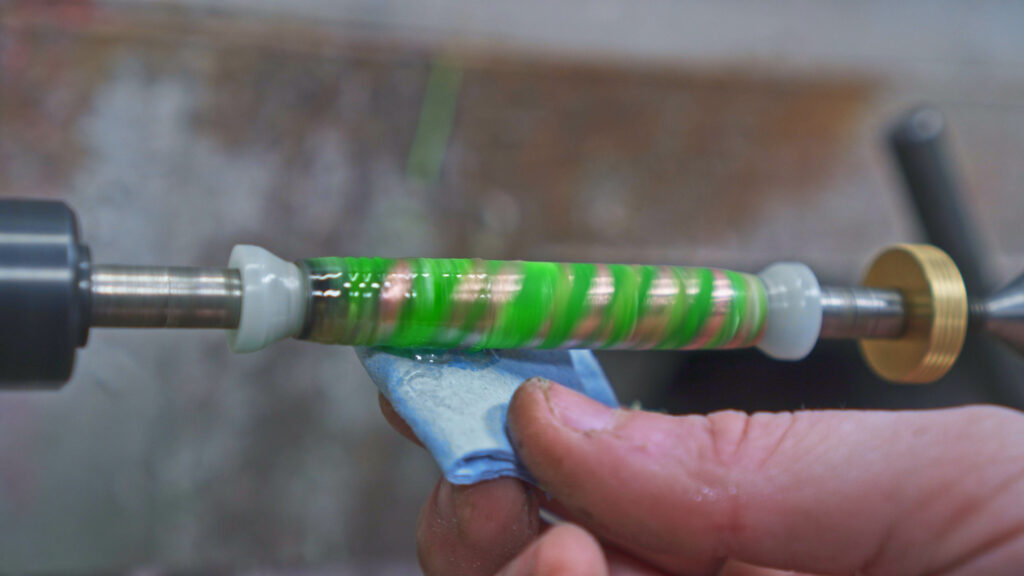
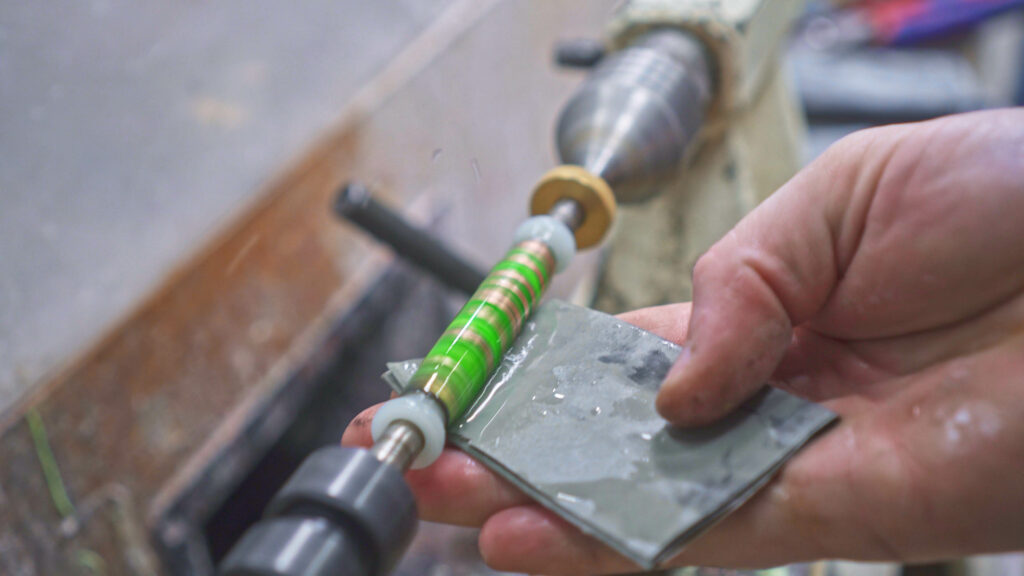
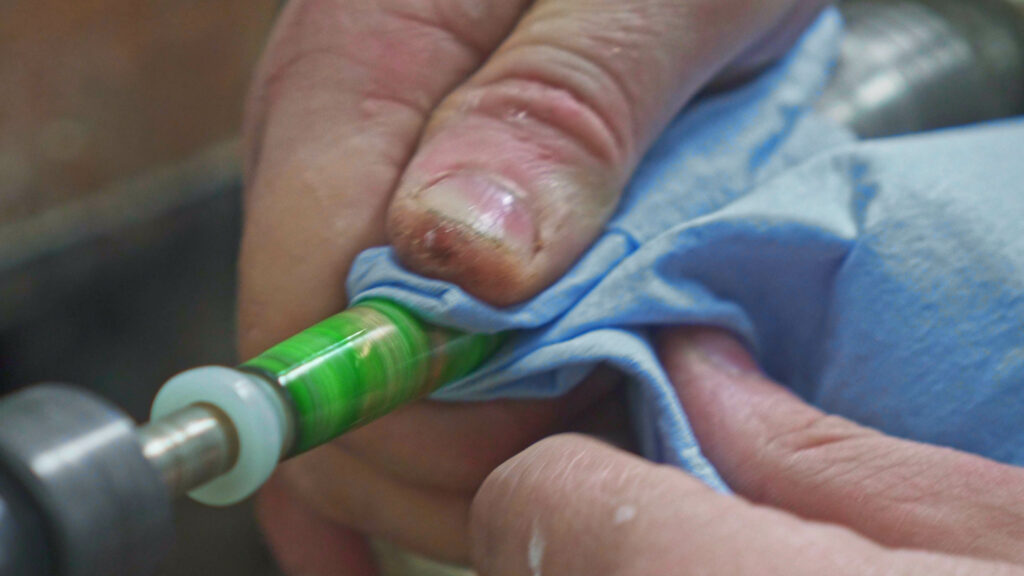
Like all of my lathe projects I then sanded the blank down to around 400 grit and applied around 10 layers of Starbond CA Glue to seal the blank and then wet sanded to a smooth finish up to 12000 grit. I then used some eee-Ultra Shine to pollish the blank to a high gloss shine and smooth finish.
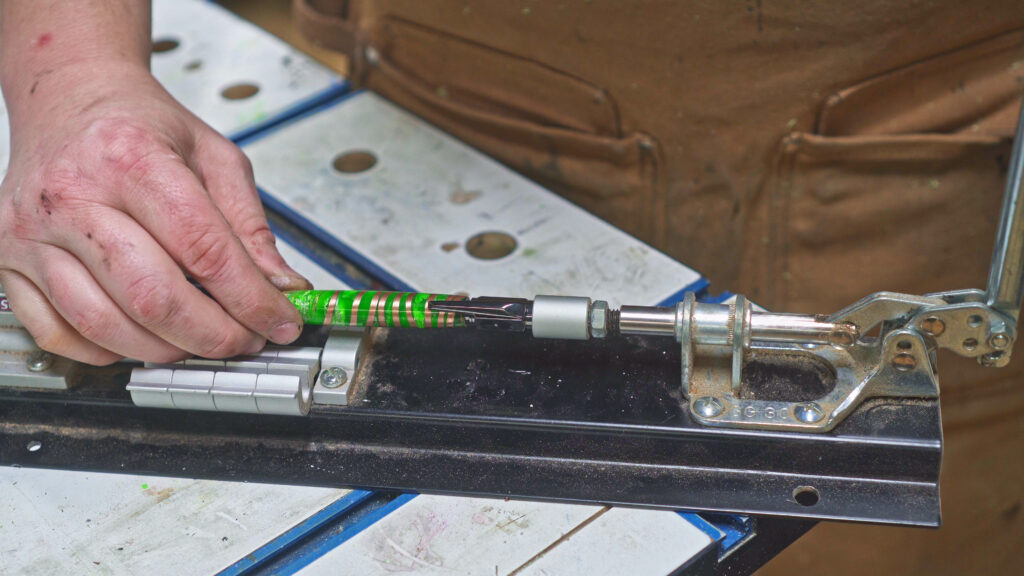
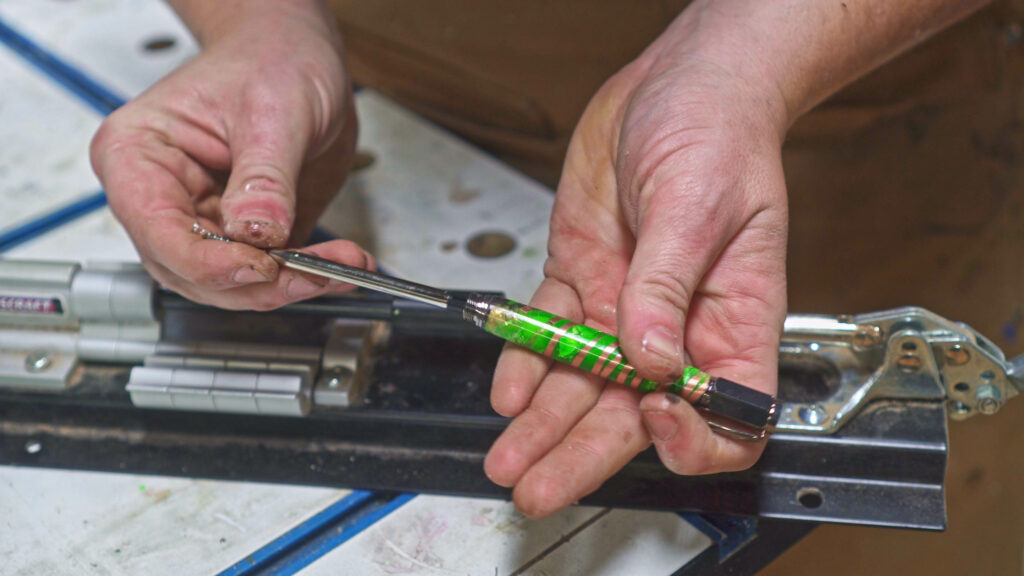
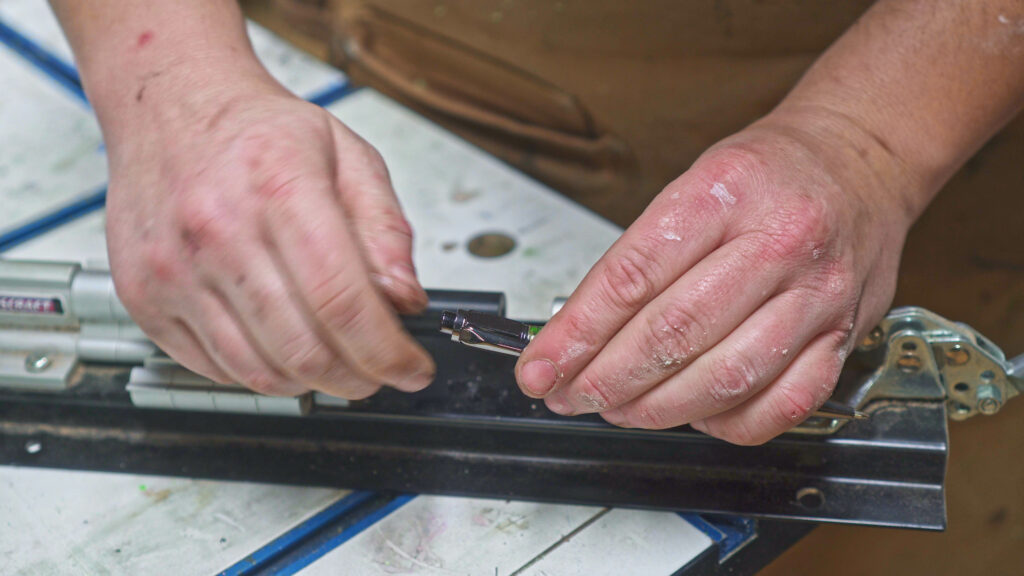
Assembly is very easy with this kit but if you are making one for yourself make sure to use the process that is listed in the instructions in the kit you are using some are very very different. Using a good pen press also is very helpful.
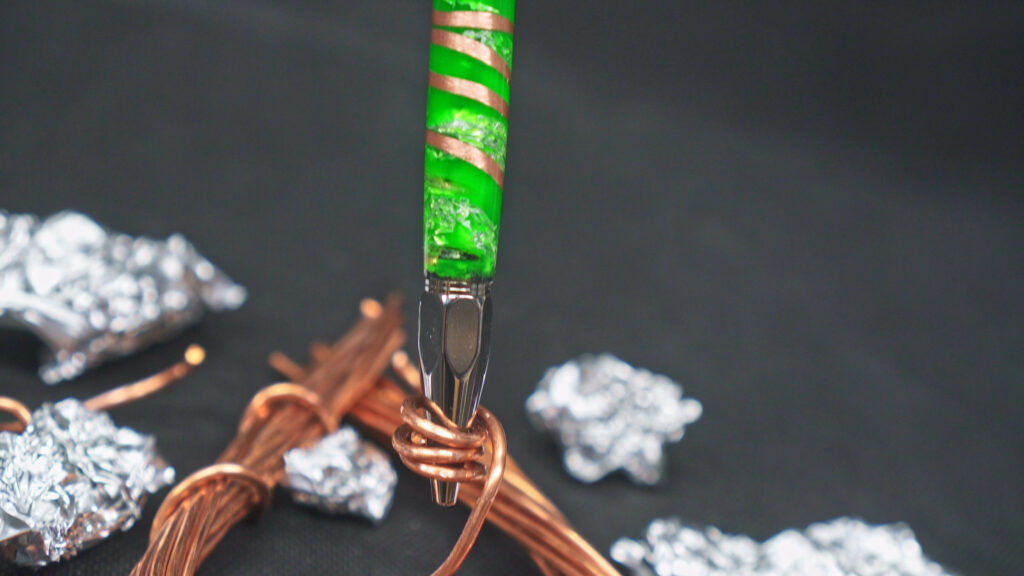
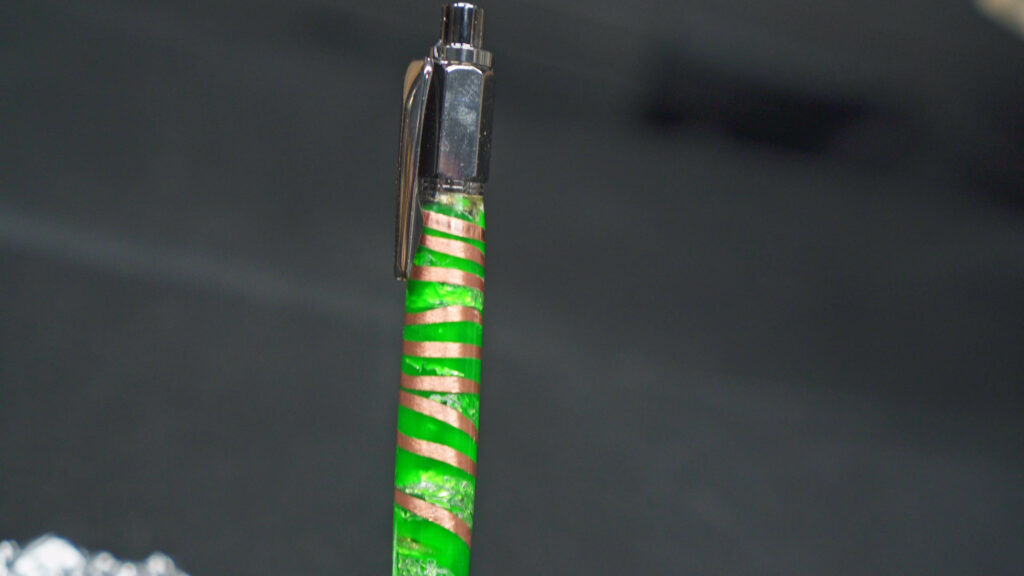
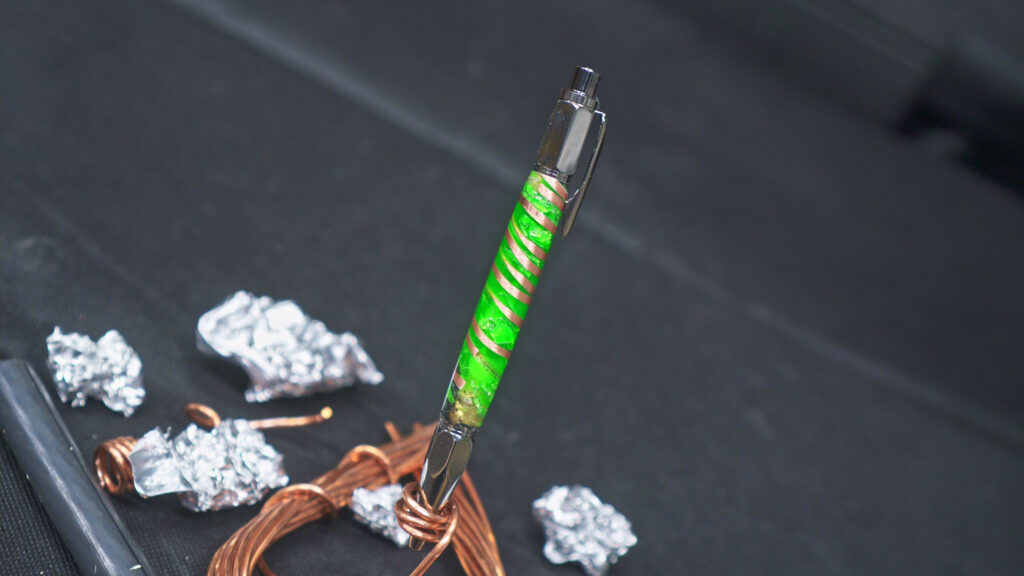
This was so much fun to make. I did not know if some of these processes would look good or even work. So I was very pleased with the outcome. It looks amazing honestly even better in person. The colors are very bright and vibrant and the copper has a really cool tiger stipe pattern.
Thank you for reading and watching make sure you go to the youtube and subscribe its a great way to keep up with new content. Also follow me on Instagram for more photos and videos @jpaynewoodworking. Or you can join the email newsletter here on jpaynewoodworling.com and get notified every time there is a new article or product is released. Also if you are interested in this pen and would like it for yourself check out the shop page HERE and grab it for yourself before it is gone. Thank you for all your support and I will see you on the next one!
