 JPayne Woodworking Creative Craftsmanship
Hey guys how is it going? So some of you may have seen the video I did on making a red epoxy hybrid pool cue ( If not you can see it HERE). It was a lot of fun and looked great but I really wanted to push a little more to get more of an exotic look. This is what came of that idea. This cue is much more of an interesting look when it comes to the final product. I decided to do a two color pour. In this case Silver and Black throw in some black walnut strips and you have yourself one awesome looking custom cue. Add into the mix one very cool looking carbon fiber shaft and BOOM! Perfection!!

Many of the techniques I use to make this cue are the same as with the red cue. The processes are very similar but the outcomes look very different. Starting off with preparing the walnut strip to be inserted into the mold. This process is very simple. Using a hatchet or ax or even a chisel you split the wood along the grain to small enough strips to fit within the mold. Keeping the pieces shorter also helps a lot when placing the strips into the mold. Along with the added benefit of shorter strips give a much more randomized look to the layout of the wood within the epoxy.

Putting the strips in place seems like it is straightforward but there should be some thought to how it is laid out. How these pieces lay within the epoxy once poured with very much affect the final look of the cue. You do not want to many strips placed to heavily on one section or side. If you are doing this process don’t be afraid to try to lay the strips out then remove them to try a different configuration. For this particular cue i also wanted the quantity of strips seen in the finished product to start to fade off to a more solid epoxy end near the joint cap. I thought this would give the epoxy a nice clean look.

Now comes the color. I used about 40 ounces total of Total Boat Epoxy with the mixes being split up into two separate containers. This is so I could mix one color into each mixing cup. For the colors I went with Kp Pigments Carbon Silver and Oem Black. The amount of epoxy for each color was slightly different as I wanted more of the silver up the length of the cue and have that blend into the black closer to the joint section.


These colors came out amazing the silver has a lot of pear in it and the black is a beautiful deep black. As soon as the colors were mixed and sitting side by side I knew they would look amazing together.

I started pouring with the silver being that that was the predominant color in the cue. One extra step that I took was to place a small wedge under the mold on the joint end of the cue. This would elevate that end of the mold and allow the silver to gather more completely in the one end of the mold. I did not want the silver to go the full lenght of the mold and the wedge accomplished the goal of containing the silver to one end.

This meant that once I had Poured the black I would quickly remove the wedge allowing the two colors to meld and blend slightly about two thirds of the way up the mold near what would become the joint section of the cue. I also poured small amounts of each color into the other where the two colors meet. This was in hopes that it would help the two colors blend even more and have no hard line of contact between the two.


Once the mold was full I placed the mold into the pressure chamber. This is a custom chamber I build and I plan on doing a much more in depth overview of how i built it as well as possibly designing detailed plans on how you can build one for yourself if you are interested. With the cap in place and sealed I added around 50 to 55 Psi of pressure. This is plenty to remove the bubbles from the epoxy and is also well within the capabilities of the custom pressure chamber.

I let the epoxy sit and harden at least overnight. Before removing the mold from the pressure chamber. With pool cues I really like to let them cure for a couple of days before attempting to turn them. This ensures that the epoxy is completely cured and hard before turning it on the lathe. This also gives the best finish to the final product being that you can sand and polish harder epoxy much better than if it were not completely cured.


After removing the mold from the chamber I started the mold removal. I designed these molds to be disposable they are not meant to be reused. To remove the ends of the molds the miter saw make the job much easier and quicker. After the ends have been removed the blank releases easily from the mold. This is due to applying clear packing tape to the inside faces of the mold. The epoxy does not stick to the packing tape very easily. This makes it easy to pop the blank out of the mold with a chisel and a mallet.

The top of the mold where the pour was done is almost always going to be slightly higher that the rest of the blank. This is due to the pieces of wood stick out from the mold and also the about of epoxy poured bulging slightly on the top face of the blank. To remove this and square up the blank I use my band saw witch does the job just fine.

After cutting the top face down to size I mark center on the ends of the blank this is where the joint pin and weight bolts will be installed in there respective ends. As well as the points which we will mount the blank to the lathe to achieve the rough cylinder shape.

Another step I take is something that in my opinion helps but is not completely necessary. I like to use the band saw and remove the corners of the blank. In my experience this will help a lot with shattering of the epoxy while doing the rough turning. It is a simple process of angling the table of the band saw and using the fence to cut a large chamfer into each corner.


Mount the blank onto the lathe and start turning the blank to a cylinder. This is not a fast process but take your time and there is no worries if your cuts are not exactly precise as much of this material will be removed during a later process.

I try to get the cylinder as fast as i can and then smooth out the length of the blank with 80 grit sandpaper. This will help the blank spin better once installed onto the steady rest. If you make your blanks smaller to decrease waste which can be done you have to be much more aware of the size of you blank during this process.


Attach the steady rest to your lathe and correctly align the center of the blank to start the drilling process to install the joint pin. Check your alignment multiple times. This is very important as you want to center the pin as much as you can. This is a very important process and the vibration or movement of the blank from center should be adjusted to minimize it as much as possible. Installing the joint pin now and turning the joint with the pin as the center is the best way I have found on a wood lathe to ensure the proper placement of the pin. As long as the pin was properly installed during this process. Start with a self aligning counter sink and work progressively to larger bits until achieving the diameter cut needed for the pin you are using.

Once you have completed the tapping process on the blank used compressed air to clean out the hole and make sure to test fit the joint pin before you epoxy the pin into place. Let the epoxy cure overnight before you remove the drill chuck and start turning again.


Installing the joint collar starts with marking the length you need to cut down the blank from the end of the blank where the joint pin is installed. Use the collar and a set of calipers to get your length and transfer that measurement to the blank. Using another set of calipers set the the diameter of the inside of the collar to turn the end of the blank down the to proper diameter to be able to slip the joint collar onto the tenon around the pin.


Some collars have a small lip in the inside of the collar and you will have to take that into account and mark as well as cut the tenon accordingly. The collar should fit snugly but not to tight as you need space inside the collar for the epoxy to take adhesion.


Test fit the collar multiple times during this process. Do not cut away to much material as this will cause the joint collar to be installed improperly.


Once the collar fits perfectly onto the tenon use epoxy to secure the joint collar into place. Depending on the color of the cue and the collar I will sometimes add pigments to this color to give a clean line along any edges where the epoxy happens to been seen. Allow the epoxy to cure completely before attempting to turn away the excess.


This is where I start to build in the taper of the cue I start by shaping the joint end of the cue to close to its final diameter. You do not want to go to the finial diameter yet to allow for you to sand and smooth out the taper.

If you are at the final diameter of the joint of the cue at this stage it will most likely be to small once sanded and will not align properly with the edges of the shaft. At this point I also cut the length of the cue in and shape the bottom end of the cue. I do not remove the excess material yet as it helps make it easier to mount the cue on the lathe.


I then started building in the rest of the taper. I really take my time doing this as this is a very important step. Making very light cuts help to control the cuts themselves as well as reduces the chattering of the cue on the cutting tool. This is due to the fact that the cue will flex slightly at the center so use the steady rest to help secure it and stop some of the vibration. I also use a straight edge to help me spot any high areas and once the taper is very close to perfect I use low grit sandpaper to smooth out the entire cue with a flat sanding block.


After finishing with the taper I remove the excess material from the back of the blank. Using the same process as earlier with the joint pin I install the holes and threads for the weight bolt and the rubber bumper. The removable weight bolt is a handy component that is honestly not one hundred percent necessary. You can build a cue that does not have a removable weight bolt but the weight will be fixed and a cannot be adjusted. Start with a self centering countersink bit and working progressively to the correct size bit then installing the threads using a tap.


Before thread tapping the weight bolt hold you need to cut in the larger diameter hole that will allow the rubber bumper to be installed onto the bottom of the cue. Once the hole is drilled for the bumper thread tap the smaller hole drilled earlier and install the weight bolt.


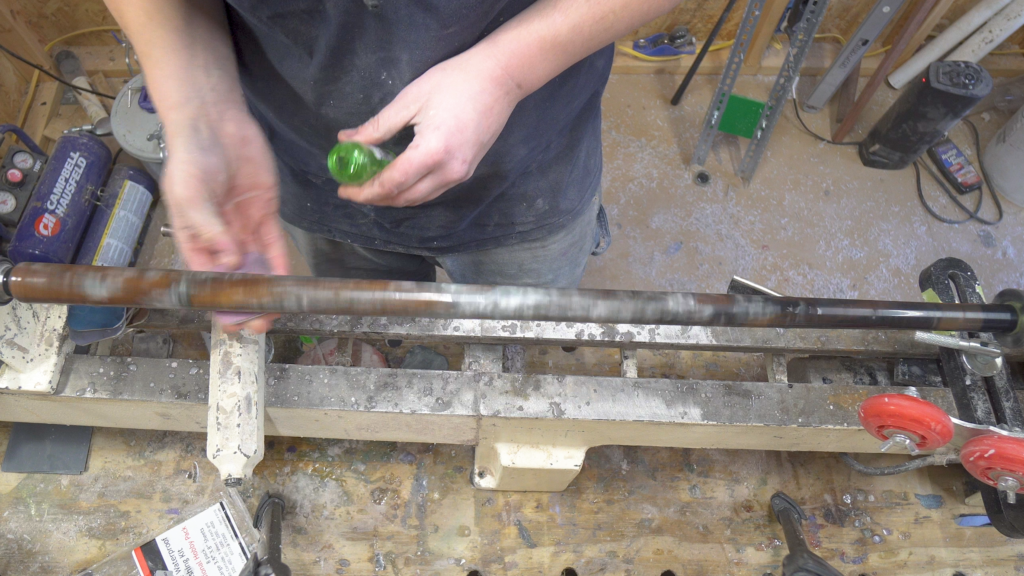
Start sanding the entire cue now starting with 120 grit and working way up to around 1000 grit sandpaper. At 400 grit I start using a wet sanding method. This helps to reduce the number of scratches in the cue from the paper and help the sand paper cut better .


For the finish on this cue I decide to try out Starbond Adhesives Thin CA. This is one of the first times I have used Starbond on a pool cue and the finish came out amazing. Start by cleaning the cue with a dry shop cloth or rag. Then using a paper towel or shop towel apply the Starbond Adhesives Thin CA to the cloth and with the lathe on a slow speed slowly work cloth down the cue applying more CA periodically. Once you have entire cue covered use the Startbond Accelerator to instantly dry the CA. Repeat this process for as many layers of finish you would like to apply. Be sure not to let the cloth sit still on the cue as it will stick and you will have to start the finishing process over again.


After the last layer of finish start wet sanding the cue with 1000 grit and working all the way to 12000 grit micro mesh. Take you time with this process the smoother you get the finish the more it will shine. Once the cue is completely sanded apply EEE-Ultra Shine to polish the cue to a high shine. Apply the wax while the lathe is off and then using medium firm pressure and a medium speed on the lathe work from one end of the cue to the other. Once you have the cue polished clean the finish with a clean dry cloth.


I want to talk a little bit about this go custom shaft. It is a carbon fiber shaft and is pretty low deflection from my experience with it, it shot great this is not any kind of sponsored post or anything like that just this shaft was pretty interesting and is an nice option as far as i can see if you want a carbon fiber shaft and need it made to a custom length or with a specific joint.


I am extremely happy with out this cue came out. It looks amazing and shot great. If you cannot tell from the video I love to play and this cue was a pleasure to use. The colors though caught a lot of attention. The silver and black had a drastic contrast but fit well with each other. Where the two colors came together it looked almost like silver smoke on a black sky.
I hope you have enjoyed this build I know I did. Make sure to sighn up for the newsletter here on the website. Aslo make sure to Subscribe on YouTube and leave a comment as to what colors or style cues you would like to see. Or even any epoxy project you would like to see. For more videos and picture of all my projects make sure to follow me on Instagram @jpaynewoodworking and like the Facebook Page Here. Like always I’ll see you on the next one.
If you would like to win a custom pool cue Click the link below to enter into the Custom Cue raffle. First place prize will be a Custom Pool Cue , Second place prize is a Custom Vertex Pen and third place is Custom Slimline pen. Only 250 spots available and winners will be drawn and announced live on my Instagram and also posted to facebook and youtube. ENTER HERE:
https://jpaynewoodworking.com/product/raffle-win-a-custom-pool-cue/

Your epoxy cue is so awesome! Can you tell me what size dowel is used to start with?
Thanks
Dale
Thank You. Its a 5/8 inch dowel.