 JPayne Woodworking Creative Craftsmanship
Sometimes trying sometimes different is not such a bad thing it can teach you a lot and sometimes it can also be a lot of fun. We all know that in the woodworking world one of the more beginner level projects is a pen. Any wood turner will tell you that they are great starter projects. Pens are great to learn turning basics and get a handle on some of your lathe skills. One of the greatest challenges is to take a project that is made so often and can be so simple and try to turn it into something amazing and unique.

So with that in mind I set out to make a pen that would be like no other. I started off with some walnut nothing to crazy there. Then came the interesting material Aluminium honeycomb. This aluminium honeycomb is a cool material that can add a very unique look to any epoxy project.

It can be used with colored or clear epoxy for two very different looks. With a clear or tinted translucent epoxy it has a light diffusing effect. With a solid colored epoxy it will add a almost snake skin effect with the shape of the honeycomb.

For this project I also got to try out a new silicone mold from amazon. This mold is made to cast four pen blanks at once. This was very helpful as I needed to cast blanks for multiple pens and makes the workflow much faster.

Mixing up the Total Boat Epoxy I was contemplating what colors I wanted to incorporate into the honeycomb I decided to go with a three color pour. I thought that this would give the pen a more aggressive look as I was going with a single tube pen kit that was somewhat aggressive itself.

I went with Oem Black, Sakhir Red and Prometheus Purple I also added in some Carbon Silver to the Prometheus Purple all from Kp Pigments. The colors looked great together and I thought would make for an amazing looking blank.


When pouring the epoxy I tried to pour it in a way that would create a distinct pattern in the blank. It is difficult to do this in a pen blank because once turned down to shape the pen is so small that controlling the epoxy colors to suck a small degree is not easy. This is why most random pattern blanks look so good when there is small amounts of the colors but many contrasting layer.

After the epoxy had hardened in the pressure tank and fully cured I removed the blank from the silicone mold. This mold is designed to be able to cast and remove the blank without the use of any type of mold release and it worked great. The blank came right out of the mold with no problems. This makes casting much much easier.

After removing the blank from the mold I trimmed down one end of the blank and cut it to a length slightly longer than the barrel of the pen. This would make drilling the hole for the barrel easier and more accurate.

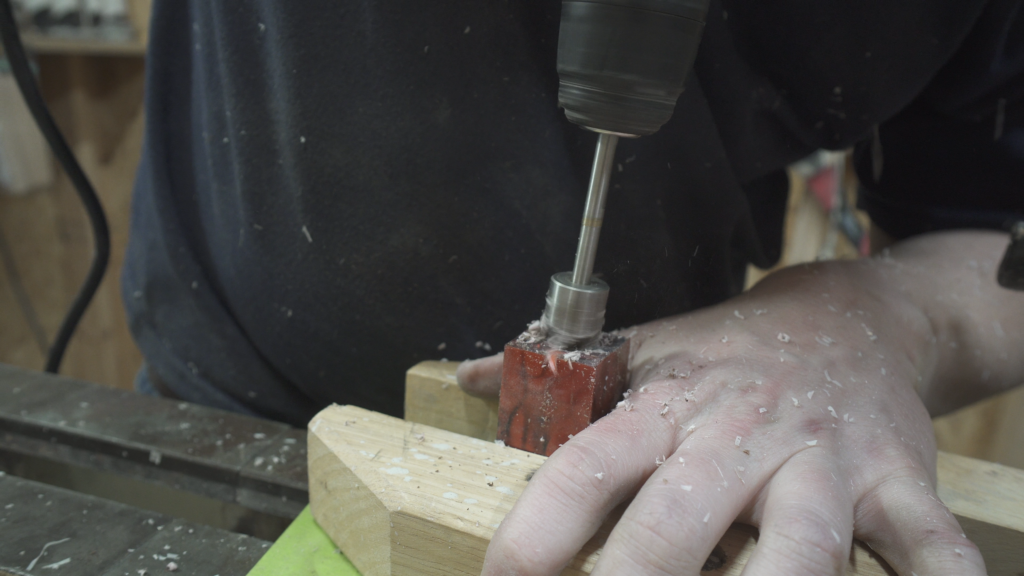
Using the pen jaws on the lathe chuck I bored the 10mm hole for the the pen barrel. The pen jaws make this process much simpler. Using the 10mm bit and the drill chuck the hole is quickly bored completely through the center of the blank.
After gluing the pen barrel into the blank flatten the ends of the barrel with the barrel trimmer this is to remove the excess gule if any is in the inside of the barrel and to flatten the to ends of the barrel to fit flush against the ends of the pen kit.


Mount the pen blank onto the mandrel using the proper bushings. I wanted a flowing somewhat larger design to the pen. As well as wanting to keep as much of the blank showing as possible. With that in mind I shaped the pen into a shape that was somewhat fatter in the middle and tapers to the proper size on the ends. This shape should also give the pen a great feel and be comfortable in the hand


When the pen is shapped i started sanding with 120 grit sandpaper and dry sanded to 320 grit after 320 grit I wet sanded with 400, 600 then 1000 grit.


After the initial sanding I applied 5 coats of Starbond Adhesives Thin CA as a finish. I love using this for finishing pens as once it is sanded and buffed it has an extremely high shine and smooth finish. Also adding the five coats of finish instead of just two or three will give a deeper wet look the the finish. This also really brings out the shine and pearls of the epoxy. Once the finish was applied I wet sanded the pen starting at 1500 grit micro mesh working my way up to 12000 grit.


With the pen sanded and smooth I used EEE-Ultra Shine turners polish to polish the pen barrel until satisfied with the shine. This method works well with epoxy and looks amazing.

With the pen polished it was time to buff the pen to a mirror like shine. Using the PSI 3 Wheel Buffing System I buffed the pen blank starting with the course wheel and working my way to the fine cotton wheel. While buffing the pen I had to be careful not to let the wheels grab the end of the blank as it will pull it from your hands and damage the blank. Also do not let the blank set still against the wheel as it will burn the finish and you will have to completely start the finishing process again.

To assemble the pen start by pressing the tip tread into place using a pen press on the end you would like the tip of the pen from.

Then press the clicking portion of the pen into place with the plastic end going into the pen barrel. Now insert the pen cartridge into the pen with the spring on the tip end of the cartridge.


Holding the spring into place screw on the tip section of the pen. Finally screw in the click button and test the pen to make sure the mechanism is correctly.


I love how this pen came out. The honeycomb looks amazing with the red epoxy and walnut. While the other colors did not come out exactly how I was hoping it does have some hints of the other colors. With small wisps if black and silver showing through in the light. What do you think of the pen? Let me know in the comments of the video. Make sure to Subscribe and for more pictures and videos follow me on Instagram @jpaynewoodworking and like the facebook page. These pens will be for sale and I will have them up in the shop soon. Subscribe to the newsletter to see when a new product is up for grabs and to see when new articles are posted.
If you would like to win a custom pool cue or custom pen. Click the link below to enter into the Custom Cue raffle. First place prize will be a Custom Pool Cue , Second place prize is a Custom Vertex Pen and third place is Custom Slimline pen. Only 250 spots available and winners will be drawn and announced live on my Instagram and also posted to facebook and youtube. ENTER HERE:
https://jpaynewoodworking.com/product/raffle-win-a-custom-pool-cue/