JPayne Woodworking Creative Craftsmanship
If you own a bandsaw then you probably know and realize that one of the most useful accessories you can have is a good fence. Having a good fence on your bandsaw will allow you to make quick more precise straight cuts and in my opinion makes things much easier and makes the saw much more versatile.If you happen to own a Porter Cable 14 inch bandsaw this can be a problem. As the Porter-Cable is fixed with mounting points for a fence it does not come with rails or the fence accessory to my knowledge. This process can be done for multiple different brands and styles of bandsaw. Even if your saw does not come with the mounting points pre drilled and tapped that is something you can do yourself to add rails and a fence to your band saw. The rest of the process should be very similar.
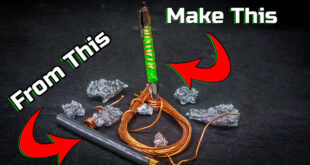
While some companies do make aftermarket bandsaw fences and they are great I did not want to spend in excess of $150 for something I was not sure was going to fit my saw. With this in mind I decided to build my own fence rails included to try to be as affordable as well as precise as possible. Using some various tools and materials from Home Depot and Harbor Freight I achieved just that for under $50.

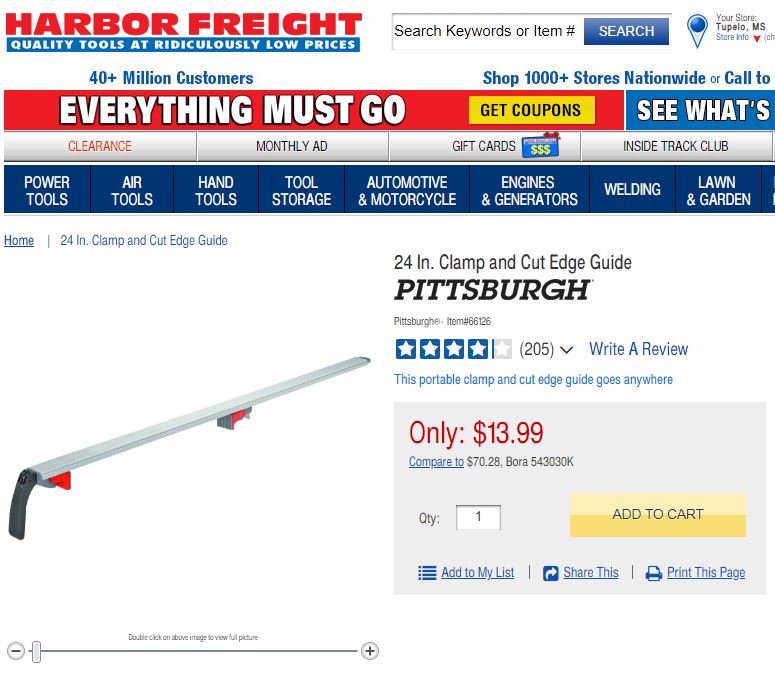
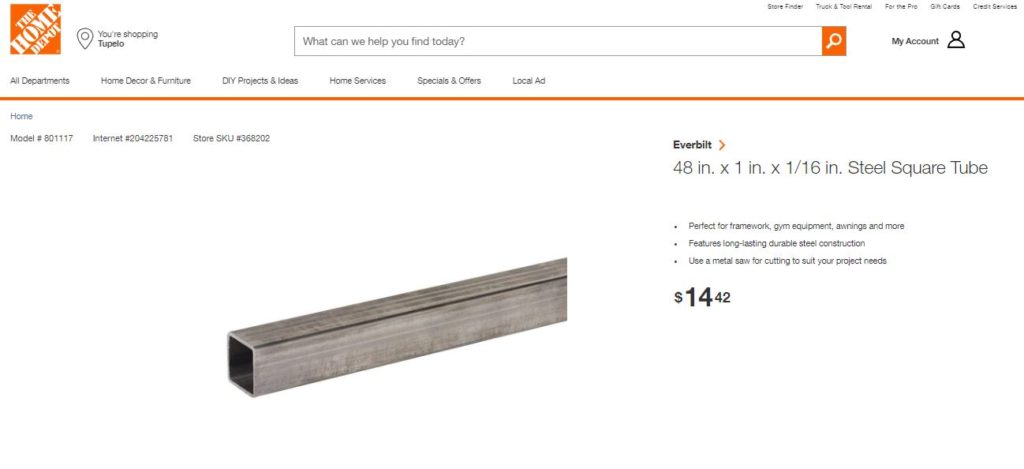
The materials I am using is one 24 each guide clamp from Harbor Freight Tools. Though any guide clamp will do as long as it has the ability to clamp itself to a flat surface and is self squaring. The Edge clamp I am using from Harbor Freight came in at around $15 or less. and they work well as I have used them before with my circular saw. Next on the list of materials is one 48 in Long 1 in square tubing. This can be purchased at Home Depot for around $15 as well.
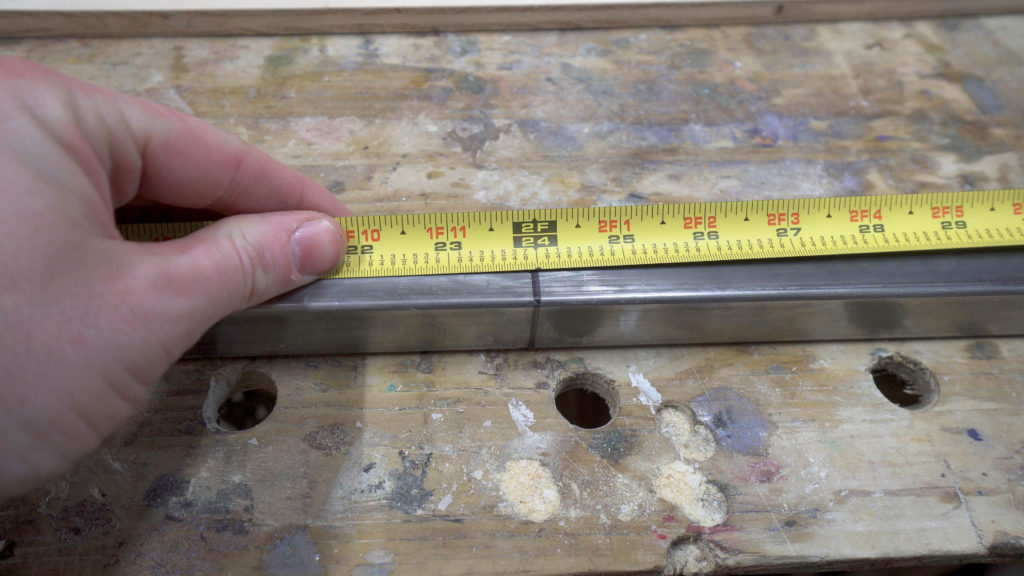
The one inch square tubing is plenty strong enough with little to no flexibility making using this tubing for the guide rails a great choice. If you happen to have some other tubing such as a larger square tubing this would work as well. I also have a scrap piece of half inch birch plywood that I will be using as the vertical walls on the fence. Along with this peace there is also 2 flexible measuring tapes that will be glued to the top of the guide rails for cut reference. for this particular band saw it will also require four M6 bolts or screws. I elected to go with an allen head style bolt as this would make installing the bolts through the real easier. The first step is to cut the square tubing to link when purchased the tubing is 48 inch Long so cutting the tubing directly in half to have two 24 inch equal length is the easiest as well as most efficient course of action.
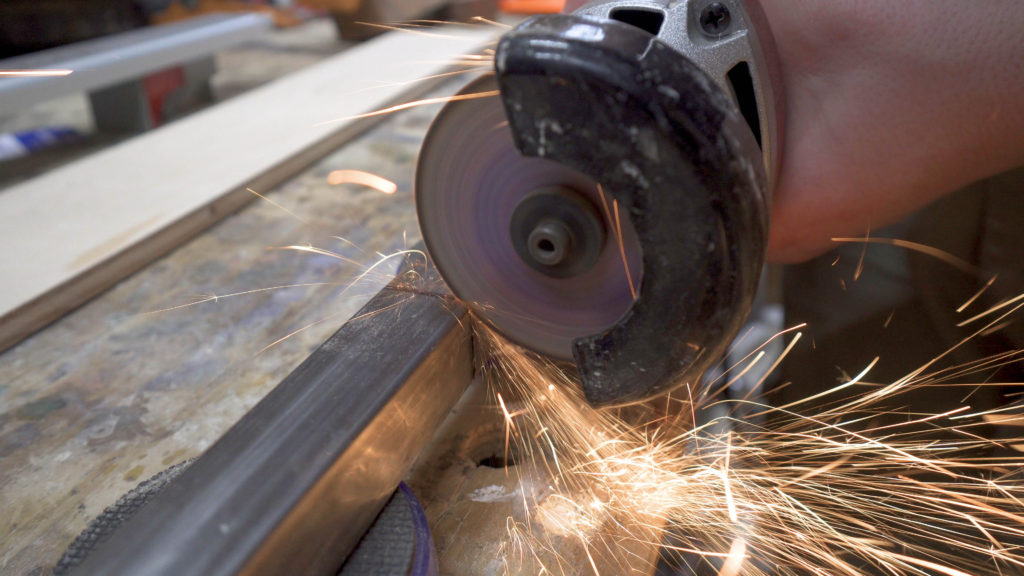
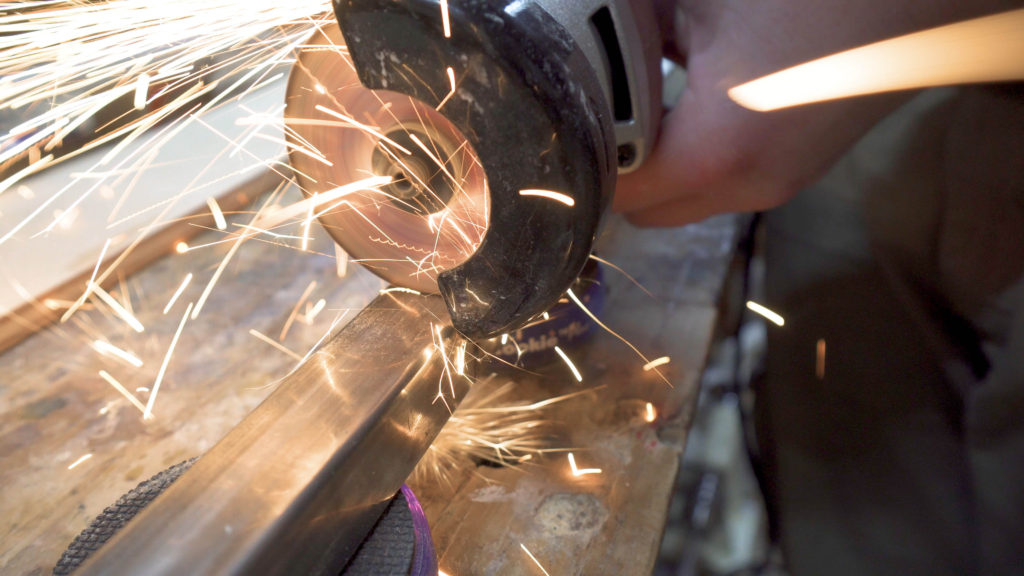
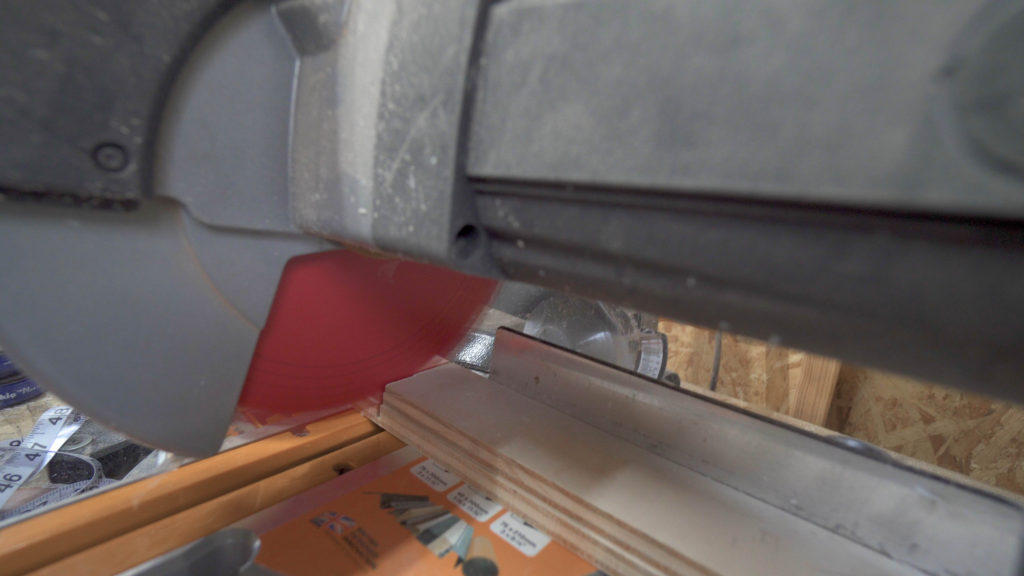
If you have a metal chop saw or metal bandsaw I would suggest using them to cut the tubing. As I did not have these tools available I used a cut off wheel. Which works just fine but can affect the accuracy of your cuts. A hacksaw will also work if it is the only tool available. If using a cut off wheel cut each side of the tubing individually to try to preserve as much precision in your cuts as possible. Once all of the cuts have been made use a grinder or the cutoff will itself to remove any sharp edges or burrs along the end of the tubing that has just been cut.
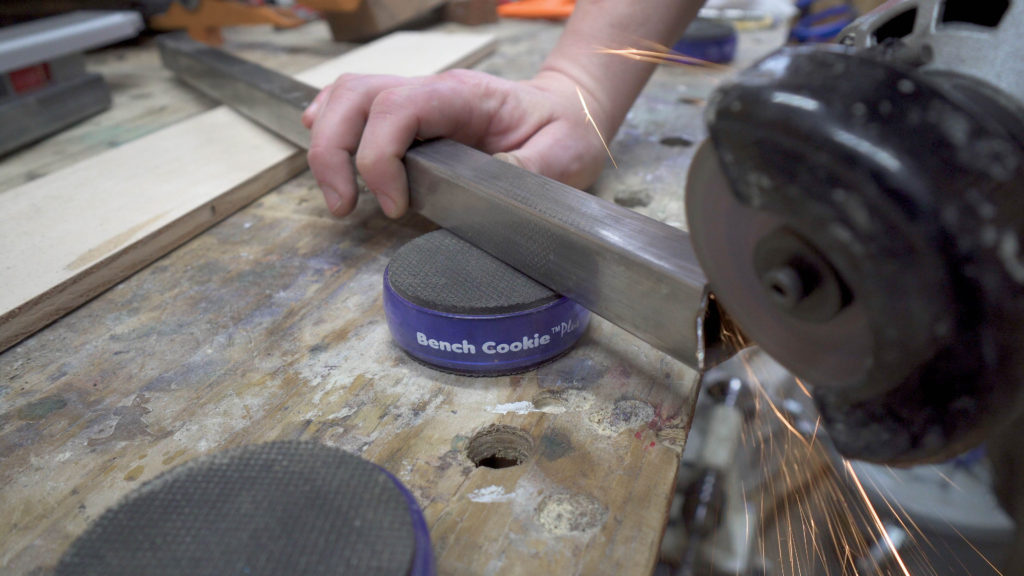
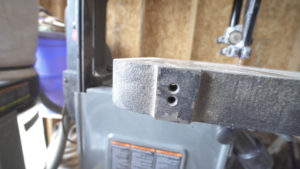
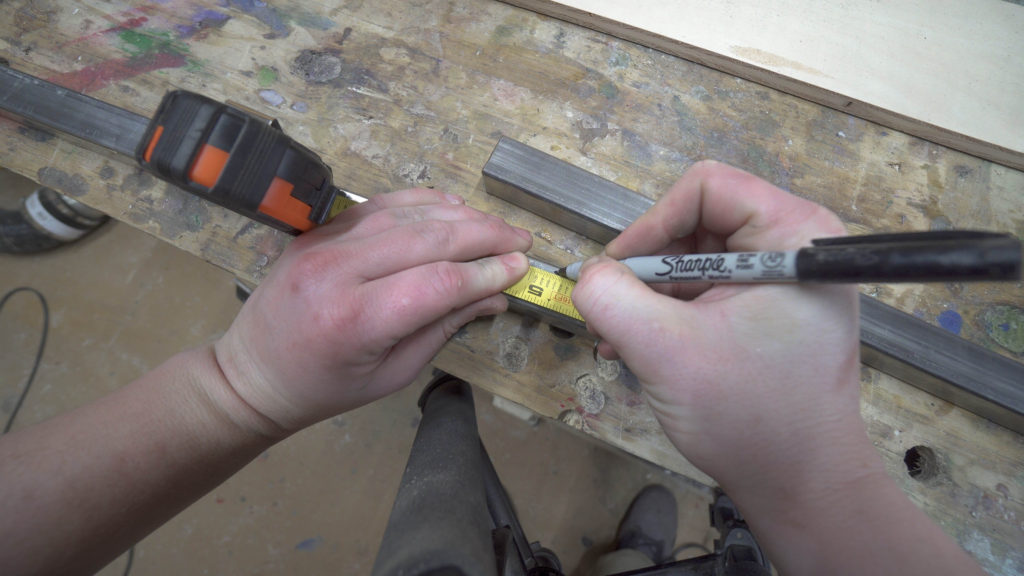
To figure out the position of the holes needed to mount the rails to the table first measure the distance between the mounting holes on the table from center to center. once you have established this measurement subtract that measurement from the total length of the rail and divide the reminder in half. this will give you the length from each end of the tubing at which you will drill the mounting points. Doing this properly will center the table on the guide rail. Using chalk or marker mark this position on to the tubing that you previously cut.
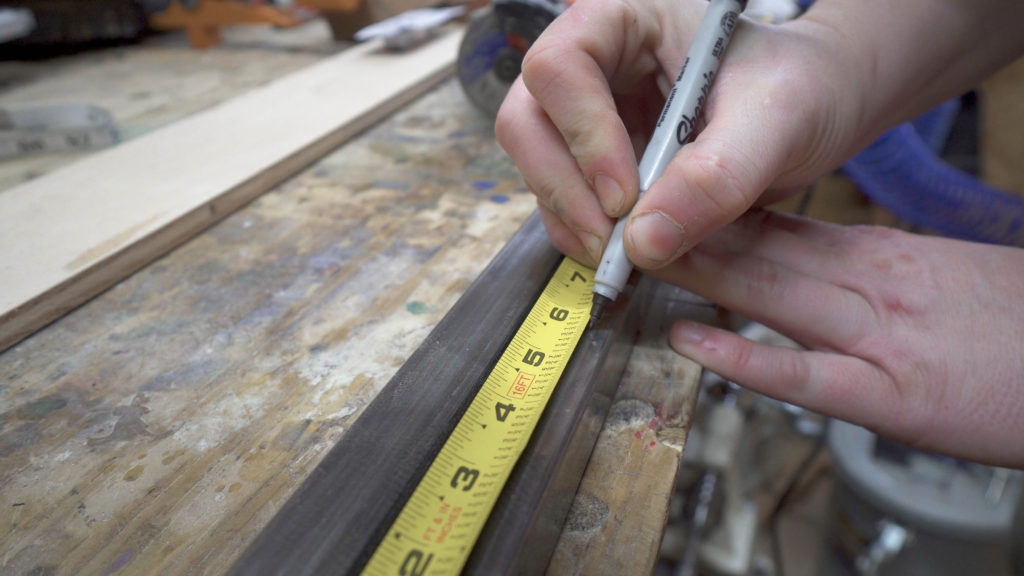
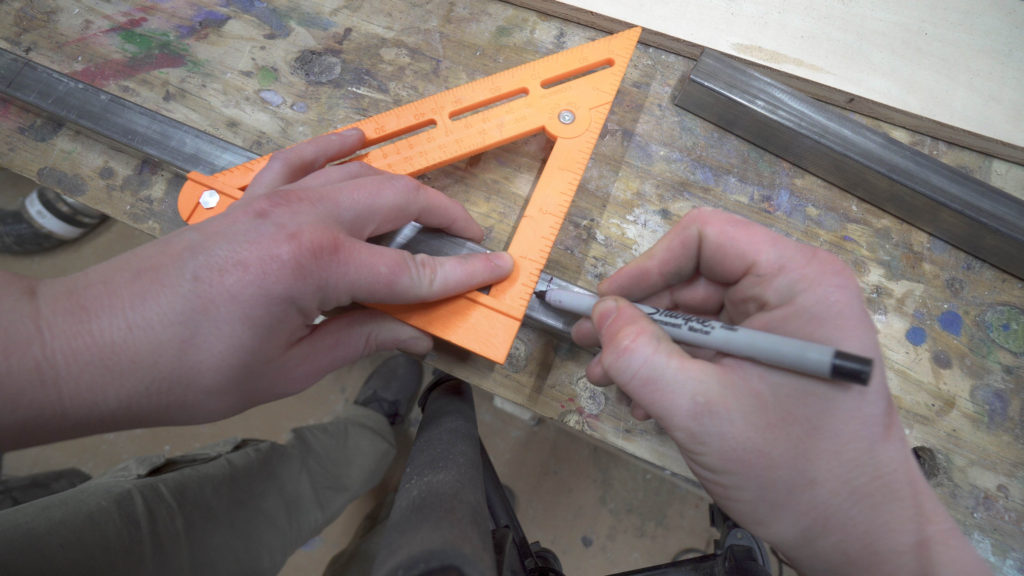
Using a tape measure or calipers determine the distance from the top of your saw table to the center of the mounting point holes. This will be the distance from the top edge of the rail at which you will Mark and drill the mounting points. Keep in mind that some saws will have different measurements for both front and rear rails. with this measurement determined use a square to mark the corresponding Heights on to the guardrails. Where these two lines intersect will be your melting point and where you will drill.
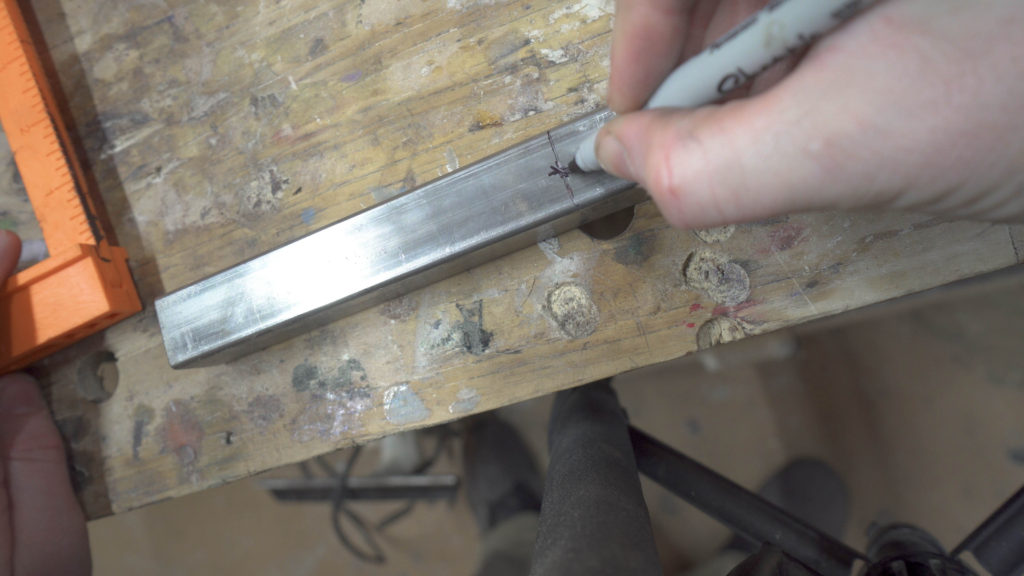
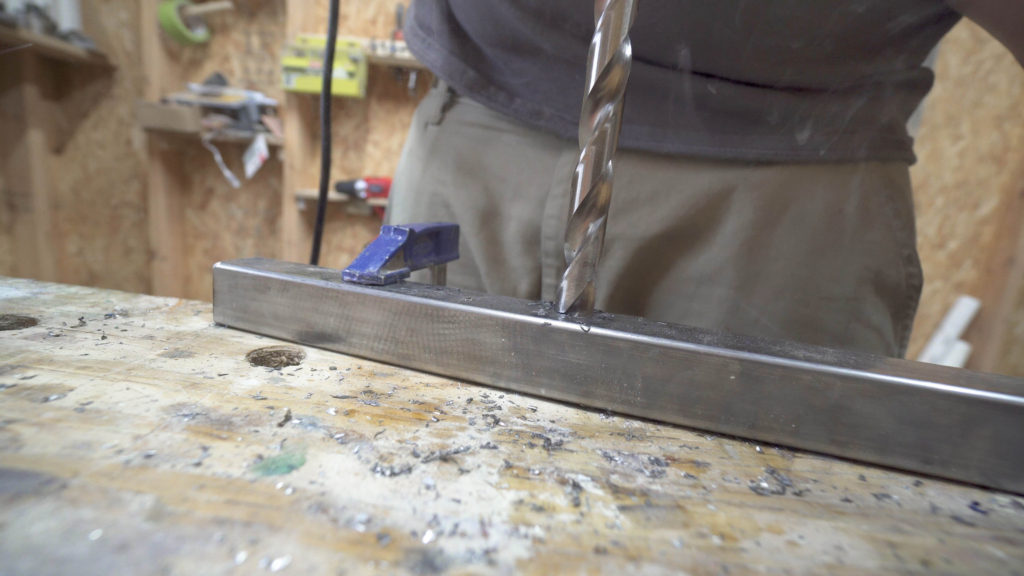
Mark all corresponding mounting points on both rails. Using a center punch punch a small indentation into the center of your mark where the hole will need to be drilled. This will help keep the drill bit from wandering as well as give you a physical reference point for the location of the hole.There will be two different size holes drilled into each rail. In this case the first and smaller hole being 1/4 inch and the second larger whole being 1/2 inch diameter. When Drilling the quarter inch diameter hole you will drill through both sides of the rail. Use 3 in1 oil to lubricate your cuts as well as using a sharp bit.

This will make the cuts much easier. After drilling all of the quarter inch mounting Point holes swap two 1/2 inch bit. When you drill this hole it will only go through one wall of the tubing. This is to allow a hard enough opening to pass the allen head screws through to mount the rails to the band saw table. U Turnsing an extremely sharp bit as well as oil will greatly improve how well the bit cuts and reduces the likelihood of the bit binding.
What you have all did your holes drilled into your rails use a grinder or low grit sandpaper to remove Burrs and sharp edges. Now you can mount the rails to your band saw table. do not over torque the bolts as you can strip the threads on the table. Firmly tighten both rails into place on both sides of the table.

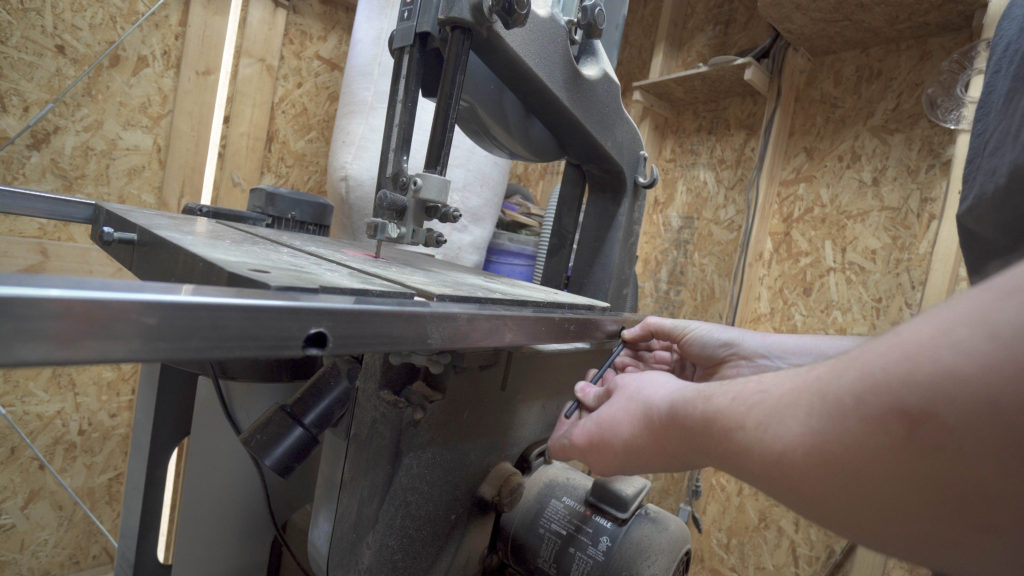
Play Sure Edge clamp over the band saw table and loosely fit the elite by the clamp to the rails previously installed. Adjust the clamp to wear when tightened or clamps down it will not move. release the clamp and slide the edge of the clamp softly against the flat edge of the band saw blade. do not press the clamp into the blade as this will give an inaccurate line for reference. Do not deform the blade or bend it in any way with the clamp. The clamp should be resting lightly against the blade giving you the ability to mark a line on the table and rails that is perpendicular to the edge of the band saw blade.

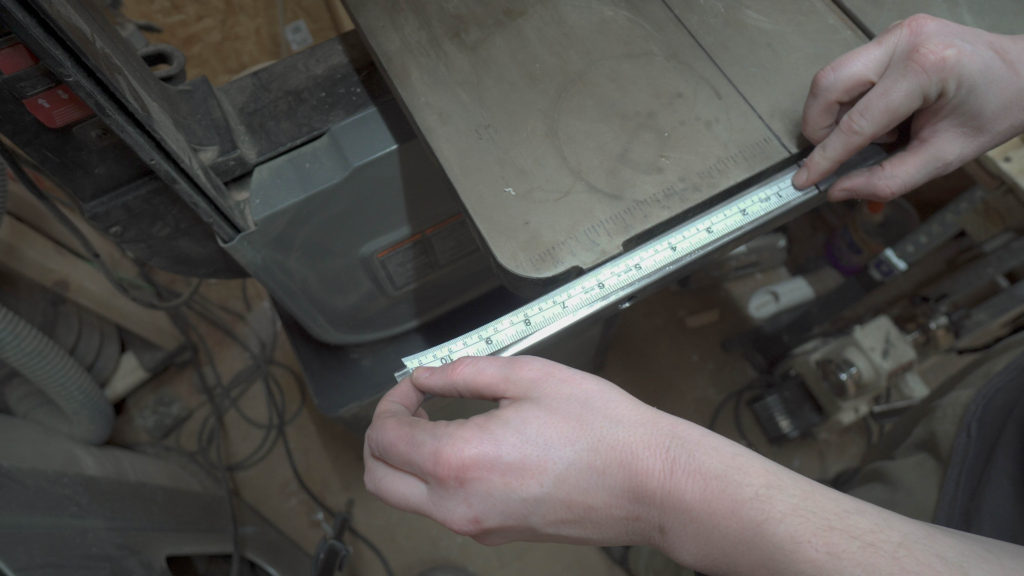
This line will be your reference point for installing the measuring tape on to the guide rails. To do this accurately remember that the inside line of the reference just made will be slightly offset to the outer edge of the blade. Once this has been determined use CA glue or epoxy 2 glue down the measuring tape to your guide rails. I also went back and added an extra bead of glue on the seams around the measuring tape just for better adhesion. This is not always necessary but I do recommend it as you do not want your measuring tape to move.

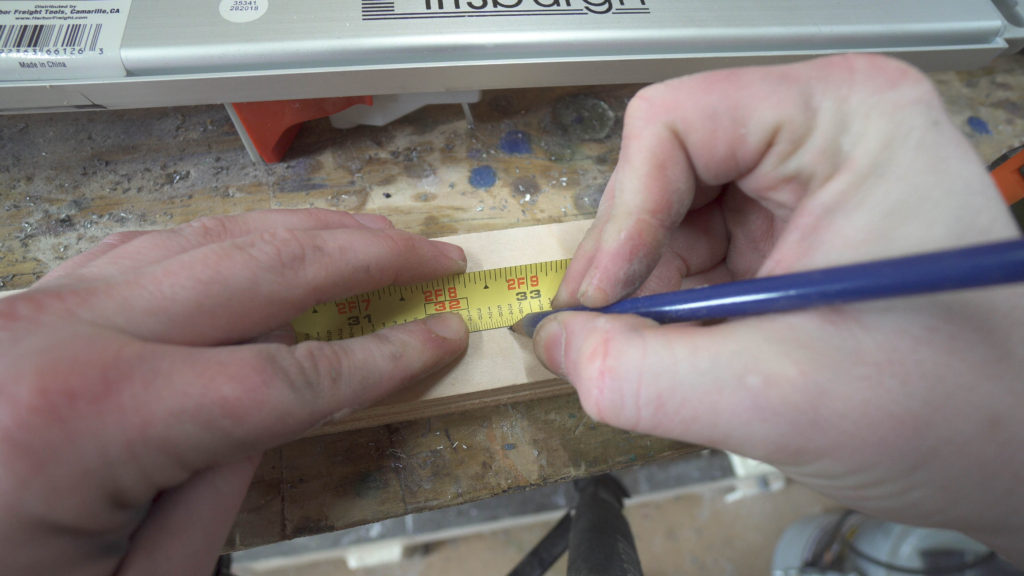
Now you need to cut down the scrap plywood that will be used for the walls of the fence. in this case I decided to make the walls 2 1/4 inches high. Cut down the plywood it to the desired height of the fence and then cut these pieces to lengths matching the length from end to end of the edge clamp that you will be using for your fence.

With your edge clamp laying on its side apply CA glue or epoxy down the length of the edge clamp. Place the walls of your fence onto the edge of the clamp aligning the bottom of the board with the bottom of the clamp. Make sure that the board is not protruding from the bottom of the clamp as this could affect the clamping and accuracy of the fence once finished. I highly recommend using a CA glue such as starbond adhesives thick CA. this will hold the wall of the fence in place firmly as you screw the walls into place in the next step.


Once the CA glue has dried use a countersink bit to drill countersink holes in multiple locations on each of the walls of the fence. Using a standard countersink bit and short wood screws work just fine for me. This not only will permanently attach the walls of the fence to the clamp this will also allow you to back the screws off to help adjust the fence and help square up the fence to the band saw table.


To add support for the walls of the fence. Rip down one of these small sections of the plywood to the height of your fence walls from the top of the clamp and cut this piece 2 fit tightly between the two walls of the clamp. While doing this check the square of the walls of the clamp. Cutting this piece too long can cause it to push the walls of the clamp out and cause the walls of the fence to not be perpendicular with the band saw table. Check multiple times and adjust accordingly. Glue the pieces into place and use brad nails or screws to permanently attach it to the walls of the fence.


Measure between the two walls of the fence in the center and cut a final piece of the scrap plywood to this with this brace will stop the walls of the fence from flexing at the top If used to cut taller stock. blue this piece into place as well as using brad nails or screws being careful not to over tighten and to cause your fence to be out of square.

Once the fence was finished I did a quick test cut aligning the fence at 1 1/2 inches on the guide rail reference marks and ripped down a small piece of plywood. Then used a set of calipers to check the accuracy of the cut. It was dead on which means we’re good to go and the fence is finished. If this test cut is not accurate adjust your fence ensuring that it is properly aligned with the reference marks on your rails and test again. Do this repeatedly to determine if realigning the reference marks on the rails is needed.


Well guys I hope this helps you out especially if you have a band saw that did not come with a fence from the Manufacturer. another great thing about this is if you also use a small table top table saw this fence can serve a dual purpose as a fence for your other saws. As long as there is a flat perpendicular reference face on both sides that can be clamped to this fence will work with multiple tools.


If you have any questions feel free to leave a comment on the YouTube video or here and I will do my best to answer them. Make sure to subscribe on YouTube as well as follow me on Instagram for daily pictures and videos all the links to YouTube and social media are here on the website. Thanks guys I hope you have enjoyed it and we’ll see you on the next one.