JPayne Woodworking Creative Craftsmanship
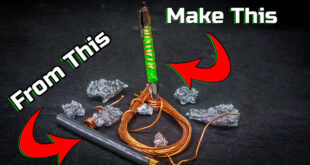
Hey guys how’s it going so on this version of quick tips I’m going to show you guys how to use some of clear caulking like you would use around your windows and cornstarch to save you some money on making negative cast molds of items that you want to replicate in epoxy resin.


The first thing you want to do is start off with an empty bowl that doesn’t have any kind of residue or material in it. Also you want to make sure that this bowl or platter or whatever you’re using a to mix up this concoction in is Expendable as more than likely it will not be able To be used again. I will go ahead and warn you now this is a bit of a messy process but it is a whole lot of fun to do. With the bowl ready to go I started off by using a razor blade and removing the end cap of a full tube of clear caulking. Why you might not need a full tube I would suggest starting off with enough caulking to ensure that you are going to have a large enough mold to encase whatever you are trying to replicate. I’ve only done this a few times but it works really well and with that being said I ended up using an entire tube just to make sure I have enough. But if you were doing something larger you might need more.


What you had the end cut out of the caulking tube simply press the plunger on the rear of the tube to remove the caulking. I also decided to go ahead and add some coloring. This would just make it easier for me to see when the mixture was a consistent color and know that there was no spots that were heavy with caulking or cornstarch.


This is where the fun part begins. start by adding a bit of cornstarch to the mixture and using your hands or a mixing stick slowly fold the cornstarch into the caulking. you will have to add more cornstarch as you go. And it is also a good idea after getting the mixture started to transfer the entire thing to a second Bowl if possible as this will help with the caulking not sticking to the bowl like it will in the first Bowl.


Keep adding cornstarch until the mixture is at a consistent color and texture. You might have to work at this for a while and I would highly suggest wearing gloves as the caulking will stick to pretty much everything for the first a little bit. As more and more cornstarch is added the caulking will stick less and less to the bowl and your hands. The closer to the perfect consistency you get you will notice that the mixture becomes more and more like a Play-Doh type consistency. Once you have reached a consistent color and texture all the way through the mixture, play a little bit of cornstarch out on a flat board and then press this mixture into a thick layer that is large enough for whatever you are trying to take a mold of.


At this point let the mixture set for a while allowing it to firm up just a bit somewhere around fifteen minutes or so should be all that is needed. Then while the mixture is still soft and malleable insert in whatever pieces you would like to make the mold of. In the case in this video These are 3D printed crystals for a working lightsaber replica I was making I will leave a link to the video HERE. What you have pasty pieces into the cornstarch and caulking mold material press the material around whatever you are casting to ensure that all the details are completely filled in and allow the mixture to set for at least a couple of hours. Depending on what caulking you are using this might take longer. In this case I was using a quicker setting caulking. But allowing the mold to sit until it is very firm but still slightly pliable. This will give it a consistency of silicon.


Once you have the mold material set to the proper firmness. You should be able to remove the pieces you are trying to make the negative cast of with no residue left on the pieces. If you start to remove the original piece in any of the mold is sticking to the original piece allow the mold to sit and firm up longer as it is not properly set. with the mold properly set the original piece should be able to be removed cleanly with all details left pressed into the mold. At this point you can now fill them old in with whatever colored epoxy resins you would like to use. Then like most other castings let completely cure inside a pressure chamber to remove air pockets. Before moving on to the removal of the casting.


With the epoxy completely cured you can now remove the castings from the mold. If done carefully and correctly you will be able to reuse this mold multiple times. Though these do not last forever.
This is a great alternative to spending 30 to $40 on a small silicone mold making kit. While the mold making kit does it work extremely well this is a process that works well on its own also. I have used this a couple of different times and have had great results from it. That being said it is a process that takes a little practice especially to know when the mixture has set firmly enough to remove the original piece. With that being said this is a money-saving way to make some really cool negative casting molds of whatever you would like. So I hope you guys have found this helpful. make sure to go SUBSCRIBE on YouTube. as well as follow me on Instagram at @JPayne woodworking. also make sure to sign up for the newsletter here on the website so you can see all of the new content products promotions and more coming up. Thank you guys. I will see you on the next one.